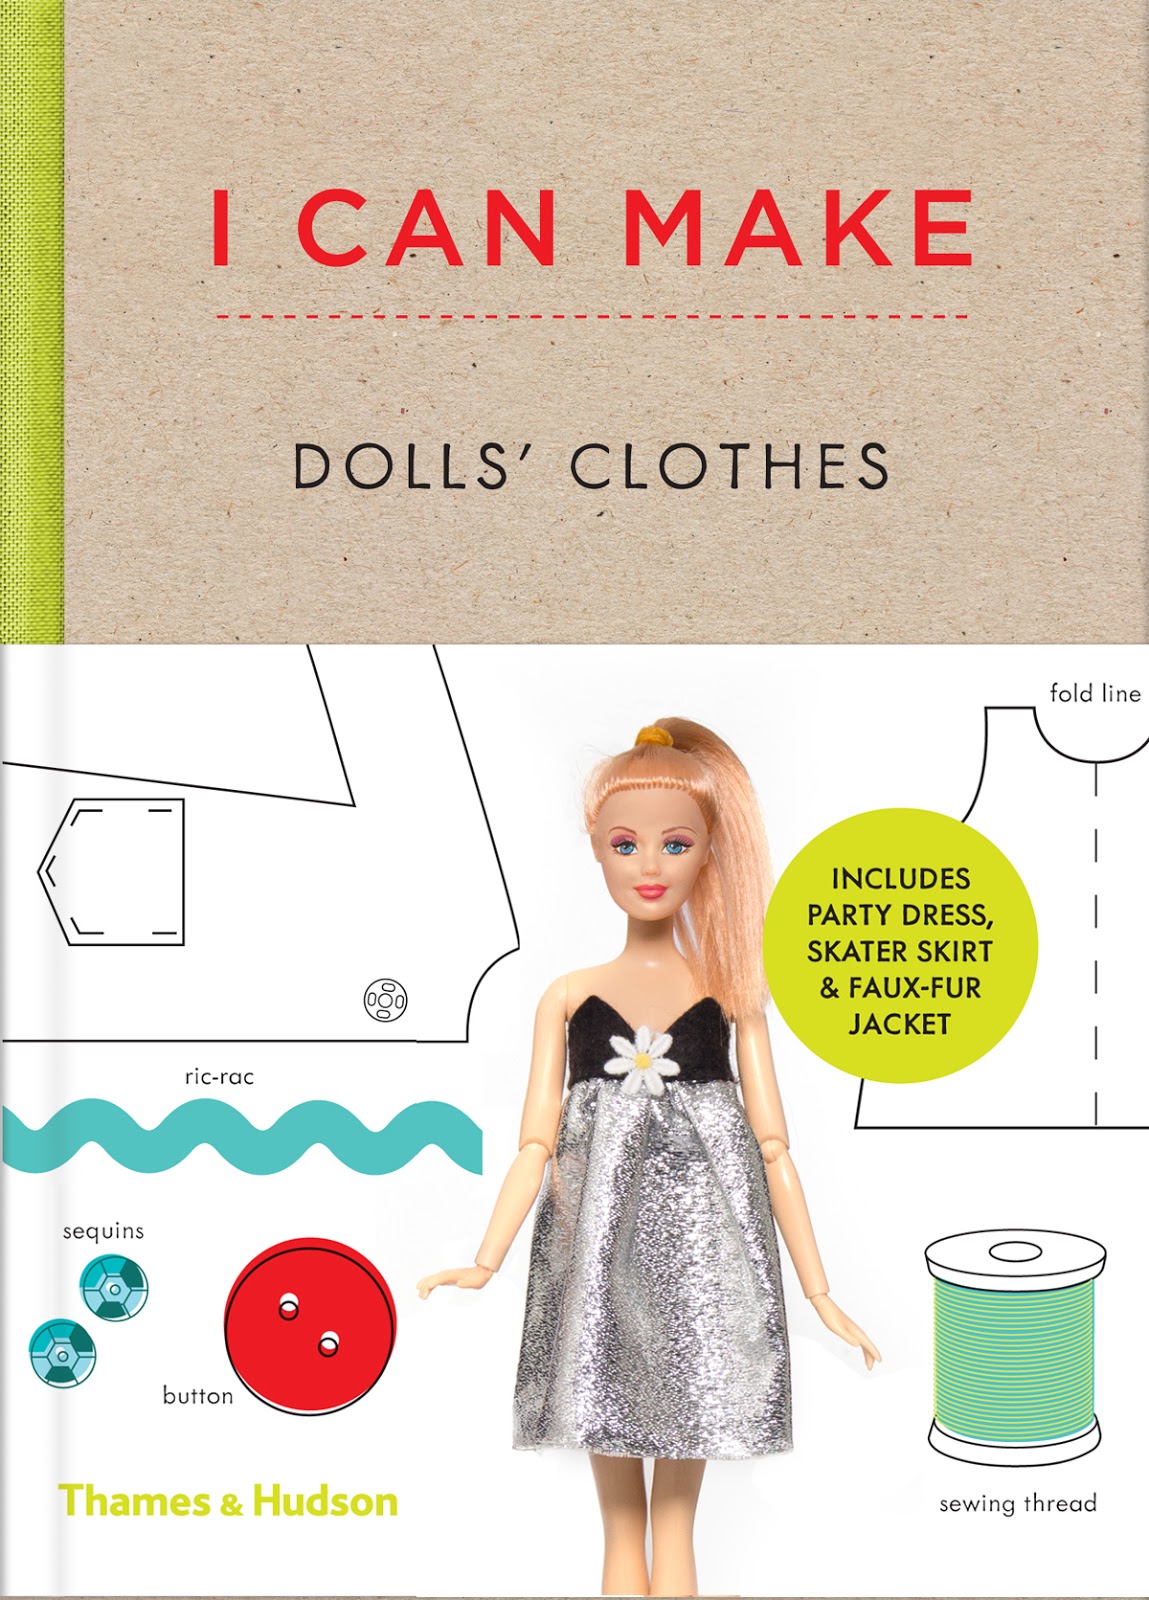
Showing posts with label Toys For Kids. Show all posts

Saturday, September 26, 2015

Book Review - I Can Make Dolls' Clothes

I CAN MAKE DOLLS' CLOTHES is an easy-to-follow guide for young fashionistas ages 8+ that shows them how to create a wardrobe for their standard-sized (12 inch) dolls. The approach is easy, quick, and fun and the results are extremely stylish. Children ages 8 and up can follow clear instructions to make a range of garments and accessories for their dolls, using basic materials such as fabric scraps, sequins, and a needle and thread.

ISBN: 9780500650516

The beautifully-designed handbook includes actual-size patterns for creating a doll’s tunic top, a knee-length coat, an A-line skirt, a faux-fur jacket, a skater skirt, a day dress, a party dress, an evening bag, and a fringed bag. There are simple, step-by-step diagrams and instructions for creating each piece of the outfit, with photos of dolls modeling the finished designs. A section at the back of the book outlines the basics of sewing, including how to thread a needle, how do a running stitch, and how to sew on buttons. Beginners with no sewing experience will have no trouble picking up the techniques.

Throughout, young seamstresses and crafters are encouraged to be creative and adapt the patterns to make their own designs. As vintage fashion and crafting emerge as an antidote to our frenzied, tech-filled lifestyles, this charming sewing book will appeal to parents and children looking for wholesome, hands-on activities.

My Thoughts: I have a grand daughter who is 6 1/2 years old. She's been doing a wide variety of different crafts & sewing projects with me for the past 2 years. Every time she visits my home we are sitting down and doing some type of arts & craft project. The reason I am telling you this is because the book is for kids ages 8 and up but my 6 1/2 year old grand daughter has been able to use this book to make the dolls' clothes just fine...with my supervision & help.

This is a hardcover book containing 176 pages. All of the patterns and projects are simple and super easy to make. The patterns are basic but can certainly be altered and made more fancier as your child grows older and her sewing skills develop. The patterns are full-size and your child simply traces them onto blank paper, cuts them out, pin's them to fabric, cut out again and then sew the pieces together as instructed. All of these items are made with hand sewing but can be done via machine depending on the age of the child.

I personally think this book is fantastic! We all know that those "fashion doll" clothes are expensive out there in the retail stores. Now you or your little girl can make the doll clothes as home and use fabric scraps and other sewing supplies that you have on hand. Plus, by making all of these items it teaches your little girl the basic sewing skills of doing hand sewing, attaching buttons, snaps, lace, fiber trims and more. Fantastic book!

You can learn more about this book and where you can purchase it by visiting Thames & Hudson online.

About the Creators: Louise Scott-Smith is a children’s wear designer. She was formerly Head of Children’s Wear Design at Liberty of London and at Caramel Baby & Child. Georgia Vaux is a graphic designer, book designer, and art director.

Disclosure: Shelly H. received a free complimentary copy of this book to review on her blog. No monetary compensation was received. Her thoughts, opinions and words are 100% her own and are unbiased and truthful opinions of the item she has reviewed.

Monday, December 26, 2011

How To Make Homemade Edible Play Dough with Recipe

We love this frugal recipe for making homemade edible play dough and it only takes about 3 minutes to make! You don't have to worry about your kid's eating this one as it is totally edible! So they can create some fun things with their play dough and then when they are finished they can have a little snack. I do recommend that you have them WASH their hands before playing with this so that they don't "germ" up their dough snack!

Edible Play Dough Recipe

Mix 1 jar of peanut butter (18 ounce)
6 Tbsp. of honey
non-fat dry milk powder (until the correct consistency)

In a large mixing bowl you will want to mix up the creamy smooth peanut butter with the honey. Then start stirring in the dry powdered milk until you get a dough consistency. I recommend doing a tablespoon at a time. Once it is ready...let the kids play with it and then when done they can enjoy a snack!

Additional Tips: If you want colored play dough you can break off balls of the dough and then mix in some cocoa powder for brown chocolate dough or try mixing in some kool-aid drink powder. The cherry flavor makes a nice red or reddish pink dough but you ONLY want to use just a tad of the Kool-aid powder...just a tad to tint the dough. We have also added drops of juice into the mixture and decreased the honey a tad to get tinted dough...like a few drops of grape juice (purple grape juice) will help to tint the dough blue.

You do NOT want to store this dough as there is no preservatives in it and it will go bad...so let them eat it or dispose of it when they are done.

Wednesday, October 19, 2011

How to Crochet a Purse for Fashion Dolls and Barbies

Today I would like to share with all of you how I make little fashion doll purses for my grand daughter to use with her Barbie dolls. You only need a little bit of scrap yarn, a pair of scissors and a size F crochet hook. (or smaller crochet hook). We used 4-play acrylic yarn to make the one shown above.

You will simply chain 10-12 stitches to obtain the width guage that you want your purse to be. You will then single crochet in the second chain from the hook and in each chain across. Chain 1, turn and single crochet in each chain across. We did this for 5 rows, fasten off, hide ends and then we made a second matching piece. Both pieces will be in the shape of a rectangle. We then placed both pieces together and single crocheted 3 sides together and chain stitched 20-22 stitches for the purse carrying handle.
You can use this same technique to make square shaped purses, round purses, rectangular purses and even oval shaped purses and you do it all for about .04 cents (if that) per purse by using scrap yarn. I made 8 of these in less than 90 minutes for my grand daughter in a variety of shapes and colors and she loves using them with her fashion dolls.

Monday, October 10, 2011

Fabulous Kid's Craft Kits From Klutz ~ Product Review

Today I would like to talk to you about a company and their products which I think are absolutely fantastic and these craft products and kits are perfect for kid's birthdays, school crafts, scouting crafts, holiday gifts, party favors, you name it...these children's craft kits are fabulous!
The craft kits are made by a company called Klutz and they make a large variety of kid's craft kits like jewelry-making kits, rubber stamping kits, face painting kits, needle craft kits, painting kits, drawing kits, window art kits and so much more. Trust me...they have hundreds of craft kits that they sell and most of them are really unique ideas! One of the things I appreciate in regards to these kits is that you can purchase "refill supplies" after your children use up the supplies that are included in each kit.

My Review: Today I am reviewing 3 great craft kits by Klutz. First up...the Stamp Art craft kit that contains the spiral bound book, 1 clear stamping block, 64 clear stamps, black ink pad and 3 double-sides colored pencils (six total colors). This kit's clear stamps are done in a variety of shapes and the book & instructions teach you how to put the shapes together to create pretty flowers, various animals, sea life, aliens & planets, foods, zoo animals, etc. The directions are very easy to follow and it teaches you step by step how to do this. I sat down to do this with my 10 year old nephew and we had a blast! Check out this cute sea life CRAB that we made together? Isn't he cute? It took us less than 10 minutes to stamp him and color him in.We also got to review the Pom-Pom Monster Salon craft kit which includes yarn, pom-pom maker, wiggle eyes, foam facial features, ribbon bows, tube of liquid glue, various card stock cut-outs to accent your pom-pom creatures and more! I spent about 10-15 minutes reading all the directions in the book and then got busy making this adorable purple pom-pom creature. I named her "Purple Peter Eater" LOL and check out those shoes! I made the purple pom-pom first, glued on the wiggle eyes and pink tongue and then finished up gluing on the purple sneakers and lime green hair bow. Super cute and so easy to make! You can make several pom-pom animals, creatures, etc. just with this one kit and everything is included but the scissors!
Finally...we got to review the new Twisted Critters craft kit which is super fun! The kit comes with over 70 different types of pipe cleaners in a variety of colors along with the spiral bound instruction book. The book teaches you step by step how to make various creatures & animals using the included pipe cleaners and rolling them, twisting and attaching them to one another to create these special designs. We had a blast with this kit with my 10 year old nephew and 11 year old god son!

Overall Impression: We love the craft kits from Klutz! I love that almost (if not everything) that you need is included with the kit. Each kit has a large instruction book that is spiral bounds and is really easy to read & understand. These kits are great for kids of all ages and I think even adults will enjoy them. As a crafter myself, I really appreciate the ease of use and the cute things you can make with the Klutz kits!


I would personally like to thank Klutz for allowing me to do a product review for their company and for hosting a giveaway here on the Passionate About Crafting Blog.

Disclaimer: Shelly Hill has personally reviewed the product listed above. Shelly has not received any monetary compensation for her review. Shelly did receive a free product to try out so she could evaluate and use it for her review. Her thoughts & opinions in this review are unbiased & honest and your opinions may differ. The Passionate About Crafting Blog is not responsible for delivery/shipping of giveaway items won from this blog nor are we responsible for mis-use or injury caused by items won from this blog.

Tuesday, September 27, 2011

How To Make Homemade Blowing Bubbles for Kids!

Today I am sharing with you the frugal recipe we use to make blowing bubbles for our little grand daughter who absolutely loves playing outside and blowing the bubbles and then running after them to try to catch them. You don't need to buy bubble solution at the toy store because you can make them at home and it only takes about 3 minutes to make a big bottle of bubbles! Here is the recipe we use!

Homemade Blowing Bubbles for Kids!

1/2 cup of handwashing dish detergent (purchase a cheap generic brand that is mild)
5 cups of tap water
1 container with lid
1 bubble blowing wand

Pour the mild liquid dishwashing detergent into a large plastic container and then gently add the tap water. Take an old spoon and stir it gently and place the lid onto the container until you are read to use them. Please keep this OUT OF REACH of children and please supervise them as you don't want them drinking this mixture.

You will need a few plastic bubble blowing wands from your old bubble blowing sets.

Sunday, August 14, 2011

How To Make Homemade Bath Soap Crayons For Kids

You can make your own bathtub soap crayons for the little ones quickly and easily by following the recipe below and making them yourself which is so much cheaper than buying them in a speciality bath store.

We use the following recipe all of the time and our grandkids, nieces and nephews just love it when I hand them a pile of homemade bath soap crayons for them to enjoy while getting a bath.

Homemade Bath Soap Crayons For Kids Recipe

You will Need:

1 cup grated Ivory Soap
1/4 cup warm water
Food Coloring
Plastic Cookie cutters

How to: Mix water, soap & food coloring together in med. size bowl. Stir the crayon mixture until it begins to stiffen. Remove the mixture from the bowl and knead until it is the consistency of a very thick dough. Spoon Crayon Mixture into plastic cookie cutters or other plastic molds (playdough molds work great too!). Press down firmly. Place the plastic cookie cutters in your freezer for 10 mins or in your refrigerator for 30 mins. When firm, Pop the bath crayons out of the cookie cutters (or other molds) and allow them to air dry overnight or until hard.

Molds: Ice Cube Trays, Playdough Molds, & Cutters Tupperware Cookie Cutters, Plastic Cookie Cutters, Plastic Guest Soap Molds (buy at local craft store), The Plastic divided tray that comes in choc. candy boxes and so forth! Inexpensive Fun!

Friday, April 15, 2011

Play Food ~ How To Make Canned Sliced Carrots & Canned Green Beans ~ Felt Food

If you have been following my craft blog for awhile now...you will have noticed that I design and post a lot of felt food patterns here on my blog. For almost 2 years now, I have been making a lot of playfood for my little grand daughters kitchen play set! If you love making felt food, I think you will appreciate this craft project as it's really simple to make.

I took 2 large clear plastic medicine bottles (not with child proof lids) and washed them out to use as 'store cans' for my grand daughters canned foods. I then cut down some scrapbooking paper and used a glue pen to glue the paper around the sides of each plastic can. I used my Cricut machine to cut out 2 ovals on the number 2 setting. I used my chalks and chalked around the oval's edge and then glued those onto the front of my cans. I simply used scrapbooking markers to write the name of the food items onto the label. You can get fancy if you want and write nutrition info on the back so that they resemble more like a can of food, that is entirely up to you.

You can find my free patterns for the felt sliced carrot rounds and the felt green beans here on my blog. I plan on doing a few more 'canned' food items for her playset next week.


Sunday, January 16, 2011

Play Food - FREE Pattern For Felt Fish, Felt Burger & Felt Chicken Leg

For the past year I have been super busy making play food aka felt food for my little grand daughter's kitchen play set so last weekend I decided to make her a few felt dinner items. I made her a hamburger pattie, piece of fish and a chicken leg (drum stick) for her to use with her kitchen set.

I was able to make all 3 of them pretty quickly. You can hand sew them together with blanket stitches or sew the pieces together via a sewing machine...the choice is yours.

To Make The Felt Fish:

1 sheet of vanilla colored felt
vanilla embroidery floss
small amount of stuffing

I simple hand drew out a fish shape onto paper. Mine measures 5" long by 1 1/2" at the tail and 2 1/4" at the body by 2" at the head...just to give you a rough measurement. I cut out 2 body pieces and then 1 strip that measures 1/4" by the circumference of my fish. Using 2 strands of embroidery floss and a blanket stitch, I attached the strip to one body piece. I then attached the other body piece to the other side of the strip. Right before closing, I inserted some poly fiber fill stuffing. Don't over fill it or it will get too puffy on you. Finish your stitching and fasten off.

Picture shows me hand sewing the strip onto the fish body.

To Make The Felt Hamburger Pattie:

1 sheet of dark brown colored felt
dark brown embroidery floss
small amount of stuffing

I made a circle pattern by tracing around the bottom of a 4" diameter drinking glass. You will need to cut 2 circles from brown felt. You will need 1 piece of brown felt strip that measures 1/4" by the circumference of your circle. Using 2 strands of embroidery floss and the blanket stitch, attach the strip to one of your circles. Once it has been connected, attach the other circle to the other side of the strip. Right before closing, insert some stuffing to give it a puffy burger shape, then fasten off.

To Make The Felt Chicken Drumstick:

1 tan colored piece of felt and small amount of vanilla colored felt
tan & vanilla colored embroidery floss
small amount of stuffing

I drew out a chicken drumstick shape that measures approximately 5" long by 2 1/2" wide at it's widest point. I cut 2 of these shapes from tan felt. I then cut 2 bone ends using my paper pattern from vanilla felt. (see photo). Using 2 strands of vanilla floss, I hand stitched on the vanilla bone pieces onto the end of my tan piece using tiny whip stitches. You will do this for each piece (sides). Once done, place the wrong sides together (if hand sewing), use 2 strands of tan embroidery floss and whip stitch or blanket stitch the 2 pieces together. Right before closing insert a small amount of stuffing inside, finish stitching & fasten off.

There you have it...3 more pieces to your felt foodie collection. I will be posting many more FREE patterns over the next several months so keep checking back or follow my blog via Google Friend Connect to stay updated. Enjoy!


Happy Crafting!

Tuesday, January 4, 2011

Play Food ~ Free Felt Food Ice Cream Sandwich Pattern!

If you have been following my blog...you will have read & seen a lot of the free felt food patterns that I have been designing and making for my little grand daughters pretend play kitchen that she has. Well...today I am posting yet another FREE felt food pattern for you to enjoy.

Below you will find my instructions on how I made an Ice Cream Sandwich for her kitchen play set using craft felt. I did mine completely with hand sewn stitches but you can machine sew it together too.

Play Food ~ Felt Ice Cream Sandwich Pattern

Chocolate Brown and White Craft or Wool Felt
Chocolate Brown and White Embroidery Floss or Sewing Thread
Small Amount of Fiberfill Stuffing
Scissors & Sewing Needle

Pattern: 2 1/4" by 4 1/2" paper pattern + 1" by 13 1/2" paper pattern

Directions: From chocolate brown felt, cut 4 pieces that measure 2 1/4" by 4 1/2" in size. From chocolate brown felt, cut 1 piece that measures 1" by 13 1/2" in size, from white felt cut 1 piece that measures 3/4" by 13 1/2" in size (the white strip needs to be slightly smaller in it's width than your chocolate strip).

Place 2 chocolate brown rectangles together and using 3 strands of brown embroidery floss, hold those 2 pieces together and make random french knots on them to simulate the indents of a real chocolate wafer. You will then repeat this with the other 2 rectangles. Your next step is to use 2 stands of chocolate brown embroidery floss and blanket stitch the 1" by 13 1/2" chocolate brown strip around one of the rectangles. Once completed (attached) blanket stitch it to the other chocolate rectangle. Before closing it up to resemble a brick, insert some polyfiber fill but don't over-fill it or it will get too puffy. Finish up. At this point, it should look like a chocolate brick. Your next step is to attach the white strip around the sides of the chocolate brick to resemble the vanilla ice cream. You can blanket stitch it on using 2 strands of embroidery floss or just make simple tiny hand sewn stitches to attach it. If in a hurry, you can glue it on with some craft glue.

You have now completed your felt ice cream sandwich. The size I made is an ACTUAL size of a real ice cream sandwich but if you want to make a smaller one to fit toddler hands, just shorten the measurements on the paper pattern.

You can find more of my FREE felt food patterns ----> HERE

Happy Crafting!

Friday, December 31, 2010

Play Food - FREE Felt Food Cheese Blocks Pattern

My little grand daughter loves to snack on little blocks of cheese so I decided to make some out of felt so that she can use them with her play kitchen. This is the 94th piece of play food aka felt food that I have made for her so she has a well-stocked kitchen now! These cheese blocks are super easy to make...completely made with hand sewing and you can use up your smaller pieces of felt scraps.

I used acrylic felt for the cheese blocks in a light orange color. I did hand sewing and did a blanket stitch around all of the edges to form oblong blocks and inside I just put in some fiberfill stuffing so that they would hold their shapes.

The two small ends of the block measure 1" square and the rectanular sides of the block measure 1" by 1 1/2" in size. Just use 2 strands of matching embroidery floss and blanket stitch all of the sides together to form the block! Super easy! I made 4 blocks of cheese for her play food set.

You can find more of my FREE felt food patterns ----> HERE

Happy Crafting!


Sunday, December 26, 2010

PlayFood - FREE Felt French Fries Play Food Pattern


Here is my next installment in FREE felt food aka play food patterns for your little girl's kitchen and playfood sets. Today's installment features french fries and a splat of ketchup on the side. I decided to hand sew these together since working with skinny pieces of felt was trying my patience on the sewing machine.

Felt French Fries with Splat of Ketchup:

1 piece of vanilla colored craft or wool felt
vanilla colored embroidery floss & needle
scrap piece of red felt with red embroidery floss
Scissors

For the splat of ketchup, I just cut out a splat shape from 2 pieces of red felt. My splat measures about 2" in diameter...I made mine odd shape, not a perfect circle. I then did a blanket stitch and stitched the 2 splats together using red floss.

The french fries were a little big of a challenge for me. I decided to make the fries various sizes...after all, no 2 french fries are ever the same. From vanilla felt I cut out 2 pieces that each measure 5" long by 1 1/4" wide. You will want to vary these measurements for each french fry and each fry will take 2 matching pieces of vanilla felt. I used 2 strands of embroidery floss and just made tiny running stitches up 1 long side, across the one short side and halfway down the other long side. I then flipped it right side out and used tiny whip stitches to sew the fry shut. I didn't use any stuffing inside as the felt was the perfect bulk all on it's own. For our french fry set...I made 6 french fries.

Happy Crafting!

Tuesday, December 21, 2010

Play Food - FREE Felt Chicken Nuggets Play Food Pattern!

 Here is my next installment in my felt food aka play food patterns! I have been making felt food for my grand daughter's kitchen play set for a year now and let me tell you...she has a large collection of it!

Today's installment is for felt chicken nuggets which happens to be one of her favorite foods! You can make 2 chicken nuggets in less than an hour and there is no machine sewing. I made mine by blanket stitching my pieces together.

For each nugget...you will need to matching sized pieces for each side. Mine measure about 2 1/2" by 2" and I cut them oblong but not a perfect oval...after all..chicken nuggets are not a perfect oval. You can make yours any shape you would like or trace around an actual chicken nugget to get your pattern. I made mine out of tan craft felt.

Once I had my 2 sides cut out...I cut a strip from the felt that measures 1/4" by the circumference of my nugget. I then did a blanket stitch using 3 strands of tan colored embroidery floss to connect the strip to the side piece and then repeated it for the other side piece. Right before I had it completely sewn...I stuffed it with some fiber-fill. As you can see...pretty dang gone easy!

You can find more of my FREE felt food patterns right here on my blog by checking out my faux food and my felt project categories. Happy Crafting!

Monday, December 13, 2010

Play Food - FREE Felt Food Hot Dog Pattern

Here is my next installment on how to make felt food for your little girl's kitchen play sets. I think this hot dog came out really cute. It is complete with a squirt of ketchup and mustard! I was able to make this hot dog completely by hand with no machine sewing....although you can machine sew it if you want to.

Felt Hot Dog:

1 sheet of tan colored craft or wool felt
scraps of red and yellow felt
red and yellow embroidery floss
small amount of fiber-fill stuffing
scissors and needle

Pattern: piece of paper measuring 5 1/4" long by 2" wide. From tan felt, cut 2 pieces.

For the ketchup and mustard squirt, I just free-handed that from scraps of felt. I used 2 strands of red embroidery floss and hand sewed it onto one of the tan pieces of felt using tiny stitches. On top of the red squirt, I simply hand sewed on the yellow mustard squirt. Place the 2 tan pieces of felt wrong sides together and use 2 pieces of tan embroidery floss and make a running stitch up the 2 long sides. Turn the "tube" right side out and stuff firmly with fiber-fill. Using tiny stitches...gather up each end with stitches and fasten off. You want your ends to be tightly gathered up so it looks like a hot dog.

You can find more of my FREE felt food patterns ----> HERE

Happy Crafting!
Shelly

Saturday, December 4, 2010

Play Food - FREE Felt Food Pattern - Holiday Peppermint Candies

Here is my next installment on free felt food patterns! I decided to make a holiday theme'd food item this time for my grand daughter play food & kitchen set that I have been working on for over a year now. This little felt peppermint candy works up super quickly and you can make one using your felt scraps. If desired, you could turn this into a Christmas Tree ornament by just threading through some string at the top.

Felt Peppermint Candy:

Scraps of white and red craft or wool felt
white and red embroidery floss and needle
stuffing
scissors

For my pattern: I made mine a little bigger than a normal sized peppermint candy so that wee one could hold it better & so it wouldn't get lost as easily. Mine measures 1 1/2" in diameter, so you will need a paper circle measuring 1 1/2" diameter for your pattern.

Use your pattern to cut out 2 circles from white felt. For the red stripes/swirls...I totally winged it and just used scraps that I cut to fit. I then used 2 strands of red embroidery floss and hand stiched my 5 swirls/stripes onto one side of each white circle...remember, you want your candy to be 2-sided. I then cut out a strip from white felt that measures 1/8" wide by the circumference of my circle. I used 2 strands of white floss and stitched the strip to once circle and then stitched it to the second circle. (make sure your red patter is facing outward when placing your 2 white circles together). Right before closing, I inserted just a tad of stuffing so that it would hold it's shape or you could insert a cotton ball inside it. Finish your stitch and your done! I was able to make 3 of these in just one hour.

You can find more of my FREE felt food patterns ----> HERE

Happy Crafting!
Shelly

Thursday, November 25, 2010

Play Food - FREE Felt Fudgesicles Popsicles Pattern!

If you have been following my craft blog...you will have noticed that I love making play food aka felt food for my little grand daughters kitchen set. Today I am posting my next installment which is how to make popsicles or in this case...how to make fudgesicles out of craft felt. This project is really easy to do and you can make one in less than 1 hours time. You can hand sew or machine sew the popsicle together...choice is yours! You can change the colors of your felt to make a variety of popsicle flavors...use peach or light orange to make creamsicles or use purple or lime green to make summer popsicles.

Felt Popsicles:
1 sheet of craft or wool felt (I used brown so I could make a fudgesicle)
1 wooden popsicle stick (washed & dried)
small piece of quilt batting that is 1/4" thick
small amount of craft glue
brown embroidery floss & needle if sewing by hand or brown thread if machine sewing

Pattern: I drew my own from a sheet of paper. You can trace around a normal sized popsicle to get the shape and size right.

From brown felt, cut 2 front and backs for your popsicle. For the sides, you will want to cut a strip from brown felt that measures 1/4" by the entire circumference of your popsicle. Using 2 strands of embroidery floss, stitch the long strip to the front of your popsicle felt piece using tiny little stitches, leaving the bottom of the popsicle open. Using 2 strands of brown floss, stitch the back piece to the long strip, again leaving the bottom open. Using scissors, cut a very small slit the width of your wooden popsicle stick in the strip of felt that runs across the bottom of your popsicle. Place the quilt batting inside the popsicle shape. Place some craft glue onto the wooden popsicle stick and insert it up through the slit in the felt so that 2/3 of the stick remains out. Using 2 strands of brown floss, handstitch the bottom together and let dry.
You can make these in any color combination that you want and it's a great way to reuse wooden popsicle sticks that you normally throw out. You can find more felt food aka play food patterns on my blog -----> HERE

Happy Crafting!!!
Shelly

Tuesday, November 23, 2010

Play Food - FREE Felt Food Whoopie Pie Pattern!

Here in Pennsylvania, Chocolate Whoopie pies are very popular and here in my household...that is no exception! I decided to make some whoopie pies out of felt for my little grand daughters play food collection that she uses in her play kitchen. These whoopie pies are super easy to make and you can hand sew or machine sew them together.

Felt Whoopie Pies:
chocolate brown and white craft or wool felt
brown and white embroidery floss with needle
small amount of stuffing
scissors

Pattern: I made my own from a piece of paper. You will need two 3 1/4" diameter circles cut from chocolate brown felt.

From brown felt, cut out two circles with each one measuring 3 1/4" in diameter. From white felt cut a strip that measures 1/4" by the circumferece of your circle...my strip measures 1/4" by 10 3/4" long. You will also need a strip cut from brown felt that measures 1/4" by 10 3/4" long. Using 2 strands of brown floss, handstitch the brown strip to one of your brown circles. Once you have it attached, handstitch the other edge of the strip to the other brown circle. Right before you close it up, insert some stuffing and then finish your stitching. For the white icing aka vanilla filling...you can hand sew it onto the whoopie pie around the sides or do what I did and that was just glue it on with some tacky glue. Isn't the whoopie pie cute? LOL

Very quick and easy project that little girl's would love to have these felt foodie items for their kitchen play sets. Great items for creative fun!

Wednesday, October 20, 2010

Trash To Treasure Project - Play Makeup For Little Girls!


My little grand daughter sits and watches her mommy put her makeup on every day...then when she is around me, she gets to see it all over again. While I am applying my makeup, I usually hand her a few things to hold or play with to keep her busy. I had just finished up using all of my pressed powder in my CoverGirl compact and handed it to her. She loved opening and shutting the compact! Next...she wanted to "apply" some powder to her face too. So....here is what I did.

I washed and dried my old compact. I then got out some pink craft felt. I used the compact as a template and traced a circle onto my pink felt. I used scissors, cut the circle out and had to trim it down a little more to fit into the well of the compact. I used my white tacky glue and put a thin layer of glue into the empty well and placed the craft felt on top. I left it dry for 2 hours. I then went to the dollar store and purchased some of those wedge makeup sponges and a new powder puff.

Note: You will want to make sure that the mirror is safely secured in the lid of the compact. If not, remove it and use some good strong glue to place it back inside or remove it and replace it with some aluminum foil to give the appearance of a mirror.

My little grand daughter now has her own "faux" face powder to play with and I saved an old plastic compact from reaching the landfill. Gotta love Trash to Treasure craft projects!

Shelly

Wednesday, August 4, 2010

FREE Plarn Crochet Barbie Doll Beach Mat and Tote Bag Patterns

As part of my Barbie Doll (Fashion Doll) and Plarn series of patterns & projects, I have come up with a very simple crochet pattern to make a Barbie Doll Beach Mat and Tote Bag.

You will need a size H Crochet Hook and 8-10 plastic shopping bags. This is a quick and easy project to use up some of your bags & to save them from our landfills.

Click Here for a you tube video on how to make plarn.
Click Here for a web site that will teach you how to make plarn.

To Make The Plarn Beach Mat

You will want to chain 44 stitches, SC in the 2nd chain from the hook and in each chain across. Chain 1, turn and SC in each stitch across. You will continue this pattern until you have 11 rows.

To Make The Plarn Beach Tote Bag

This tote bag is made by crocheting 5 rectangular blocks and then simply slant stitching all of the rectangles together to make the tote bag. I made the tote bag larger than a purse because I want it to hold barbies plastic suntan lotion bottle, her towel, hat, sunglasses, etc. You know...barbies come with a bunch of beach themed accessories!

I used a size G crochet hook to make the tote bag and used all simple SC stitches.

You will need to make 2 long side panels:

Chain 8, SC in 2nd chain from hook and in each chain across. Chain 1 and turn, SC in each stitch across, chain 1 and turn. Repeat until you have 4 rows, fasten off, weave in ends.

You will need to make 2 short side panels:

Chain 5, SC in 2nd chain from hook and in each chain across. Chain 1, turn, SC in each stitch across, chain 1 and turn. Repeat until you have 4 rows, fasten off, weave in ends.

You will need to make 1 bottom panel:

Chain 8, SC in 2nd chain from hook, SC in each chain across, Chain 1, turn, SC in each stitch across, chain 1, turn. Repeat until you have 2 rows.

Assembly:

You will simply slip stitch all 4 side panels to the bottom panel of the tote bag and then slip stich up each of the 4 sides to connect them to one another. Fasten off, weave in your ends. For the handle, I just chained 10 and slip stitched each side of the handle to the top of the tote bag.

You can find more FREE Plarn crochet patterns here on my web site by clicking --> HERE


Monday, August 2, 2010

FREE Plastic Canvas Barbie Doll Table and Rug Patterns


A few days ago I shared my plastic canvas pattern on how to make a Barbie Doll sized chair. Today I am sharing how I made the side table and square rug with you. Both of these projects were made with 14 ct. plastic canvas and Red Heart 4ply yarn.

Plastic Canvas Table Directions:

table top - 19 holes by 19 holes squared
8 legs - 3 holes wide by 18 holes tall

Stitching: I simply used a tent stitch and stitched the top of the table and then the 8 legs. Once done I stitched all 8 legs to my table by joining 2 leg pieces at each of the table's corners. After they are attached using a simple whip stitch, just go around and whip stitch all of your unfinished edges.

Plastic Canvas Accent Rug Directions:

rug piece measures 22 holes by 22 holes squared

Stitching: You can do the stitching in any pattern that you would like but I decided to use a Scotch Stitch. You can find directions on that ---> HERE Once I had the center portion completed, I whip stitched around my unfinished edges.

You can make both of these pieces in just one afternoon.

You can find more free plastic canvas patterns --> HERE

Happy Stitching!

Saturday, July 31, 2010

Free Plastic Canvas - Barbie Doll Chair Pattern

Now that my little granddaughter is growing older and soon she will love to play with Barbie Dolls, I have been busy making furniture, clothing and accessories for her. Today I am sharing how I made a Barbie Doll - 11 1/2" Fashion Doll chair out of plastic canvas and some yarn.

From 14 ct. Plastic Canvas you will need to cut the following pieces:

1 seat - 19 holes by 19 holes
2 seat backs - 19 holes by 22 holes high
4 leg pieces - 19 holes by 18 holes high

You will need to cut your leg pieces into an A shape like what I show in the photo. For my 2 seat back pieces, I angled the top corners to give interest to it but you can leave yours straight.


Stitching: I did a simple tent stitch but I did it over 3 holes at a time going top to bottom to make vertical rows. I used 4-ply Red Heart Yarn. You will first stitch your seat, seat backs and then the legs, leaving all outer edges unfinished. Once done, place the 2 seat backs wrong sides together and stitch them together using a whip stitch but leave the bottom edge unfinished. Stitch 3 of the chair leg sections to the seat. Place the seat back and 4th leg section together and whip stitch to the remaining unfinished edge of the seat. Finish up by stitching around the legs and openings so that your chair has no unfinished edges.

I will be posting the instructions for the side table and rug in a few days or you can find free Barbie Doll Patterns here on my blog.

You can find more free plastic canvas patterns --> HERE


Happy Stitching!
Shelly