Showing posts with label Product and Pattern Reviews. Show all posts

Friday, February 10, 2017

Star Wars Felt Holiday Christmas Ornaments

Star Wars EWOK Christmas Ornament from Felt
My husband has been a HUGE Star Wars fan since the very first movie came out. He's in his 50's now and has been collecting Star Wars items for over 35+ years! Wow, can you believe that the franchise has been around that long? Time flies!

Over on my main blog - The Classy Chics, I received a complimentary Star Wars Collectible Felt Characters Craft Kit to review and feature. You can visit my other blog to check out my official review, purchasing information and to see additional photographs. 
Star Wars Collectible Felt Characters Craft Kit

Since receiving the craft kit, I've made 4 of the Star Wars characters. One of the things I love about this craft kit is that everything you need is included in the kit and all of the sewing and embroidery is done by hand. So, if you don't own a sewing machine or don't want to mess with one, you don't need one to complete these adorable characters!

I've been working on them one-by-one and hoping to have them all completed by the end of the year. We have a little 4 foot tall Christmas tree that we decorate in a Star Wars theme every holiday season, so I'm turning all of these felt characters into Christmas tree ornaments!
Star Wars Handmade EWOK Ornament from Felt

After I get done making a set for my husband, I want to work on additional ones and use them as toppers & ornaments on Christmas packages for the kids in our family. What's really cool about this kit is that once you run out of craft felt, go to your local craft supplies store, buy felt in the colors that you need and you can make as many as you want since the patterns & instructions are included in the kit and you can re-use them over & over again.

You can visit my main blog for the official review on the craft kit that I received. Since my readers on this blog didn't see the original review, I wanted to mention it over here too!

Sunday, September 4, 2016

Book Review: I Can Make My Own Accessories

For the past 2 1/2 years I have regularly gotten together with my now 7 year old granddaughter for regular craft dates. Like most children, she loves to sit down with me and do various arts & craft projects, many of which we've shared right here on the craft blog. Today, we are featuring a complimentary book that we received for review.

Title: I Can Make My Own Accessories
By: Thames & Hudson
ISBN: 978-0-500-65082-0

Synopsis: This book includes easy-to-follow patterns to make & customize fashion accessories. Make unique, stylish accessories with some fabric scraps, a few buttons & a ribbon. Create bags, belts, jewelry, hair accessories and more. Follow actual-size patterns, which are quick and easy to make. Super clear instructions aimed at beginners, with tips & tricks along the way.

My Thoughts: Wow, where do I begin with this one. My granddaughter is 7 1/2 years old and with my assistance she could make the majority of the projects featured in this book. While the projects inside are not my fashion style at all, they are perfect for her and for teenage to young adult women. Inside the pages you'll find instructions on:
- A Lip's Brooch
- Cat Ears
- A Bag Charm
- Festival Garland
- Pasta Necklace
- Braided Belt
- Jeweled Collar
- Kawaii Bear Bag

Along with design tips, techniques and tricks to help you get the projects done quickly and how you can customize several of them to suit your own needs. For example: I never knew how to dye pasta but thanks to this book, I do now! The pasta necklace project would be a great project for little girls and for those of you who teach scouting groups...this book would be great for you too.

In the back of the book they teach you how to use pom-poms to adorn socks, pony tail holders, to make jewelry, etc. I love the little ideas on how to use felt flowers to decorate sunglasses, barrettes, pony tail holders, hair clips, etc. All of the designs are super easy-to-make and whip up quickly.

You can learn more about this book and where you can purchase it by visiting Thames & Hudson online.

Disclosure: Shelly H. received a free complimentary copy of this book to review on her blog. No monetary compensation was received. Her thoughts, opinions and words are 100% her own and are unbiased and truthful opinions of the item she has reviewed.

Thursday, August 18, 2016

No-Sew Superhero Capes for Kids

I love making arts and crafts, especially when I can make items and give them to my grandchildren or donate them to charity. Such as the recent campaign that I participated in called Capes for Kids, sponsored by FamilyFun Magazine.

People were encouraged to get together & throw superhero cape making parties and then donate those capes to charity. All of the capes made during the campaign were donated to homeless shelters and given out to kids. How cool is that? Totally cool.

I was honored to participate in this important campaign and had my little cape making party with my mother, husband, granddaughter and godson volunteering to help me. We used the pattern and instructions online to make the No-Sew Superhero Capes. You can print it all out and make some kid's superhero capes for charity and/or make a few for your own kids to enjoy.

To decorate some of the No-Sew Superhero Capes that we made for the campaign I used some complimentary products that I received from the May Arts Ribbon Company. Here's some information about the company and their gorgeous ribbons & trims that they offer.

May Arts offers a variety of different products featuring:

* Decorative Ribbons for Apparel, Crafts, and Floral Design
* Lace Ribbons
* 100% Silk Ribbons
* May Arts’ Signature Adhesive Ribbons
* Trims & Embellishments
* Gift Tags
* Banners & Garland

When we made the children's superhero capes, I decided to use some of the May Arts ribbon on two of the capes. On the one shown above, I used some fabric glue and glued the red pom-pom decorative ribbon around the collar portion of the cape and left it dry overnight & then trimmed it to the proper length. I drew a simple flower onto a piece of paper and used that as my flower template and simply cut out the flowers from various pieces of colored felt. I glued them onto the cape along with a colored pom-pom to accent the center of each flower. A really easy design for little girls!

For the second little girl's design I used the burgundy decorative ribbon in a zig-zag pattern to trim around the bottom of the cape. Again, I just used fabric glue to adhere it to the felt. I then drew a large heart onto a piece of paper and used it as my template to cut out a heart from purple felt. I glued it on and decided that it needed a little more special trim, so I used that same decorative ribbon around the collar of the cape. When using fabric glue, you always want to let it thoroughly dry overnight before using your items. If you use special glue for fabric, they are indeed washable and dryable!

Over the coming weeks I'll be using more of the ribbons that I received from May Arts in various sewing and craft projects and will be featuring them all here on my craft blog. I plan on using some of the ribbons & trims in some of my holiday cardmaking & scrapbooking projects that I want to do. In addition, I'll be using them to make some cool ribbon holiday ornaments too. Stay tuned for all of those craft projects in the coming weeks!

May Arts ribbon can be purchased through their new retail website www.ribbonresource.com, or through one of their many suppliers found in the retail locator.

Disclosure: Shelly received complimentary ribbons & trims from May Arts to feature in various craft & sewing projects here on her blog. No monetary compensation was received. Please visit our sponsor and thank them for helping to support our blog. Thanks!

Sunday, April 17, 2016

Disney's FROZEN Characters Crochet Kit

If you love to crochet and are a big fan of Disney's hit movie FROZEN, you'll love this brand new crochet kit from Thunder Bay Press. The kit comes complete with 8 colors of yarn, instruction book with photos, stuffing, safety eye beads, 4 colors of embroidery floss, tulle and a tapestry needle. The kit contains everything you need to make Elsa and Anna plus patterns/instructions to create 10 additional characters from the hit movie Frozen. (You'll need to add your own supplies to make those 10 additional characters).

Title: Disney Frozen Crochet
ISBN: 978-1-62686-443-6
Retail Value: $24.95

The instruction book that comes with the kit contains 76 pages with more than 100 full-color photographs. If you're brand new to crochet and have never done it before...you'll need help with this kit and the projects. If you have some experience with crochet...you'll do just fine.

Crochet Patterns Included: Queen Elsa, Princess Anna, Kristoff, Prince Hans, Oaken, Olaf, Sven, Grand Pabbie, Marshmallow, Young Elsa, Young Anna and Young Kristoff.

These characters are great for those of you who love the movie Frozen or make them and give them as gifts to that little girl in your life. I know my 7 year old grand daughter loves Frozen and has many toys and collectibles from the movie.

I have owned and worked on 2 previous crochet kits from Thunder Bay Press and absolutely love them. They have craft kits for adults and for kids. Not into crochet? They have other styles available too. We recently reviewed their Pom-Pom Animals craft kit over on my other blog and you can check out that review for additional information.

You can visit Thunder Bay Press online to learn more about the company and to see the wide variety of craft kits and books that they have to offer.

Disclosure: I received a complimentary craft kit to review. No monetary compensation was received. Shelly's thoughts, words and opinions are 100% her own. Your opinion may differ.

Monday, January 25, 2016

Book Review: The Complete Photo Guide to Cardmaking

The Complete Photo Guide to Cardmaking is the ultimate resource on card making. All paper-crafting techniques that can be employed for card making are thoroughly explained, including a comprehensive description of paper types available, folding options and techniques, coloring and image transfer methods, and adding embellishments. Inside, you'll also find methods for using a computer to design and print cards. Enjoy a gallery that gives you lots of ideas and inspiration to create cards of your own, using the techniques you've learned.

Book Title: The Complete Photo Guide to Cardmaking
Author: Judi Watanabe
ISBN: 978-1-58923-882-4
Publisher: QuartoKnows.com

Expert paper crafter Judi Watanabe provides you with a one-stop reference for making cards for any occasion. This book includes step-by-step photographed instructions for a wide range of techniques, as well as projects to accompany each area of card making. Full of gorgeous cards, The Complete Photo Guide to Cardmaking explores a wide range of techniques and end products, making it a valuable reference for any crafter. So, when the mood strikes, you can use the artistry you've learned to create personalized greetings for everyone you know!

My Thoughts: I'm a big-time scrapbooker and paper crafter and I'm always looking for new and fresh ideas. This book is specifically made for those who are into cardmaking but the techniques and designs you learn from it...can be used in other paper crafting mediums too!

Within the pages of this book you'll find more than 800 full color photos and step-by-step instructions on how to make each card that is featured. There are variations included with most of the designs too. I love that the author gives you a supplies list with each project so that you'll know what supplies you'll need ahead of time. All of the supplies are readily available too!

There are projects for beginners, intermediate and expert cardmakers, definitely something for every skill level and design-taste. The author covers all different kinds of handcrafted greeting cards, from window cards, folded cards to money/gift cards and everything in-between. It's quite extensive and I love that she didn't forget about anything!

I'm super happy to have this book in my library collection. I'll be learning some new design skills and will be applying them to my cardmaking and scrapbooking projects. It my opinion, it's a definite must-have book if you're into cardmaking and/or scrapbooking.

Disclaimer: Shelly was provided with a complimentary copy of this book to review on her craft blog. No monetary compensation was received. Regardless, Shelly's thoughts, opinions and words are 100% her own. Your opinion may differ.

Sunday, November 15, 2015

Creative Options Introduces a Tote-All Craft Experience this Holiday Season

With the holidays fast approaching, Creative Options®, the leader in craft and storage organization, is ready to help crafters unleash their creativity by housing and organizing their holiday creations. From molded organizers to soft sided bags, their line of stylish totes combine smart design and versatility, making them the perfect gift for seasoned crafters, DIY divas and budding artists.

Creative Options® craft storage products offer a fashionable, affordable tote for any craft activity, and are available in a variety of popular prints.

Scrapbooking:

Total Tote in Vineyard MSRP $39.99 – Hybrid construction combines the look of a soft-sided organizer with the rigid body of a Creative Options® molded product, resulting in a clever storage that keeps its shape. Featuring a removable center wall for diverse storage options, a zippered take-away pouch, elastic loops and pockets for pens or tools, it’s perfect for storing scissors, stamps, punches, tape, cards and much more. The vinyl take-away pouch and detachable center make it “tote-ally” versatile.

Jewelry and Beading:

Tapered Tote in Viva La Pink MSRP $19.99 – A must-have for the stylish jewelry maker or beader on the go, this fashionable tote features a flip top, soft carrying handles and enough room to stash supplies while traveling. Its spacious pink interior has French memo-board-style elastics in the lid and a zippered take away pouch that perfectly protects loose odds and ends.

Knitting:

Knitting Needle Roll-Up Tote in Bliss MSRP $8.78 – Created specifically for storing needles, this versatile bag rolls into a cylinder, with two sturdy ribbons to keep tools safe and secure. Ample pockets keep knitting items separate and a top zipper opens to a larger pocket that lines the entire bag.

Crocheting:

Crochet Tote in Viva La Pink MSRP $34.99 – A crocheter’s dream, this stylish tote features grommets in each side and two carrying handles, making it perfect for holding and toting up to three skeins of yarn, needles and more.

General Crafting/Multi-Purpose: (shown below)

Large Signature 5-Pocket Tote MSRP $49.99 – Nominated for the 2015 The Craft & Hobby Association Hot Product Award! This multipurpose bag is everything! It features five exterior pockets, elastic bands that hold crafting tools and knitting essentials, alongside a wide-open inner compartment. A versatile carryall, it’s perfect for holding skeins or yarn, art projects and notebooks—everything you need to stay organized at home and on the go. Made of easy-to-clean, durable polyester, it coordinates with other “Andee Cool” Creative Options® soft fabric and molded organizers.

My Thoughts: I am a big time crafter...hence why I have a 6 year old crafting blog! For this review I received the Creative Options® Signature 5 Pocket Knitting Tote to check out for all of you. I admit, I am not into knitting but I am heavily into scrapbooking, crochet and general crafting. Matter of fact, I belong to several craft groups here in my area and I'm always looking for totes & organizers so I can take my supplies and projects with me!

The Creative Options® Signature 5 Pocket Knitting Tote is absolutely fantastic! The outside of the bag has 3 large front pockets and a mesh netting pocket on each of the short sides. To make the bag easy to tote around...there are 2 carrying handles which are securely fastened to the bag. Underneath the bag is 4 plastic feet which help it to remain upright when you set it down. Also on the front of the bag right above the left front pocket are 4 elastic strap bands where you can store pens, markers, glue pens, knitting needles, crochet hooks or other slender-style items.

The inside of this tote bag is beautifully lined in a contrasting fabric so that you can easily find what you are looking for. You can stack a lot of your craft supplies inside the bag and trust me, it really holds a lot! It's big enough to hold containers of your little, itty-bitty supplies and big enough to hold full skeins of yarns. You can really load it up with your craft or knitting supplies.

One of the things I love about the tote is it's fabrication. It's very durable, but yet very light-weight. You don't feel like you are toting around a bunch of heavy bricks. Second, I accidentally spilled something on the outside of the bag and it completely beaded-up and wiped off. I absolutely LOVE LOVE LOVE this tote and would love to have several more! It's fabulous and would make a great gift this holiday season!

Creative Options® products are sold throughout the United States at the following locations: Hobby Lobby, Jo-Ann Fabric and Craft Stores, Michaels and Walmart. Head on out to your local retailer today and take a look at all of the fabulous Creative Options® products that they have to offer. You can learn more about these products and the company by visiting Creative Options® online.

Disclaimer: Shelly H. received a complimentary tote to feature on her blog. No monetary compensation was received. Regardless of receiving a complimentary product, Shelly's opinions on the item are 100% her own, unbiased opinion. Your thoughts may differ.

Saturday, September 26, 2015

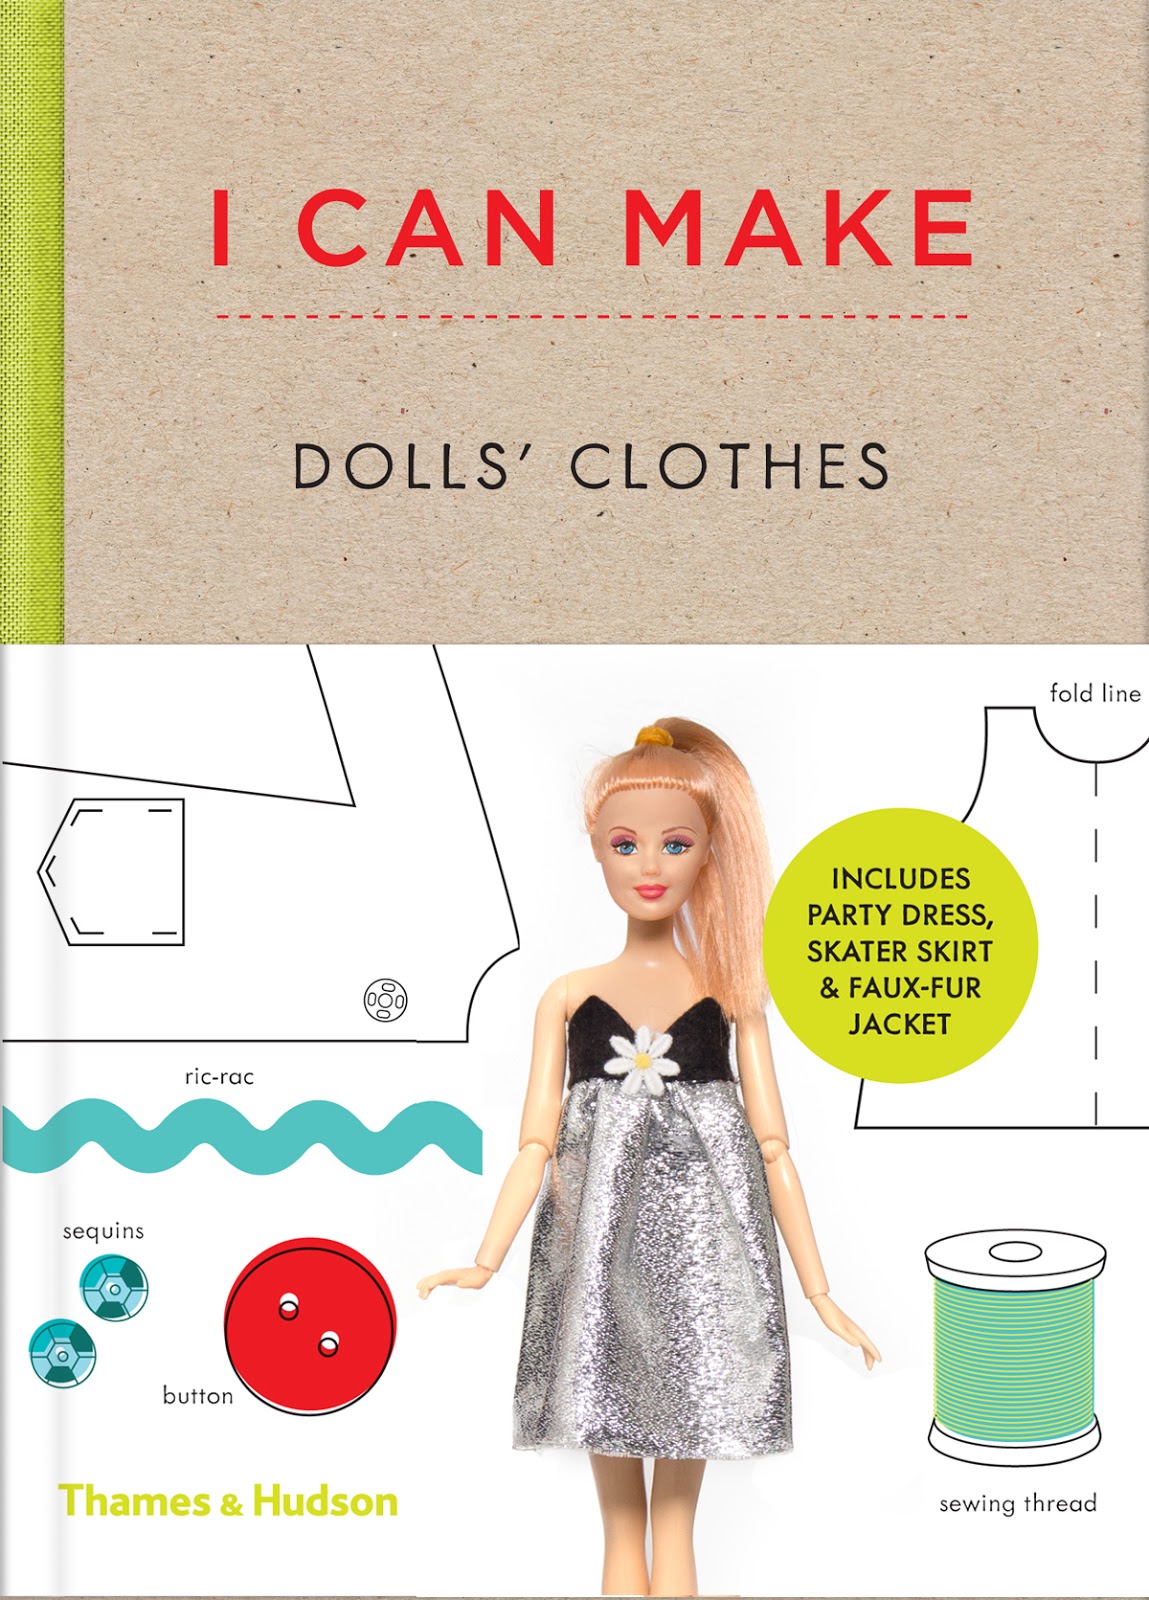
Book Review - I Can Make Dolls' Clothes

I CAN MAKE DOLLS' CLOTHES is an easy-to-follow guide for young fashionistas ages 8+ that shows them how to create a wardrobe for their standard-sized (12 inch) dolls. The approach is easy, quick, and fun and the results are extremely stylish. Children ages 8 and up can follow clear instructions to make a range of garments and accessories for their dolls, using basic materials such as fabric scraps, sequins, and a needle and thread.

ISBN: 9780500650516

The beautifully-designed handbook includes actual-size patterns for creating a doll’s tunic top, a knee-length coat, an A-line skirt, a faux-fur jacket, a skater skirt, a day dress, a party dress, an evening bag, and a fringed bag. There are simple, step-by-step diagrams and instructions for creating each piece of the outfit, with photos of dolls modeling the finished designs. A section at the back of the book outlines the basics of sewing, including how to thread a needle, how do a running stitch, and how to sew on buttons. Beginners with no sewing experience will have no trouble picking up the techniques.

Throughout, young seamstresses and crafters are encouraged to be creative and adapt the patterns to make their own designs. As vintage fashion and crafting emerge as an antidote to our frenzied, tech-filled lifestyles, this charming sewing book will appeal to parents and children looking for wholesome, hands-on activities.

My Thoughts: I have a grand daughter who is 6 1/2 years old. She's been doing a wide variety of different crafts & sewing projects with me for the past 2 years. Every time she visits my home we are sitting down and doing some type of arts & craft project. The reason I am telling you this is because the book is for kids ages 8 and up but my 6 1/2 year old grand daughter has been able to use this book to make the dolls' clothes just fine...with my supervision & help.

This is a hardcover book containing 176 pages. All of the patterns and projects are simple and super easy to make. The patterns are basic but can certainly be altered and made more fancier as your child grows older and her sewing skills develop. The patterns are full-size and your child simply traces them onto blank paper, cuts them out, pin's them to fabric, cut out again and then sew the pieces together as instructed. All of these items are made with hand sewing but can be done via machine depending on the age of the child.

I personally think this book is fantastic! We all know that those "fashion doll" clothes are expensive out there in the retail stores. Now you or your little girl can make the doll clothes as home and use fabric scraps and other sewing supplies that you have on hand. Plus, by making all of these items it teaches your little girl the basic sewing skills of doing hand sewing, attaching buttons, snaps, lace, fiber trims and more. Fantastic book!

You can learn more about this book and where you can purchase it by visiting Thames & Hudson online.

About the Creators: Louise Scott-Smith is a children’s wear designer. She was formerly Head of Children’s Wear Design at Liberty of London and at Caramel Baby & Child. Georgia Vaux is a graphic designer, book designer, and art director.

Disclosure: Shelly H. received a free complimentary copy of this book to review on her blog. No monetary compensation was received. Her thoughts, opinions and words are 100% her own and are unbiased and truthful opinions of the item she has reviewed.

Wednesday, August 12, 2015

DIY Garden Stepping Stone Kits with Solar Lights

I love doing crafts...all kinds of crafts. In addition to crafting, I love being outside working in my garden or on our various landscaping projects. Today, I am going to tell you all about these fabulous DIY Solar Light Garden Stepping Stone Kits from HomenYard.com.

HomenYard sells all kinds of DIY Garden Stepping Stone Kits in a wide variety of different designs. Some of them come with a solar light that you embed down into the stepping stone when you make it and others are without the solar lights.

What I really love about these DIY kits is that everything is included except for the water! That's right, everything is included! You will get the plastic mold, the cement mix, stirring stick, the colorful jewels, broken glass pieces, solar light (in those type's of kits), full step-by-step instructions and a color photograph of the completed project.


We got a few of these garden stepping stone kits and have been making one every few weeks when our grand daughter comes over to visit. She loves arts & craft projects so this is one that she can do with our assistance. Basically, we do all of the mixing and pouring into the mold and she does all of the decorating with the included faux jewels, stones and glass pieces that come in your kit.

Once you have it made you will let it sit out in the sun on a nice warm or hot day. Let it sit out for a good 24 hours and then you simply pop it out of the plastic mold. We found that these plastic molds are reusable too...so save them and get some additional supplies to make more!

I was really impressed with the quality of these completed stepping stones. Once completed and hardened they are super-weighty and about 2 to 2 1/2" thick. These are not cheesy, thin and flimsy stepping stones at all. A really nice quality!

The solar light that is included comes with the solar rechargeable battery already in it. You will follow the directions to activate it and it will need a good day or two in the sun to fully charge up. I was amazed at how much light is given off with just one of these stones! It's not too bright and not too dim, it's just perfect in my opinion!

Head on over to HomenYard.com and take a look at all of the DIY Garden Stepping Stone Kits that they have to offer. They are really affordable kits and very nice quality too!

Disclaimer: Shelly H. received a complimentary stepping stone kit to review and feature on her craft blog. No monetary compensation was received. Her opinion, thoughts and words are 100%  unbiased and are true. Your opinions may differ.
Thursday, July 23, 2015

Disney and Star Wars Crochet Kits from Thunder Bay Press

Love to crochet? Well guess what? Thunder Bay Press expanded its line of crochet titles, which launched in 2013 with Wizard of Oz Crochet, to three popular franchises: Peanuts Crochet (April 2015; ISBN: 978-1-62686-324-8; $24.95; 76 pages), Star Wars Crochet (May 2015; ISBN: 978-1-62686-326-2; $24.95; 76 pages), and Disney Classic Crochet (April 2015; ISBN: 978-1-62686-325-5; $24.95; 92 pages). Each crafting kit comes complete with five yarn colors, a crochet hook, stuffing, and a yarn or tapestry needle – everything crafters need to start bringing the beloved characters from each franchise to life.

Recently I received the Disney Classic Crochet Kit and the Star Wars Crochet Kit from Thunder Bay Press to review for all of you.
The Star Wars Crochet Kit includes everything you need to make Yoda and a Stormtrooper. The crochet book that is inside the kit includes the crochet patterns to make 12 different characters from Star Wars. You can create: Boba Fett, C-3PO, Chewbacca, Darth Vader, Han Solo, Jabba the Hutt, Luke Skywalker, Princess Leia, R2-D2, Wicket the Ewok, Yoda and the Stormtrooper. However, the supplies that are included in the kit just make Yoda and the Stormtrooper but with those patterns in the included book...you can easily go out and buy the supplies to make all of those cute Star Wars characters.
Working on Yoda from the Star Wars kit.
I love to crochet but I am NOT an expert at it, nor a beginner. I would say I am at an intermediate level and I found these patterns to be super easy. They include step-by-step instructions, diagrams and color photos in the pattern book so I think even a beginner could handle these projects. I don't have a lot of time to sit down and crochet but these characters work up really quickly.
The Classic Disney Crochet Kit includes everything you need to make Mickey Mouse and Minnie Mouse. The crochet book that is inside the kit includes the crochet patterns to make 12 different classic Disney characters. You can create: Mickey Mouse, Minnie Mouse, Donald Duck, Daisy Duck, Goofy, Pluto, Chip 'n Dale, Dumbo, Bambi, Lady Pinocchio and Jimmy Cricket. The supplies within the kit just make Mickey Mouse and Minnie Mouse but you can easily go out and buy additional supplies to make the rest of the Disney characters.

I absolutely LOVE both of these crochet kits! My hubby is a Star Wars fanatic and has been collecting Star Wars items since he was a kid. I would estimate that he has over 350+ items in his collection so I started with the Star Wars kit first. I am going to make all of the characters for him and give them to him for Christmas this year.

The Classic Disney kit is just as fantastic. I am expecting my #2 grandchild to arrive in early Fall and I am going to crochet a few of the Disney characters for him. I am also expecting several new nieces and nephews by the end of the year and plan on making each of them at least one of the characters for their nursery too.

The crochet kits include the step-by-step pattern/instruction book, crochet hook, stuffing, yarn, etc. to complete 2 characters per kit. Like I said, that book includes patterns for all of the characters that I've mentioned here in my post. These kits are just fabulous!

You can get both of these kits from Thunder Bay Press as well as many other books and kits that they sell.

Disclosure: Shelly received complimentary crochet kits to try out and evaluate for her craft blog readers. No monetary compensation was received. Shelly's thoughts, ideas, opinions and words are 100% her own and were not influenced by the sponsor.

Friday, July 10, 2015

BernzOmatic TS400 Self-Igniting Trigger Start Torch

A couple of months ago my husband and I purchased a few old travel trailers (campers) and are totally remodeling them. All of these campers are older and need a lot of work...hence why we got them at a bargain price. With that said, hubby finally started work on the 1992 Wilderness Camping Trailer and the first project was to fixing some old copper plumbing pipes.

Before I get started here...I will be starting a new section here on my blog and will make regular updates of our remodeling projects inside & outside the camping trailers. I will be making new cushions, bedding, bathroom items, decor, etc. and will be showing you all how I did it.

For this first project...hubby received a BernzOmatic TS400 Self-Igniting Trigger Start Torch for review and put it to good use soldering together & repairing some old copper piping. Here is some information about that torch.

The TS400 Self-Igniting Trigger Start Torch is perfect for all kinds of projects you have around the house...or in our case...our camping trailers!

* Plumbing repair: Save a few bucks and tackle small plumbing jobs around the house. BernzOmatic makes everything needed to tackle plumbing projects including torches, propane cylinders, flux and solder.

* Kitchen remodeling: If you’ve got a dated kitchen with old, unattractive linoleum, you may find it’s a lot more difficult to remove than you thought. Use the TS4000 for easier removal. You can also use the torch to loosen old rusty bolts on cabinets. When metal is heated, it expands, resulting in the rust cracking off or loosening.

* Paint stripping: A torch can be used to easily strip off old paint. Just remember to do this outside, or in a well vented area with the proper safety equipment, avoiding flammable surfaces underneath such as dry, old wood. The heat helps to destroy the film contained in the paint, allowing it to be removed from the surface. When the finish starts to wrinkle and bubble up, begin to scrape the paint off using a paint scraper. The same heat stripping technique can be used to remove calk in your bathroom.

The BernzOmatic TS400 Self-Igniting Trigger Start Torch features:

* On/Off Trigger Switch
* Lock Butter (keep torch lit, finger-free)
* Swirl Flame
* Continuous Run-Lock
* High Temperature
* Fracture Groove (safety feature in case torch is dropped)
* Cast Aluminum Body
* Pressure Regulated
* Easy-to-Use
* Instructions Included w/Package
* Use for Soldering and/or Brazing

My husband removed the damaged copper piping from the trailer and took them into his work shop. Once in there, he put them in some vice clamps to hold them as he did some of the soldering work that needed to be done. Now...this is not my area of expertise so I just sat there and watched him and took photos of the torch in action.

He told me that he loves the BernzOmatic Trigger Start Torch because it's really easy for him to use and it fits comfortably in his hand. He loves that it has a lock button for more lengthier jobs to keep it lit without having to keep his finger on the trigger. He also appreciates that fracture groove safety feature should he accidentally drop it while using it.

He said that if you need a torch like this...this is definitely the one you should get. He plans on using it for all of the plumping and soldering work that these trailers need and will be getting over the next few months.

You can learn more about this product and BernzOmatic by visiting their site online. Please keep checking back here on the blog so you can follow along with all of our camping trailer remodeling projects as we tackle & complete them.

Disclosure: We received a complimentary BernzOmatic torch for this review. Regardless, our thoughts, opinions, ideas and wordage are 100% our own and were NOT influenced by the company. No monetary compensation was received.

Monday, May 18, 2015

DIY Coastal Beach Treasures Glass Display Jar

I love anything and everything that has to do with the beach. As soon as you put your foot on our property or inside our home...you will see my love for the beach, surf and sand. While I do buy a lot of our coastal home decor...I also try to make a lot of it too. After all, it is much cheaper to make it myself and I can get a truly customized one-of-a-kind piece.

Today I am sharing with all of you how I made my own coastal beach treasures glass display jar. It's very easy to make and even if you don't have a crafty bone in your body...you can make this!

Before I get started...I want to talk to you about a product that I used to make this project. It's called a Chalk Ink Marker and I used the Chalk White color. These markers have been out in the retail marketplace since 2005 and come in at least 30 different colors. They are water-resistant, blendable markers that leave no powder residue and dry super quickly. You can use them on any non-porous surface (think metal, glass, plastic, chalkboards, etc.). The color wipes off easily with water or an ammonia-based cleaner. They are smear-proof, non-toxic, food-safe and 100% guaranteed.

DIY Coastal Beach Treasures Glass Display Jar

1 large glass pasta jar (this one is an old one that held dry pasta)
3 pieces of dried raffia or roping
1 Chalk Ink Marker - Chalk White
scissors
beach treasures that you collected

I bought some dry pasta years ago and kept the jar because it was so large and had a wooden lid. I pulled it out of storage for this project and washed it up. I used 3 different colors of raffia and just wound them around the neck of the jar and knotted the pieces to give it a rustic feel. The raffia reminds me of dried sea grass so that is why I opted for that. Fill up your jar with your collected beach treasures. We spend a lot of time at the beach & I am always collecting my finds so inside my jar are various seashells, pieces of sea glass, sand dollars, starfish, etc.

I then used the Chalk Ink Marker in Chalk White to simply write the words "Beach Treasures" on the wooden lid. You can use the Chalk Ink Markers in whatever colors that you like to write & decorate the lid or the body of the glass container. I liked the simple look for my beach treasures jar. Super quick and incredibly easy!

Mine is displayed on our covered porch/patio and I have it sitting on my birdbath table that I created a few weeks ago. You can find that DIY project here on this blog too! Enjoy!

Disclosure: I received 2 complimentary Chalk Ink Markers to use in this project. Please visit the company's site to learn more about this product and to grab ideas on other projects that you can make. No monetary compensation was received.

Thursday, May 7, 2015

Craft Project - Metal Sand Bucket DIY Garden Planters

When it comes to decorating the inside and outside of my home I am all about the coastal and beach look. If you have ever shopped for coastal home decor, home accessories or even beach garden yard art...it can be quite pricey! Instead, I try to make my own items as much as possible like this one that I am sharing with all of you today.

Before I get started...I want to talk to you about a product that I used to make this project. It's called a Chalk Ink Marker and I used the Chalk White color. These markers have been out in the retail marketplace since 2005 and come in at least 30 different colors. They are water-resistant, blendable markers that leave no powder residue and dry super quickly. You can use them on any non-porous surface (think metal, glass, plastic, chalkboards, etc.). The color wipes off easily with water or an ammonia-based cleaner. They are smear-proof, non-toxic, food-safe and 100% guaranteed.

DIY Metal Sand Bucket Garden Planter

1 Metal Sand Bucket
1 Plastic Liner
Chalk Ink Marker in Chalk White with 6MM Wet-Wipe Tip

Note: I picked up my metal sand bucket for $3.00 at one of those dollar-type of discount stores. I also picked up a white plastic planter liner for $1.00 at the same store that fits down inside the metal bucket.

Wash and thoroughly dry your metal bucket to make sure all debris has been removed. Shake up your Chalk Ink Markers and use them to paint designs on the outside of your bucket. For me, I like the simple look so on one side of my bucket I wrote the word "Beach" and on the other side I wrote the word "Seashells". You can draw pictures, write words or decorate your buckets with squiggle lines, circles...whatever it is that you like.

The Chalk Ink Markers dry within minutes. I made mine on a very warm day and they were completely dry within 5 minutes.

You can place a real plant or faux plant down in your new garden planter. For myself, I will be placing some ornament sea grass in mine as soon as it comes in at the nursery (I ordered some Citronella plants to keep the bugs away). Super quick and easy project!!! (post updated, see below).

This would also be a great craft project for kids to do over the summer. Just get some metal buckets and a few of the different colored Chalk Ink Markers and let them design their own! (Great birthday party kid's craft project idea too).

Disclosure: I received 2 complimentary Chalk Ink Markers to use in this project. Please visit the company's site to learn more about this product and to grab ideas on other projects that you can make. No monetary compensation was received.

Wednesday, March 11, 2015

The Jewelry Recipe Book by Nancy Soriano

Artisan Books has a great DIY jewelry book publishing in April 2015 that delivers easy to read “How-to” instructions in a recipe format. This fabulous new book is titled: The Jewelry Recipe Book: Transforming Ordinary Materials into Stylish and Distinctive Earrings, Bracelets, Necklaces, and Pins (Artisan Books; April 7, 2015; Hardcover/$24.95) and walks the reader through projects that incorporate funky found objects such as pinecones, ribbon, lace, keys, and nuts and bolts in their handmade jewelry designs.

Title: The Jewelry Recipe Book
Author: Nancy Soriano
Publisher: Artisan Books
ISBN: 978-1-57965-618-8
Genre: Craft and Hobbies

This book has 400 color photographs and contains 224 pages. One of the things I love about the book is at the beginning there is an introduction section that has all kinds of tips and instructions on how to crimp, dull pin tips, how to do dyeing, knotting, polymer clay, make wire loops, how to wrap thread and all kinds of other things. Great info for the beginner for sure!

Inside the book you will find step-by-step project ideas (jewelry recipes) to make all kinds of jewelry items like hair pins, necklaces, bracelets, earrings, pendants, rings and more! There is definitely something for everyone.

A few of my personal favorites were the creative jewelry pieces the artisan created using simple things like bobby hair pins and buttons. My daughter who is in her twenties really loved the necklace that was made from Lifesaver's candies. Yes...candies! The artisan shows you how to preserve those candies and turn them into colorful beads which can be strung onto cords or chains & turned into beautiful necklaces and bracelets. If you love the industrial punk rock look, there is something for you too like the bracelets and necklaces made from metal hardware typically found at the home improvement store!

Every project (jewelry recipe) is presented to you in an easy-to-read and understand format. None of the instructions are complicated and all can be mastered by a beginner in only a few minutes. All projects include a color photograph of the completed item and I love how the artisan sprinkles in all of her various crafting tips along with alternative suggestions on materials that are needed.

I think The Jewelry Recipe Book by Nancy Soriano is a great craft book for anyone who is looking to try their hand at jewelry making. It's great for beginners and those who are experienced in this crafting medium. You can find this book in April 2015 from Artisan Books.

The attached digital image file(s) may be used solely in connection with the promotion of The Jewelry Recipe Book. You must include a credit line: “Excerpted from The Jewelry Recipe Book by Nancy Soriano (Artisan Books). Copyright © 2015. Photographs by James Ransom." adjacent to the image and retain any credit, copyright, image identification and associated metadata as part of the digital file. Following the publication [or use], you cannot retain the image as part of your image archive; consequently, please delete the image file(s) immediately.

Disclaimer: Shelly H. received a complimentary copy of The Jewelry Recipe Book for a review on her Passionate About Crafting Blog. No monetary compensation was received. Her thoughts are 100% unbiased and are based on her personal experience with the book. Your opinion may differ.

Thursday, December 25, 2014

Book Review: Idiot's Guides to Quilting

If you have ever wanted to learn the art of quilting then I highly suggest you check out the Idiot's Guides to Quilting book by author Jennifer Fulton. This book includes step-by-step color photos which makes machine and hand quilting simple. Inside the book you will find easy lessons on cutting, piecing, appliqueing and more. Included are 15+ fun and fresh quilting projects to help build on the quilting skills that you've learned.

Book Synopsis: Whether it's a meaningful gift for a special occasion or a warm & cozy cover for cold nights, a quilt is always welcome. But if you've never stitched a quilt top, the craft can seem over-whelming. Not anymore! This book is packed with beautiful color photographs that instruct and inspire, this helpful guide shows you how easy it is to create one-of-a-kind quilted pieces. In the guide you will get:

* A primer on the quilting tools and supplies you need to get started.

* Helpful tips for selecting the best fabrics for your projects.

* Step-by-step tutorials for piecing, quilting and applique - by hand or machine.

* Lessons on cutting and piecing blocks, sewing a quilt top, assembling quilt layers and quilting your work.

* Easy-to-print, accurately scaled project patterns are available online.

* ISBN: 978-1-61564-612-8

My Thoughts: A few years ago I tried my hand at quilting and I admit, I have some of the basics down but not all of them. This book is absolutely a must-have if you are a beginner or just need some refresher lessons. Even if you are an experienced quilter...you will still enjoy this book and the author's quilting tips and projects within it.

The book is broken down in easy-to-read chapters starting with Chapter 1: Getting Ready to Quilt which goes over the terminology and the supplies that you will need. Chapter 2: Explains how to select the perfect fabric for your projects, Chapter 3: How to prepare and cut your fabric, Chapter 4: Explains how to piece your quilt blocks, Chapter 5: Explains piecing techniques, Chapter 6: Explains advanced piecing techniques, Chapter 7: The art of applique, Chapter 8: How to assemble a quilt top, Chapter 9: How to prepare your quilt for quilting, Chapter 10: Quilting a quilt and the book finishes up with Chapter 11: The gallery of projects. Phew...this book covers everything!

One of the things I love about it is that quilting is explained in a manner than anyone can understand. Even if you have never sewn before or crafted anything in your life...you will totally learn how to make a quilt with this handy dandy guide! The book is loaded with beautiful color photographs that show you step-by-step how to complete each of the tasks outlined in the book.

If you can't have a "master" quilter sitting beside you and giving you "hands on" lessons, this Quilting book by Idiot's Guides is definitely the next best thing!

Disclaimer: Shelly H. received a complimentary copy of the Idiot's Guides to Quilting Book for a review on her Passionate About Crafting Blog. No monetary compensation was received. Her thoughts are 100% unbiased and are based on her personal experience with the book. Your opinion may differ.

Monday, October 6, 2014

DIY - Instant Chalkboard for Your Pantry

** Product Samples Were Received **

My pantry was a royal mess until I decided to reorganize it. I bought plastic bins, new shelving, labels and all kinds of other things. Now when I walk into my kitchen pantry, I can clearly see everything that I have and everything is in its place.

With that said, I wanted an easier way to keep track of what we used (ran out of) from the pantry so that when grocery shopping day arrived, I could quickly add pantry items to my shopping list. After all, grocery shopping and list-making, are not my favorite things to do!

Recently I received a complimentary package of Scotch Tapes to help me get better organized. When I saw that roll of Scotch Chalkboard Tape, I knew immediately what I was going to do with it. Along with that tape, they also sent me a roll of the Scotch Dry Erase Tape, a box of colored chalks, a dry erase marker and an eraser.

So, let's get back to my project.

I decided to use the Scotch Chalkboard Tape to make a chalkboard inside my kitchen pantry! I got a ruler and figured out how wide and how long I wanted my chalkboard to be. I then cut strips of tape from the roll and applied them directly onto the back (inside) of my door. This took me less than 2 minutes from start to finish.

I then used a sticky plastic hook beside my new board and attached a small basket. That basket holds the box of chalk along with the eraser. Now when my family takes the last item out of the pantry to eat or drink, they write down the name of that item on the chalkboard. When grocery day rolls around, I open up the door, take a look at the list and add all of the items to my shopping list! Yay!

Over the next few weeks I will share some additional quick and easy projects with all of you that I have been doing around my home to get better organized thanks to the great folks over at Scotch! You can learn more about the new Scotch Dry Erase Tape and the Chalkboard Tape by visiting their web site online. Plus, you can pick up some fun project ideas too!

Disclaimer: Shelly Hill has personally reviewed the product listed above. Shelly was not compensated for her review but did receive a free product to evaluate for all of her blog readers here on the Passionate About Crafting Blog. Please read my Terms of Service Policy & Disclaimer Policy for additional information. My opinions stated in this product review are honest and unbiased. Your thoughts & opinions might differ from my own. Information contained on this blog is copyright 2014, All Rights Reserved.