Showing posts with label Crochet Projects. Show all posts

Sunday, April 17, 2016

Disney's FROZEN Characters Crochet Kit

If you love to crochet and are a big fan of Disney's hit movie FROZEN, you'll love this brand new crochet kit from Thunder Bay Press. The kit comes complete with 8 colors of yarn, instruction book with photos, stuffing, safety eye beads, 4 colors of embroidery floss, tulle and a tapestry needle. The kit contains everything you need to make Elsa and Anna plus patterns/instructions to create 10 additional characters from the hit movie Frozen. (You'll need to add your own supplies to make those 10 additional characters).

Title: Disney Frozen Crochet
ISBN: 978-1-62686-443-6
Retail Value: $24.95

The instruction book that comes with the kit contains 76 pages with more than 100 full-color photographs. If you're brand new to crochet and have never done it before...you'll need help with this kit and the projects. If you have some experience with crochet...you'll do just fine.

Crochet Patterns Included: Queen Elsa, Princess Anna, Kristoff, Prince Hans, Oaken, Olaf, Sven, Grand Pabbie, Marshmallow, Young Elsa, Young Anna and Young Kristoff.

These characters are great for those of you who love the movie Frozen or make them and give them as gifts to that little girl in your life. I know my 7 year old grand daughter loves Frozen and has many toys and collectibles from the movie.

I have owned and worked on 2 previous crochet kits from Thunder Bay Press and absolutely love them. They have craft kits for adults and for kids. Not into crochet? They have other styles available too. We recently reviewed their Pom-Pom Animals craft kit over on my other blog and you can check out that review for additional information.

You can visit Thunder Bay Press online to learn more about the company and to see the wide variety of craft kits and books that they have to offer.

Disclosure: I received a complimentary craft kit to review. No monetary compensation was received. Shelly's thoughts, words and opinions are 100% her own. Your opinion may differ.

Thursday, July 23, 2015

Disney and Star Wars Crochet Kits from Thunder Bay Press

Love to crochet? Well guess what? Thunder Bay Press expanded its line of crochet titles, which launched in 2013 with Wizard of Oz Crochet, to three popular franchises: Peanuts Crochet (April 2015; ISBN: 978-1-62686-324-8; $24.95; 76 pages), Star Wars Crochet (May 2015; ISBN: 978-1-62686-326-2; $24.95; 76 pages), and Disney Classic Crochet (April 2015; ISBN: 978-1-62686-325-5; $24.95; 92 pages). Each crafting kit comes complete with five yarn colors, a crochet hook, stuffing, and a yarn or tapestry needle – everything crafters need to start bringing the beloved characters from each franchise to life.

Recently I received the Disney Classic Crochet Kit and the Star Wars Crochet Kit from Thunder Bay Press to review for all of you.
The Star Wars Crochet Kit includes everything you need to make Yoda and a Stormtrooper. The crochet book that is inside the kit includes the crochet patterns to make 12 different characters from Star Wars. You can create: Boba Fett, C-3PO, Chewbacca, Darth Vader, Han Solo, Jabba the Hutt, Luke Skywalker, Princess Leia, R2-D2, Wicket the Ewok, Yoda and the Stormtrooper. However, the supplies that are included in the kit just make Yoda and the Stormtrooper but with those patterns in the included book...you can easily go out and buy the supplies to make all of those cute Star Wars characters.
Working on Yoda from the Star Wars kit.
I love to crochet but I am NOT an expert at it, nor a beginner. I would say I am at an intermediate level and I found these patterns to be super easy. They include step-by-step instructions, diagrams and color photos in the pattern book so I think even a beginner could handle these projects. I don't have a lot of time to sit down and crochet but these characters work up really quickly.
The Classic Disney Crochet Kit includes everything you need to make Mickey Mouse and Minnie Mouse. The crochet book that is inside the kit includes the crochet patterns to make 12 different classic Disney characters. You can create: Mickey Mouse, Minnie Mouse, Donald Duck, Daisy Duck, Goofy, Pluto, Chip 'n Dale, Dumbo, Bambi, Lady Pinocchio and Jimmy Cricket. The supplies within the kit just make Mickey Mouse and Minnie Mouse but you can easily go out and buy additional supplies to make the rest of the Disney characters.

I absolutely LOVE both of these crochet kits! My hubby is a Star Wars fanatic and has been collecting Star Wars items since he was a kid. I would estimate that he has over 350+ items in his collection so I started with the Star Wars kit first. I am going to make all of the characters for him and give them to him for Christmas this year.

The Classic Disney kit is just as fantastic. I am expecting my #2 grandchild to arrive in early Fall and I am going to crochet a few of the Disney characters for him. I am also expecting several new nieces and nephews by the end of the year and plan on making each of them at least one of the characters for their nursery too.

The crochet kits include the step-by-step pattern/instruction book, crochet hook, stuffing, yarn, etc. to complete 2 characters per kit. Like I said, that book includes patterns for all of the characters that I've mentioned here in my post. These kits are just fabulous!

You can get both of these kits from Thunder Bay Press as well as many other books and kits that they sell.

Disclosure: Shelly received complimentary crochet kits to try out and evaluate for her craft blog readers. No monetary compensation was received. Shelly's thoughts, ideas, opinions and words are 100% her own and were not influenced by the sponsor.

Wednesday, July 10, 2013

8 Creative Ways to Store your Knitting & Crocheting Yarns


For those who are passionate about knitting and crocheting, you already know how important it is to properly store all of your yarns and supplies. When thinking about storage options, you need to think about the room you will be storing them in, the amount of space you have to work with and what kind of storage item you are looking for.

Here are some creative ways you can store all of your knitting and crocheting supplies.

1. Canvas Laundry Bags - Look for washable bags with a drawstring closure to place all of your yarn in. If you have a lot of yarn...buy several in a variety of colors to color-code your yarn storage.

2. Plastic Linen Storage Bags - Every time you purchase new comforters or bed linens, save those clear plastic bags with zipper closures and use those to store your supplies in. What is really nice about these bags is that you can see what is inside them and they slip easily underneath your bed or in a closet if you are limited on storage space.

3. Plastic Storage Totes - A variety of plastic manufacturers make plastic storage totes (Rubbermaid is one of them) which are good for storing your knitting & crocheting supplies in if you have a lot of storage space to work with. Although this should not be your first storage choice option...it is an option to consider.

4. Over-the-Door Shoe Storage Bag - Have you all seen those shoe storage bags that fit over a closet door or on the back of a door? If you have a lot of little yarn balls or work with small amounts of baby yarn...these shoe organizers could be a storage option for you. With that said, most will not hold large, full-size yarn skeins, so keep that in mind when considering one for your storage options.

5. Laundry Baskets - These are an inexpensive storage option but when using laundry baskets it is important to toss something over the top of them to keep animals and dust out! A folded up throw blanket, garbage bag, etc. will be needed to over-the-top of the laundry basket to keep your yarns looking nice and bug-free.

6. Children's Toy Boxes - If your children are all grown up or if you can pick up a toy box at a local yard sale...an empty toy box works well for storing all of your crocheting and knitting supplies in...including yarn! If you invest in a wooden one, you could use it for extra seating in your home (like a bench) which gives it dual function and it can enhance your home's décor.

7. Storage Ottomans - If you are limited on space or what an option that works with your home's décor...a small or medium-sized storage ottoman is the way to go. These ottomans can double as extra seating or as a coffee table too!

8. Canvas Tote Bags - If you only keep enough yarn and supplies on hand to make one single project at a time consider purchasing a large canvas tote bag to store your project and supplies in. These tote bags are great for those of you who like to take your projects with you when you travel.

Purchasing yarn is an investment and you want to properly keep your yarn clean, dry, out of direct sunlight and well organized. Take in consideration the amount of yarn you have, the area (place) in where you will be storing it and how much money you have to spend on your storage option. Once you know these answers, you can select the perfect storage option for your needs.


Article written by Shelly Hill.

Wednesday, October 10, 2012

Learn to Crochet - Hook and Yarn Choice

Learn to Crochet - Hook and Yarn Choice
By Fiona J Sloss

Learning to crochet can be a remarkably simple process once you have taken the first step and selected your yarn and hook. This simple guide will start you off on the right track with straight forward advice on selecting the best yarns and hooks for learning to crochet.

Most important, is to choose a crochet or knitting yarn that you'll enjoy working with. When you're just learning to crochet, a DK (double knit or worsted in American terminology) weight cotton yarn in a light colour is recommended by most crochet experts. This yarn will be smooth to work with and will create loops and stitches that you will be able to see clearly. Cotton fibre holds the stitches well, doesn't tend to stretch and is relatively easy to block and finish once you have finished your crochet project. As well as pure cotton, there are great ranges of mixed yarns, particularly cotton and bamboo. Try something like King Cole Bamboo Cotton DK which comes in a great range of colours, has a smooth surface and isn't prone to splitting. For a slightly finer weight yarn (4ply or sportweight), the DMC Natura Cotton range is recommended.

Once you have really developed your crochet skills, experiment with the finer crochet threads if you like to work on delicate lace projects. There is a whole host of crochet specific yarns on the market, but you can crochet with anything yarn-like, even strips of old plastic bags, garden twine, wire or fabric! (For these kinds of "yarn", a plastic or aluminium hook should be used. Anything made of natural material such as wood or bamboo is unlikely to be strong enough for the job.)

After choosing your crochet yarn, you will need a crochet hook. Crochet hooks range in size from 0.5mm to 25mm and beyond. They come in a variety of materials from plastic, to steel, to bamboo and rose wood. A good place to start that will keep your initial outlay to a minimum while you are learning is the Pony Crochet Hook range; but if you want to treat yourself, then the colourful wooden Knit Pro Crochet Hooks are a delight to work with.

For DK (worsted) yarn, choose a 4mm hook while you are learning to crochet. As you gain in experience, you can try different hook sizes to change the tension of your work. You can also check the band from the ball of yarn that you are planning on using. Often, it will show the recommended knitting needle sizes only, but as a general rule, the yarn will crochet up well in a hook size which is 0.5mm smaller than the recommended knitting needles. By way of example, the band on the King Cole Bamboo Cotton DK recommends using 4mm knitting needles. So if we subtract 0.5mm from 4mm, we get to the 3.5mm crochet hook.

When you're starting out, the only other things you will probably need are a good pair of sharp scissors, a tape measure and a making up needle. Once you get going, there's a whole range of other tools including stitch markers, row counters, blocking pins and knitting clips, but save investing in those until you know crochet is something you're going to pursue as a hobby.

You can keep up with all my latest projects, beginners' crochet instruction and adventures as a new mum on my blog at http://fionajayne.blogspot.co.uk/ or visit us at http://www.mariashaberdashery.co.uk for all of your knitting, crochet and sewing needs.

Monday, December 5, 2011

Purchase Your Handmade Gifts From Etsy.com

Last year I did a lot of my holiday gift shopping from Etsy and found some very nice items to give as gifts and several nice handmade items to decorate my home with. If you have never shopped on Etsy before...you are really missing out!

When you shop at Etsy you can shop from thousands of artisans and crafters from all over the world. You can buy jewelry, handmade bags, wooden toys, holiday decor, holiday ornaments, knitted sweaters, stained glass accessories, crochet afghans and just about anything else that is handmade.

I firmly believe that we all should be doing more to support the small mom and pop businesses in the world and by purchasing your holiday gifts and holiday home decor items from Etsy sellers is a great way to support them. So, head on over to Etsy today and take a look around, I am sure you will find the perfect gift for someone on your holiday list!

Wednesday, October 19, 2011

How to Crochet a Purse for Fashion Dolls and Barbies

Today I would like to share with all of you how I make little fashion doll purses for my grand daughter to use with her Barbie dolls. You only need a little bit of scrap yarn, a pair of scissors and a size F crochet hook. (or smaller crochet hook). We used 4-play acrylic yarn to make the one shown above.

You will simply chain 10-12 stitches to obtain the width guage that you want your purse to be. You will then single crochet in the second chain from the hook and in each chain across. Chain 1, turn and single crochet in each chain across. We did this for 5 rows, fasten off, hide ends and then we made a second matching piece. Both pieces will be in the shape of a rectangle. We then placed both pieces together and single crocheted 3 sides together and chain stitched 20-22 stitches for the purse carrying handle.
You can use this same technique to make square shaped purses, round purses, rectangular purses and even oval shaped purses and you do it all for about .04 cents (if that) per purse by using scrap yarn. I made 8 of these in less than 90 minutes for my grand daughter in a variety of shapes and colors and she loves using them with her fashion dolls.

Sunday, November 28, 2010

FREE Crochet Dress Refrigerator Magnets Pattern

A few weeks ago I found this really easy crochet pattern online to make cute dresses refrigerator magnets! You can make them in any color combination that you want and besides the yarn all you will need is some glue, satin ribbon and a magnet to complete them.

These crochet fridgies work up super quickly...I was able to crochet 3 of them in less than 1 hour and a great way to use up some of your yarn scraps. You can find the FREE pattern over Marie's Cozy Corner Blog. As Marie suggested...you can make up a lot of them in baby girl colors and use them at a baby shower for table favors which I think is a fabulous idea!

Happy Crocheting!

Tuesday, November 16, 2010

Easy Crochet STAR Christmas Tree Ornament Pattern!

Several months ago one of my friends in my ornament exchange group made these cute holiday tree ornaments by crocheting them out of red and green yarn. She got the pattern from the Caron Yarn Web Site ---> HERE

These ornaments work up quickly and would look cute hanging on a Christmas Tree, off a Holiday Garland or use them for Package Toppers.

My friend used some glitter glue on her's...just around the edges to add some sparkle to them. I think they are cute!

Happy Crocheting!

Tuesday, November 2, 2010

FREE Crochet Pattern - Hearts Refrigerator Magnets!

A few days ago my aunt asked me to crochet some new refrigerator magnets for her to give out to her lady friends and she wanted them heart shaped...so I got online and found a great free pattern that you can find ----> HERE

They used a size F crochet hook but I wanted them a little smaller so I used a size D and they came out just fine. These heart refrigerator magnets work up quickly, I was able to make 6 of them in less than 1 hour. The instructions have 2 ways that you can finish them...one is with a lacey border and one is for a flat edge border...I made them both!

I think they would be super adorable done in red, pink and white for Valentines Day too!

Happy Crocheting!

Friday, October 29, 2010

FREE Crochet Candy Cane Ornament Pattern

A friend of mine made me this cute crochet candy cane ornament a few months ago and I think its adoreable. It would be great as a holiday package topper, on your Christmas tree or you could hang it off a holiday garland.

After looking online, I found a similar free pattern to make these crochet candy canes over on the Planet June crochet site. You basically just need a pipecleaner, white and red yarns.

I think this is an excellent little project to use up some of your scrap yarns and more importantly, they work up super quickly.

Happy Crocheting,
Shelly

Tuesday, October 12, 2010

FREE Crochet Thanksgiving Turkey Refrigerator Magnet Pattern


Can you believe that Thanksgiving is almost here? There is no better time than now to get busy with your Thanksgiving Holiday Crafting! A few weeks ago I found this easy and quick crochet pattern over on the Bevs Country Cottage Web Site to make this cute Turkey refrigerator magnet.

I was able to make 3 of them in less than 1 hour and then spent another 15 minutes hiding my yarn ends, gluing on the wiggle eyes and the magnet strip on the back. I then left them dry for 1 hour and they were ready to go onto the front of my refrigerator.

Bev used a size F crochet hook but you can use a smaller one to make him a little smaller as he measures about 5" wide by 4" high. I think next time when I make a few, I will use a smaller hook.

You can find additional free Thanksgiving Craft Patterns here on my blog!

Happy Crocheting!


Sunday, September 19, 2010

FREE Crochet Candy Corn Refrigerator Magnet Pattern

I love decorating the front of my upright freezer and the front of my refrigerator with homemade holiday magnets. In the fall of 2008, I found this free crochet pattern online to make Halloween Candy Corn magnets.

What I really like about this pattern is that its super easy, even a beginner can crochet them...and better yet, its a great way to use up some of your yellow, orange and white yarn scraps.

I made my refrigerator magnets using acrylic 4-Ply yarn and then glued magnets on the back with some all-purpose craft glue. If you decorate your home with a little Halloween ornament tree, you could omit the magnet and add a little hanging string.

You can find the pattern for FREE on the Crochet Memories Web Site ---> HERE

Have fun crocheting!

Thursday, September 16, 2010

FREE Crochet Pattern - Turkey Butt Refrigerator Magnet


Last year (fall of 2009) I found this adoreable free crochet pattern online to make a Thanksgiving Turkey...but not your regular turkey head...a turkey butt! LOL I thought it was cute and funny all at the same time!

You can find the FREE crochet pattern to make the Turkey Butt Refrigerator Magnet by heading ----> HERE (sorry ~ The original pattern poster has removed their site which means the pattern is gone.)

You only need a little bit of chocolate brown yarn, some varigated yarn and a size G crochet hook...although I used a size F as I wanted them a little smaller. Then glue some magnet on the back of them with some tacky glue and your done.

It took me less than 15 minutes to crochet a Turkey Butt! (gosh, I love saying that!)

~ Shelly ~

Monday, September 13, 2010

FREE Crochet Plarn Snowman Refrigerator Magnets Pattern

Here is another great Trash To Treasure crafting project! This project utilizes plarn (plastic yarn made from plastic shopping bags) but you could also use 4ply acrylic yarn too. These darling little snowman refrigerator magnets work up quickly! If desired, you could omit the magnet on the back and add a hanging string and turn them into Christmas Tree Ornaments.

Click Here for a you tube video on how to make plarn.
Click Here for a web site that will teach you how to make plarn.

Here is what you will need:

1 plastic shopping bag, turned into plarn
1 round magnet
scraps of black, red & orange felt (for hat, hat ribbon, eyes & carrot nose)
all-purpose craft glue
size F or G crochet hook
scissors


To Make The Snowman Head:

With your plarn or yarn, chain 5, slant stitch into first chain to form a ring. Chain 1, then make 10 single crochets in the ring, slant stitch to first SC that you made, chain 1, then make 2 single crochets in each single crochet, slant stitch in first single crochet, fasten off and weave in your ends. (note: I made mine with plarn which is much bulkier than regular yarn).

To Make The Trims:

From black felt, cut a top hat shape and glue it onto the top of your snowman's head. I trimmed mine with a scrap of red felt on one and on the other with a scrap of ribbon. Cut a small triangle from orange felt for his nose and 2 small circles from black felt for his eyes. Glue these onto his head. You can decide if you want to add a mouth or not...either way he looks cute! Finish up by gluing a magnet disc on the back and let them dry for 2 hours.

Thursday, September 9, 2010

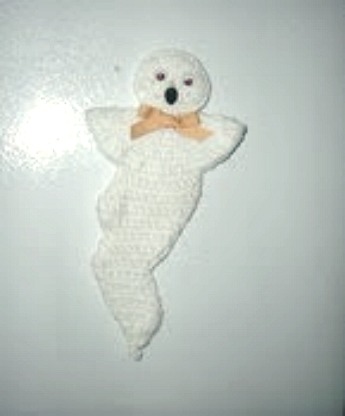
FREE Crochet Halloween Ghost Refrigerator Magnet Pattern

I love decorating my home for the various holidays through out the year with handcrafted holiday accents. A few years ago, I found this free crochet pattern online and then I lost the instructions. After some searching, I finally found Myra's great crochet blog and low and behold...she has the pattern posted there.

You can head on over to Myra's blog ---> HERE to print out the crochet ghost fridgie pattern. While you are there, check out all of her other patterns.

Now that I found her site...I will be making several more of her items. Her patterns are easy to follow and understand.

~ Happy Crocheting ~


Wednesday, August 11, 2010

FREE Crochet Plarn Granny Square Coaster Pattern

Here is another fast and easy crochet project that you can make in less than 1 hour and it won't cost you a dime because it is made by recycling plastic store bags into plarn...you will then crochet your plarn in a granny square pattern to make your free plarn beverage coaster!

This project only takes 2 grocery store bags to make...fast and easy! I used a size H crochet hook and did a simple granny square to make my beverage coaster.

If you don't know how to make a granny square, you can:

Watch this fantastic You Tube Video
Print out and check out this picture guide on how to make a granny square.

Please Note: For a beverage coaster, you will only need to crochet 3 rounds!


If you are not sure how to make plarn, you can find directions on that at:

Click Here for a you tube video on how to make plarn.
Click Here for a web site that will teach you how to make plarn.

You can find more FREE Plarn crochet patterns here on my web site by clicking --> HERE

Happy Crocheting!

Wednesday, August 4, 2010

FREE Plarn Crochet Barbie Doll Beach Mat and Tote Bag Patterns

As part of my Barbie Doll (Fashion Doll) and Plarn series of patterns & projects, I have come up with a very simple crochet pattern to make a Barbie Doll Beach Mat and Tote Bag.

You will need a size H Crochet Hook and 8-10 plastic shopping bags. This is a quick and easy project to use up some of your bags & to save them from our landfills.

Click Here for a you tube video on how to make plarn.
Click Here for a web site that will teach you how to make plarn.

To Make The Plarn Beach Mat

You will want to chain 44 stitches, SC in the 2nd chain from the hook and in each chain across. Chain 1, turn and SC in each stitch across. You will continue this pattern until you have 11 rows.

To Make The Plarn Beach Tote Bag

This tote bag is made by crocheting 5 rectangular blocks and then simply slant stitching all of the rectangles together to make the tote bag. I made the tote bag larger than a purse because I want it to hold barbies plastic suntan lotion bottle, her towel, hat, sunglasses, etc. You know...barbies come with a bunch of beach themed accessories!

I used a size G crochet hook to make the tote bag and used all simple SC stitches.

You will need to make 2 long side panels:

Chain 8, SC in 2nd chain from hook and in each chain across. Chain 1 and turn, SC in each stitch across, chain 1 and turn. Repeat until you have 4 rows, fasten off, weave in ends.

You will need to make 2 short side panels:

Chain 5, SC in 2nd chain from hook and in each chain across. Chain 1, turn, SC in each stitch across, chain 1 and turn. Repeat until you have 4 rows, fasten off, weave in ends.

You will need to make 1 bottom panel:

Chain 8, SC in 2nd chain from hook, SC in each chain across, Chain 1, turn, SC in each stitch across, chain 1, turn. Repeat until you have 2 rows.

Assembly:

You will simply slip stitch all 4 side panels to the bottom panel of the tote bag and then slip stich up each of the 4 sides to connect them to one another. Fasten off, weave in your ends. For the handle, I just chained 10 and slip stitched each side of the handle to the top of the tote bag.

You can find more FREE Plarn crochet patterns here on my web site by clicking --> HERE


Friday, July 23, 2010

FREE Crochet Plarn Round Coaster Pattern


Today I am sharing with you how I made a round coaster using plarn (yarn made from plastic store bags) and by crocheting using double crochet stitches.

Click Here for a you tube video on how to make plarn.
Click Here for a web site that will teach you how to make plarn.

To make this round coaster, you will need 2 grocery store plastic shopping bags and you will want to cut your strips into 3/4" wide sections. I used a size H crochet hook to make this coaster.

You will want to start off by chain stitching 6 stitches, slant stitch into first stitch to form a ring.

RND 1. Chain 3 and make 15 DC in the ring, join with a slant stitch to the top of the chain 3.

RND 2. Chain 3 (counts as first DC), DC in next 2 stitches, 2 DC in next stitch, DC in next 2 stitches, 2 DC in next stitch (repeat around) then in the last stitch, make 1 DC, slant stitch in the top of chain 3.

RND 3. Chain 3 (counts as first DC), 1 DC in each of the next 2 stitches, 2 DC in next stitch, repeat around and then end by adding 2 DC in the very last stitch. Slant Stitch into the top of the chain 3 stitch and fasten off. Weave in your ends.

You now have a round plarn coaster that will fit under your standard sized drinking glasses and coffee mugs. To clean: just rinse under tap water.


You can find more FREE Plarn crochet patterns here on my web site by clicking --> HERE

Happy Crocheting! I will be adding more plarn patterns so keep checking back or follow my blog using Google Friend Connect.

Crochet Plarn Placemat Pattern - Reusing Plastic Grocery Bags


Here is my Trash to Treasure project for July. You will want to save all of your plastic retail and grocery store shopping bags to make this project. Once you have 35-40 plastic bags saved, you can make some plarn and crochet a placemat.

I made 4 placemats for my brother for them to use in their camping trailer and I made a 5th one for him to use under his dog food dish for his dog. Plarn is made out of plastic shopping bags and once you make your plarn, you can crochet with it. These placemats are super easy to make and all you have to do is rinse them under some tap water to clean them up.

Click Here for a you tube video on how to make plarn.
Click Here for a web site that will teach you how to make plarn.

For these placemats, each one took about 40 plastic bags to make. I used a size J crochet hook and simply made them with single crochet stitches.

To Start the Plarn Placemat:

I simply made 58 chain stitches, I then did a SC in the second chain from my hook and single crochet in each stitch across. Once I got to the end, I chained one, turn and then SC in each stitch across. You will repeat this pattern until your placemat reaches the size that you desire. Mine are 40 rows high for the regular placemats and for the pet dish bowl placemat, I did 36 rows high.

You can make the placemats as wide or as high that you would like to make them.


Wednesday, July 14, 2010

Free Crochet Waffle Stitch Scarf Pattern


I love to sit and crochet, its a great way to unwind in the evenings after a busy day. Last week I took the time to crochet my teenage niece a scarf that she had been wanting for when fall rolls around. I decided to make hers using multi-colored yarn and with the waffle stitch.

To Make the Scarf:

Size G or H Crochet Hook
1 roll (3 1/2 oz. 4-ply acrylic yarn)
Scissors

If you are not familiar with how to do a waffle stitch, here are the instructions:

Crochet Waffle Stitch

You will make a foundation row which contains a multiple of 4 chains plus 1. For my scarf, I chained 21. (4x5 is 20...plus 1)

Row 1: You will want to DC (double crochet) in the 4th chain from your hook and in each chain across. Chain 1 and then turn.

Row 2: Picking up the front loop only of each stitch, SC (single crochet) in first 3 DC, *chain 1, skip next stitch, SC in next 3 DC. Repeat from the * across, ending with chain 1, skip next stitch, SC in last 2 DC and in top of turning chain. A ridge has been made on the right side. Chain 3 and turn.

Row 3: Now you will want to work through both loops of each stitch, skip first SC, DC in next 2 SC, * make a tr (treble stitch) around the bar of the free stitch directly below next chain-1 space; skip the chain-1 space, DC in next 3 SC. Repeat from * across. Chain 1, turn.

You will want to repeat row 2 and row 3 for however long that you would like your scarf to be. Once done, fasten off and weave in your ends.

Finishing: I chose to add some fringe to each short end of my scarf, however, you don't have to add the fringe if you don't want it. One roll of yarn (3 1/2 ounce roll) is enough to make a 4 3/4" wide by 54" long scarf...not including the 4" long fringe.

Here is a better shot of what a waffle stitch looks like on the scarf.


Happy Crocheting!