Showing posts with label Country Crafts. Show all posts

Thursday, April 30, 2015

How to Spray Paint Wooden Photo Frames

I love to visit the Dollar Store and pick up little items to accent my current home decor. In addition, the Dollar Store has a lot of great crafting supplies for only a buck...and you can indeed find some great deals there.

I primarily decorate in a coastal cottage or shabby chic style. Here in my area...finding those type of decor items can be a difficult process. Most people around here decorate in a country or victorian style, totally not my taste at all.

Recently I picked up three of these wooden photo frames at my local Dollar Store. They are the perfect size for sitting on a bookshelf, table top or on a wall shelf. While I love the style of the picture frames...I did NOT like the color of the wood at all. I bought them any way and decided to repaint them myself. I picked up one can of flat white spray paint from Lowe's and I was ready to rock and roll.

Lay down an old plastic table cloth or slice open some plastic bags. Remove the glass and backing from all of your picture frames and lay them flat on the plastic. Shake up your can of spray paint and lightly spray them with the paint. Don't get too close or you will cause drip marks...so stand back about 2 feet when spraying your projects. Let the first coat dry for 1 hour. Repeat for a second coat. Let dry for 1 hour. Flip them over and repeat the entire process again.

If you want to add a little texture or crackling to your paint finish...sprinkle a little table salt onto the wood and then lightly spray your paint. I do that for some of my projects but for this particular one I didn't do the table salt technique as I wanted a nice flat white finish. Once they are completely dry, insert the glass back in, your photos and then add your back. Done!!!

In my opinion...the frames look a whole lot better being turned into white frames and next on my list is to buy some tiny 2" and 3" diameter sand dollars and starfish which I am going to glue onto the frames to decorate them. I will update this post once I complete that portion next. Enjoy!

Wednesday, August 6, 2014

How to Make Homemade Potpourri

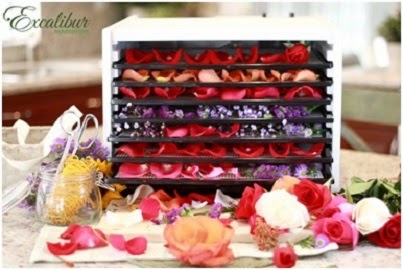
How many of you have ever made your own homemade potpourri? Making your own potpourri is a very easy process when you own a food dehydrator. The great folks over at Excalibur Dehydrators sent over step by step instructions and photos on how you can make your own potpourri. It is a great way to get your own home smelling great and it makes for a heartfelt gift to give to others. The instructions and photo is courtesy of Excalibur Dehydrators.

While completing crafty projects at home, Excalibur Dehydrators offers commercial-grade results. The units are equipped with patented Parallex™ Horizontal Air Flow and Hyperwave™ Fluctuation Technology for the most efficient heating and drying combination on the market.

Gerry's Lavender Potpourri

1 cup lavender blossoms
2 cups lemon verbena leaves
2 tsp orrisroot powder
1 cup pink rose petals
1 cup white carnation petals

Dry petals in dehydrator at 95°F/ 35°C until crisp. Lightly mix flowers in a bowl and sprinkle with orrisroot powder (a preservation). Store in jars for 1 month in a cool, dark place. Then place in decorator jars.

Spicy Potpourri

1 quart dried roses, mixed colors
¾ cup dried lavender flowers
1 tsp powdered cinnamon
1 tsp nutmeg
1 tsp allspice
1 tsp cloves
1 T. dried rosemary
1 T. benzoin (preservative) or 1 T. orrisroot powder
10 drops oil jasmine

Lightly mix all ingredients, add oil of jasmine for a long-lasting fragrance and store.

About Excalibur Dehydrators: Since 1974, Excalibur Food Dehydrators have changed the way people all over the world prepare and preserve food. Compact enough to fit on your kitchen counter, the Excalibur Dehydrator replaced sun drying, solar drying, and oven drying. The electrical dehydrator created a more predictable dehydration method that allowed people to dry 24 hours a day, come rain or shine. Excalibur Dehydrators are the only home appliance that incorporates the Parallexx™ Horizontal-Airflow Drying System for best performance, thermostat adjustability, speed, durability, clean-ability and versatility. Dehydrate fruits, vegetables, meats and fish for jerky, herbs and nuts in the comfort of your home. Excalibur Dehydrators are up to 10-times faster than common round dehydrators, and are available in a variety of sizes, including commercial and non-commercial grade units. www.ExcaliburDehydrator.com.

Disclosure: This is a guest post. No compensation was received.

Monday, June 30, 2014

Turning Old Glass Jars into Candle Holders

Any opportunity that I get to recycle and upcycle items is a good thing! On top of that, I love candles and often times I make or buy candles to give as a gift and to use around my own home. Well, today I have a great idea for all of you from Rachel Paxton on how you can turn your old mason jars and glass jars into inexpensive candle holders and gifts! The article and instructions are below. Enjoy!
Canning jar candles are very easy to make, make great gifts, and are only limited by your imagination!

To start all you need are some narrow-mouth canning jars, wire ribbon, potpourri, votive candles, small glass votive candle holders, and craft glue or a hot glue gun.

If you don't have any old canning jars, you can find some very inexpensively at thrift stores and yard sales. Wire ribbon can be a little expensive. Look for it at yard sales and at craft store clearance sales. The after-Christmas sales a great time to stock up. One roll of ribbon will make several canning jar candles. Potpourri you can make yourself or buy on sale. Votive candles are inexpensive at stores like Target or Walmart, and you can also find glass votive candle holders very inexpensively at Walmart. You want one that will set in the rim of the canning jar.

You can fill the canning jar with whatever you wish. Potpourri is one of the easiest fillers. I bought a nice autumn-scented potpourri and added some orange slices I'd dried in my food dehydrator. You can also add dried cranberries, apple slices, or cinnamon sticks.

After you fill the jar, you set the candle holder inside the mouth of the jar. The top of the candle holder should be even with the top of the jar. You might have a little trial and error before you find just the right candle holder. Place the candle in the holder and then use the ribbon to tie a big bow around the neck of the jar. That's it! (You might want to use a little craft glue or your glue gun to tack the ribbon in place).

You can glue some dried fruit, flowers, or other decorations on the bow for a more decorative look. You can also put other things in the jar besides potpourri. I've seen one half filled with white sugar with a short white taper candle set down in the sugar. Very pretty! And that one doesn't require the candle holder.

At Christmas you can purchase small ornaments and place them in the jar instead of the potpourri. Any small figurine would do--in the spring you could use little bunnies.

Maybe fill a jar with marbles or layers of colored sand. Even pennies! Use your imagination. These candles make great gifts and are also fun to make for yourself. If you get tired of one just empty it out and start again!

Originally published at Suite 101. Rachel Paxton is a freelance writer and mom of four. For scrapbooking, card making, gift-giving ideas, and more family memory-making activities, visit http://www.crafty-moms.com.

Tuesday, January 14, 2014

Make a Scissor Holder Using a Potholder - Craft Project Idea

Looking for a last minute gift idea? These are great little no-sew projects that work up in a few short minutes. They make great little gifts for the holidays, for Easter, Mother's Day and/or for Birthdays. You can buy your supplies at a local dollar store to save money.

Scissor Holder Using a Potholder Craft Project

1 large square shaped pot holder w/hanging loop
1 tube fabric glue
1 full-size pair of scissors
2 clothes pins

Note: If kids are doing this project use liquid fabric glue. If adults are doing them, you can use a hot glue gun with glue sticks.

Lay your square shaped potholder down onto the table in a diamond shape with the hanging loop to the right. The ones we used are solid color on one side and have a print on the other side. The solid color is facing up and the print is facing the table.
Fold the pot holder in half with the edges over-lapping one another. Squirt a thin layer of fabric glue down the one side and sandwich the other edge on top. We used two clothes pins to hold them together until the glue dried. 

Once the glue has dried you can tuck your full-size scissors inside. We have a little hook on the side of our refrigerator where our scissor holder is hanging which keeps my kitchen shears in easy reach. I also keep one hanging on a wooden knob in my sewing & crafting room. I always know where my scissors are and they are always within my reach!

Tuesday, April 30, 2013

Craft Project - Scrabble Tile Framed Wall Hanging


My future son-in-law is turning into a really crafty guy and today, I just had to show you all what he made for my daughter as a Christmas present this past year. Even though he gave it to her for Christmas, it would make a great Valentine's Day, Mother's Day, Easter, Wedding or Birthday gift too!

Scrabble Tile Framed Wall Hanging

Supplies List:

Wooden Frame (your choice of size, his is very large)
White Photo Mat (or color of your choice)
Piece of Heavy Duty Cardstock (color of choice to fit inside the photo opening of the mat)
Lots of Wooden Scrabble Tiles
Glue Dots ( adhesive used in scrapbooking & cardmaking)

Directions: For the project, he spelled out their names, daughter's name and words that are related to love, trust, friendship, etc. (sorry for the flash in my photo). He spelled out the words he wanted and then arranged them onto the black piece of heavy duty cardstock using the glue dots on the back of each wooden tile to hold them in place. He then took the left-over wooden Scrabble tiles and just randomly placed those letters onto the white photo mat as shown in the photograph above. He then assembled everything and slipped it all into a black wooden picture frame. On the backside of the frame, he wrote a love letter to my daughter directly onto the back of the frame which is super sweet!

My daughter has her new piece of handmade "art work" hanging up in their family room and I think it's absolutely GORGEOUS! My photo doesn't do it any justice thanks to my flash on the camera bouncing off of the glass. I will try to get a better photo of it and update this blog post when I do.

Friday, March 22, 2013

Craft Project :: Straw Hat with Silk Sunflowers for your Front Door

Some of you know that I have a 26 year old daughter who recently wasn't very crafty. However, for the past 6 or 7 months she has finally jumped into the crafting world. Well, my aunt who lives out on a farm in the country wanted something new to hang on her front door so my daughter got busy making her this straw hat with silk sunflowers. This was the first time my daughter ever made something like this and frankly, I think it turned out pretty well.

My daughter told me I could take a photo and share her project with all of you. Here is how she made it. (note: you can click on the photo in this post to enlarge it to see details).

She purchased a large straw or wicker hat at the local craft store along with a 4 stems of large silk sunflowers and 5 smaller silk sunflowers. She purchased a spool of navy blue fabric ribbon that measures 1" in width that had a sunflower print on it. She also picked up a bag of spanish moss.

She first glued the spanish moss around the hat using a hot glue gun. She then measured around the hat and cut that amount off of the ribbon and glued that around the hat. She then glued on her large and small silk sunflowers (as shown in the photo). She used the remaining sunflower print ribbon to make a bow and glued that on to the bottom of the hat.

She did use a piece of scrap wire which she twisted into a loop and hot glued it to the back of the wicker hat so that our aunt could hang it up on her front door. I think it looks pretty on her brick red colored front door.

I am so excited that my daughter has finally jumped into the crafting world and I am looking forward to seeing what she comes up with next! yeah!

Thursday, November 15, 2012

Crafts - Hand Painted Snowman Terra Cotta Flower Pots

A friend of mine loves to dabble in crafts, especially hand painted crafts and last week she made me this adorable hand painted snowman terra cotta flower pot! I think it is absolutely adorable!

She took a 6" terra cotta pot and painted the outside of it with navy blue acrylic paint. Once dry, she took some white textured snow paint and painted the rim with that. That textured paint really looks like snow!

She drew her snowman design onto scrap paper first and then used acrylic paints to paint her design around the sides of the flower pot. Once it was dry, she sprayed clear coat acrylic sealer around the outside of the pot and left it dry overnight.

I am going to use my new flower pot to hold some wrapped Christmas candies and some festive candy canes! I love my new pot and she said they are really easy-to-make. You could paint several of them up in one day and give them as gifts or use them to decorate your home. You could seriously paint all kinds of festive holiday designs on these pots like: peppermint candy swirls, santa, elves, Christmas flowers, reindeer or whatever holiday design that you like! Happy Holidays!

Saturday, November 10, 2012

How To Make A Scrapbooking Pen and Pencil Organizer


We are getting ready to move into our new home and one things I love about our new home is that I get my own scrapbooking and craft room! I am really looking forward to decorating it up and making it cozy. With that said, I want to get all of my scrapbooking and craft supplies organized but I don't have a lot of money to spend on buying various organizing containers and shelves.

I decided to make some organizers myself by repurposing empty containers that I normally throw away. For this project, I wanted something to hold all of my gel pens and markers that I use for scrapbooking and cardmaking, and I wanted it to look pretty enough to sit on a shelf or on my desk top. I turned an empty pretzel sticks container into the perfect pen, pencil and marker holder and here is how I did it!

Pen and Pencil Canister - Organizer

Supplies Needed:

1 Empty Plastic Pretzel Rod Container with Lid
2 Sheets of Scrapbooking Paper
1 Roll of Rick Rack Trim
Liquid Glue Pen
Ruler
Scissors

I measured my plastic container and then cut a strip of paper from textured chocolate brown scrapbooking paper to those exact measurements. I used a liquid glue pen to glue that strip of paper around my plastic canister/container. It took about 10 minutes to dry and set. From a piece of pink printed scrapbooking paper I cut another strip that was much smaller in it's height to wrap around the canister and used the liquid glue pen to glue it on top of the chocolate brown paper, centering it so that the brown peeked out on the sides. I then used my liquid glue pen to glue the yellow rick rack trim on both long edges of the pink paper strip. I left the entire thing dry overnight.

While it was drying, I traced around the round lid onto a piece of the pink scrapbooking paper. I then cut it out but cut the circle slightly smaller than what I needed as I wanted some of the black on the lid to frame out the pink circle once it was glued on. I used the liquid glue pen to glue it on and found that this worked a lot better than using a hot glue gun.

You can use these decorated canisters - containers to hold all kinds of things and I am going to make many more of them as I empty out containers from our pantry. (after we have eaten the food, of course!). Now all of my gel pens and markers have a pretty little home! The next one that I am going to make will hold all of my colored pencils! Yeah!

What a great way to save all of those plastic containers from our landfills! This is a great project that the older kids can do too! Enjoy!

Wednesday, September 21, 2011

Great Ideas For Crafting A Rustic Wedding Look For Your Upcoming Wedding!

Attend nearly any wedding these days and you're bound to see some rustic, country touches. A full 44-percent of brides plan at least some rustic elements in their weddings, according to The Wedding Report. And some go full-bore.

Here are several ways to incorporate the rustic look into your wedding while making it personal and within budget.

1. Barns
Rustic barns are the quintessential location for a rustic wedding. Dress it up with sweeping curtains (sew together fabric drop clothes from a home improvement store) and hanging lights (borrowed white Christmas lights work, too). A farm, open field, country church or plantation home can also provide the perfect backdrop to your themed wedding.

2. Painted Wood Signs
Add some personality to the big day with whimsical or romantic painted signs that signal to your guests what's happening where. Look locally for free reclaimed or salvaged wood to add rustic charm and eco-friendliness. For inspiration, check out this Etsy artisan's sign work.

3. Burlap
Nothing says rustic like burlap and this versatile fabric can be used in a number of ways. Use it as table coverings, then top with smaller borrowed vintage tablecloths. Use it as a background to frame table numbers for your reception. Use it as an aisle runner or atop haystacks for extra casual seating.

4. Mason Jars
Mason jars are perhaps the most-seen wedding accessory these days -- and for good cause. They ooze charm, they're economical, they come in a variety of sizes and they go with just about anything. Throw a handful of wildflowers into a mason jar and you've got an instant centerpiece. You can also use them to hold utensils or candy at the reception. Fill them with something sweet and top with burlap and ribbon for wedding favors.

5. Chalkboards
Like painted signs, chalkboards add a fun element to wedding day signage. They make perfect menus, Mr. & Mrs. signs on the back of the couple's chairs, seating charts and directional signs. Paint a vintage frame the color of your wedding, then paint over the glass with chalkboard paint for an instant showpiece.

6. Homemade
A rustic wedding is not complete without something homemade. And there's no better place to feature homemade than the reception. Pies are a big trend in weddings this year, and local vendors are making it easier to find baked goods and more with that down-home taste. Decorate the dessert table with bowls of eggs, flour and honey for that extra home-made feeling. Handwrite favorite family recipes on index cards to use as wedding favors.

7. Registry
Guests can contribute to the rustic theme through gift-giving. Register for gift cards at CardAvenue.com for retailers who specialize in rustic products, like J.Crew, Timberland, Restoration Hardware and Bass Pro Shops.

8. Music
More than decorations, music tells the story of the rustic wedding and instantly sets the mood. Whether it's country, bluegrass, folk or a combination, your choice or musicians, deejay or soundtrack will complete your theme and leave your guests tapping their feet for days to come.

###

Weddings expert Cara Davis is the author of Cheap Ways to Tie the Knot and blogs from her home in Orlando, FL, about cheap ways to spend and save at CheapWaysTo.com.

Saturday, June 18, 2011

Handcrafted Country Amish Wooden Swag Wall Hanging

I love country crafts and this easy to make "Amish" country-style swag is no exception! This swag takes about 2 hours to make because of the hand painting involved but you don't have to be an expert painter to make it because all of the painting work is really easy to do.

You will want to head to your local craft supply store and buy a roll of twine so that you can make the swag which is 5 pieces of twine braided together that is about 16" long. Make sure you tie a knot at the top and at the bottom.

You will want to purchase 3 wooden figures (found in the precut wood section of the store). We purchased pine wood Amish girl, boy and a half-circle shape for the "sign" along with various shades of acrylic paint and a paint brush. Paint your figures in traditional "Amish" colors and let them dry. Once they are dry use a hot glue gun to glue them onto the swag.

If desired, cut some raffia strands and tie them into a bow and hot glue them to your swag to add added interest to it. Hang your new swag on the wall or a door and enjoy!

Saturday, January 8, 2011

How To Make An Easy Scented Sachet

A few weeks ago I needed an easy project to make with my church youth group girls and we decided to work on holiday gifts. One of the projects we made were these quick and easy scented sachets. Here is what you will need to make each one.

6" diameter circle of tulle (we used white netting aka tulle)
5" piece of white craft wire
6" piece of white satin ribbon
8" piece of scalloped edge pink lace
1 tiny pink satin ribbon rosette (flower)
craft glue
wire cutters & scissors
scented potpourri of choice

Place a small amount of potpourri in the center of your tulle circle. Thread the edge of the pink lace onto the white wire so that it gathers the lace up. Take this and carefully wrap it around the tulle filled potpourri ball to fasten it together into a sachet shape as shown in the photo. Using satin ribbon, form a bow & glue onto the front along with a little satin rosette in the center of the bow. When the sachet needs 'refreshed' just spritz with perfume or scented oils.

If you need a quick and easy scouting project, youth group project or a quick & easy party favor...these would work well. You can even decorate them much more fancier than what we did.

Happy Crafting!

Friday, September 3, 2010

Primitive Country Halloween Stitchery Pillow

I made this pillow several months ago for a dear friend of mine who loves decorating her home in the Primitive and Country Style. It took me only 2 days to make (one for the stitchery and a second day for the machine sewing).

Primitive Country Halloween Stitched Toss Pillow

Here is what you will need:

Simple Pattern From a Halloween Coloring Book
Cotton Embroidery Floss
12" by 12" piece of Tea or Coffee Dyed Cotton Muslin Fabric
1/2 yard Cotton Homespun Fabric (I used green)
Sewing Machine and Basic Sewing Supplies
Pillow Form or Fiber-Fill Stuffing
Scissors
Disappearing Ink Pen

Pattern: I purchased a child's Halloween theme coloring book. I found this cute ghost pattern in it and transfered it to my muslin fabric using a disappearing ink pen after I shrunk the pattern by 25% in my scanner.

Hand Stitching: I used two strands of cotton embroidery floss for all of my hand stitching in the colors I preferred. You can use any colors to accent the design that you choose. I then hand drew my own candy corns and the words Happy Halloween and stitched them.

Machine Sewing: From green homespun fabric, I cut four strips that measure 2" wide by the length of my muslin fabric and sewed them onto my muslin panel for a border. Then I measured my front panel and cut a back panel from homespun fabric. Using my sewing machine, I attached the front and back panel together, leaving 1/2 of the bottom unsewn. I then inserted my pillow form and finished closing up the pillow by using a blind hand stitch.


Pretty simple and easy!

~ Happy Crafting ~

Thursday, July 1, 2010

How To Make An Easy Homemade Window Topper Curtain


A friend of mine just moved into a new apartment and didn't have a lot of money to run out and get some new window treatments, so she asked me to help her to make some simple window toppers aka curtains for some of her windows.

So, we went out to our local fabric store and she purchased some cotton blend fabrics that were on sale for $1.99 a yard.

Measurements: We measured her windows and added on 10" to the width to allow for seam allowances & trimming. For the length, we added on 12" to allow for seam allowances and the curtain rod pocket. You can make them however long that you want, as you can see from the photo, hers are 1/3 of her window length as she says a lot of sunlight comes in that window and she likes to use her mini blinds.

You will need:

Coordinating Sewing Thread, Scissors, Tape Measure, Sewing Machine, Iron & Ironing Board, Sewing Supplies

We decided to cut our fabric first and allowed 10" extra inches on our width and 12" extra inches on our length (see above). We then ironed back our seams on 2 of the width edges and on the bottom hem edge. We folded the fabric back by 2 1/2" on the width and then folded it again by 2 1/2" so that the raw edge was hidden in the fold. She then used her sewing machine and sewed a straight edge down each of the width sides of the fabric. Using the iron, we ironed under 1" and then 1 1/2" on the bottom edge (raw edge hidden in the ironed fold) and she used a straight stitch to hem them up. You want to do the ironed folds along your seam lines to hide all raw edges which protects from fraying during washing/drying.

She had a simple white metal curtain rod that measured approx. 1 1/4" in depth, so we added on a 1/2" so that the rod would slide smoothly thru the pocket. Your next step is to sew the curtain rod pocket which she did by folding over approximately 5 or 6" of the fabric and using a straight stitch with her sewing machine, she made a curtain rod pocket.

Now, if you want them fuller or more ruffling to them, double the width of your fabric measurement.

As you can see, they are very simple and easy to make. She is going to use them while she is saving up some money to get more elaborate window treatments.

Happy Sewing!

Shelly

Wednesday, June 23, 2010

FREE and EASY Crochet Dish Scrubby Cloth Pattern


When it comes to dish washing, I am very happy to say that I own & use a dishwasher...however, there are times when I need to hand wash something and need a smaller cloth to get into all of the tiny places...such as a canning jar or drinking glass and full-size dishcloths are too big or too thick.

I solve that problem by crocheting myself a few small dish scrubbies out of cotton yarn. Here is how you can make one using a simple single crochet stitch.

Scraps of cotton yarn (I use Sugar and Cream cotton yarns)
Size D or F crochet hook
Scissors

Chain 2 and then SC (single crochet) in second chain from your hook and in each chain across. Once you reach the end, chain 1 and turn. You will want to SC (single crochet) across the entire row, chain 1 and turn again. Repeat this until you have 10 rows. Fasten Off, weave in your ends.

This little cotton scrubby is the perfect size for when you need to hand wash drinking glasses, canning jars or just to get into tight little spaces to get all of your food particles out of them. They are machine wash & dry.

Enjoy!


Sunday, June 13, 2010

Free Crochet Shell Stitch Dish Cloth Pattern


I love to crochet and have been crocheting for 30 years now. One of my favorite crochet patterns/stitches in the shell stitch...it's super easy and makes really nice afghan patterns or dish cloth patterns ( dishcloth pattern ). When I make homemade crochet dish cloths, I always use 100% cotton yarn and I really like the Sugar and Cream brand of cotton yarns. You never want to use acrylic yarns!!!

Before I get started with directions on how I made the dishcloth, I want to explain how to do a shell stitch pattern.

How to do a shell stitch - Crochet

You always want to make a foundation chain in multiple of 6 stitches plus 1. For my dish cloth, I chained a foundation row of 37.

To begin a row of shell stitches on a foundation chain, thread over and insert hook in the 4th chain from your hook. Complete a DC (double crochet) and make another DC in this same stitch. This will make a half shell, the first step in a shell stitch row.

The correct order for a shell stitch row is as follows:

Beginning of row: Half shell (the turning chain 3 and 2 DC in the 4th stitch from your hook).

Repeat as often as desired: Skin 2 stitches, 1 SC in next stitch, skip 2 stitches, 1 shell (which is 5 DC in next stitch).

End of the row: Skip 2 stitches, 1 SC in next stitch.

When turning, you always want to chain 3.

Here is how I made my crochet dish cloth using cotton yarn and the shell stitch. The approximate finished size will be 8 1/4" by 7 1/4".

To make the dish cloth, I used a size 4 crochet hook. I made a foundation chain row consisting of 37 stitches. I then DC in the 4th chain from my hook and made another DC in that same stitch. I then skipped the next 2 stitches and made a SC in the next stitch, skipped the next 2 stitches and made a shell which is 5 DC in the next stitch. I did this across my row...ending with a SC in the last stitch. I then chained 3 and turned and went across again. I did this for 13 rows, not including the foundation row. You can make as many rows as desired. Once done, fasten off and weave in your ends.

You can find additional free crochet patterns here on my blog by looking under my crochet category...including additional dish cloth patterns! Please follow my blog (right hand column) so that you can see when I post new craft patterns!


Monday, June 7, 2010

Free and Easy - Crochet Dish Cloth Pattern


Years ago one of the very first things I learnt to crochet were homemade dishcloths (dish cloths) in a variety of easy patterns. When I crochet dish cloths, I always use Sugar and Cream cotton yarn and I prefer to use their varigated color patterns as its just...well....easier than to select solid colors. When it comes to dish cloths, you always want to use cotton yarns and not acrylics.

This pattern I came up with years ago and its super easy because it only uses 2 different stitches...the SC (single crochet) and the DC (double crochet). The approximate finished size is 7 3/4" by 7" in width.

Supplies:

Crochet Hook Size 4
Cotton Yarn (1 ball of Sugar & Cream makes 2 dish cloths)
Scissors

Using your size 4 crochet hook, chain 34 which is your foundation row.

Row 1: DC in the 4th chain from your hook, chain 1, skip next stitch, DC in next stitch, chain 1, skip next stitch and DC in next. Repeat across. Chain 1 and turn.

Row 2: SC (single crochet) in each stitch across for a total of 32 SC stitches. Chain 1 and turn.

I repeated row 2 for a total of 19 rows...you can do this row however many times you wish to obtain the size that you desire. After completing row 19, I chained 3 and turned.

Row 20: Repeat row 1 which is the double crochet, chain 1, skip next stitch and double crochet in next pattern. At the end of this row, I fastened off and weaved in my ends.

Friday, June 4, 2010

How To Make A Mini Rag Quilt Wall Hanging

If you love to sew and like country or primitive decor, I think you will enjoy this easy to make sewing project. You will need the following supplies:

8" square of homespun fabric (backing fabric)
(2) 4 1/2" squares of homespun fabric (2 front squares)
(2) 4 1/2" squares of tea stained muslin fabric (2 front squares)
(2) 2 1/2" by 4" pieces of tea stained muslin fabric (hanging straps)
7" piece of cotton quilt batting
Coordinating sewing thread
Black Metal Mini Hanger (found at craft supply stores)
2 round plastic buttons
Scissors
Sewing Machine

Place the piece of cotton quilt batting on top of your backing square. Arrange the 4 smaller squares on top (as shown in the photo). Using a 1/2" seam allowance, sew the squares to the backing and batting piece. You will use scissors to fringe all of their edges being careful to not cut through your sewn stitches.

Use your sewing machine to sew your muslin straps by sewing around 3 of the edges and then turn right side out. Finish sewing up the final short end of the strap. Fold straps in 1/2 and attach them to your mini quilt with handstitches or machine sewn stitches once you have the wire hanger placed inside them (make sure you place the hanger in there before you sew them shut. Finally, hand sew on 2 decorative buttons to add a little pretty accent to your mini wall quilt.

This mini quilt would look cute hanging off a peg shelf or cabinet knob.

Happy Quilting,
Shelly

Saturday, March 20, 2010

Homespun Spring Stitchery Accent Pillow


A few weeks ago I stitched up this little accent pillow because I had spring fever...now that it's the first day of spring...I am already thinking ahead to planting my annual garden.

This little pillow is fast and easy to make and you only need a handful of supplies. It's a great way to use up some of your homespun fabric scraps.

Here is what you will need:

4 3/4" by 5 1/2" piece of tea-stained muslin fabric
Less than a 1/4 yard of homespun fabric
Embroidery Floss, Needle, Scissors and Embroidery Hoop
Sewing machine and basic sewing supplies
Small amount of poly-fiber fill
Disappearing ink pen

Pattern: On a 4 3/4" by 5 1/2" piece of printer paper, write down the words "My (heart symbol) Is In The Garden. (see photo). This paper should be the exact size of your muslin fabric. Use it as your pattern and trace it onto your muslin fabric using a disappearing ink pen.

Using 3 strands of embroidery floss in the colors you choose, stitch the wording onto the muslin. Once you have your hand stiching done, its time to add a border. From homespun fabric, cut four 2 1/2" by 7 1/2" long strips. Use these strips to make a border around your muslin piece. Once you have them attached, measure your front panel. Use those measurements and cut out the same size from homespun fabric. Pin the two pieces together (right sides together) and machine sew around 3 1/2 of the edges. Turn right side out and stuff with fiber fill. Hand sew the opening shut with a blind stitch.

Your little accent pillow is now complete!

~ Happy Crafting ~


Friday, January 22, 2010

How To Make Fabric Strawberries With Sparkles


A few weeks ago I decided to make some strawberries out of some red cotton fabric that I had left over from another sewing project. With spring coming, I thought they would look cute sitting in a ceramic bowl on my counter top. After I completed them, I covered them in some sparkly German Glass Glitter so they actually look beaded (and beautiful).

Here is what you will need to make them:

5" circle template
red and green cotton fabric
poly fiber-fill stuffing
green embroider floss and sewing needle
sewing machine and basic sewing supplies
German Glass Glitter
Mod Podge and a Foam Brush
Scissors

I used a round jar candle to make my 5" circle template pattern. Once you have your paper pattern, cut your circle in half. Using your half circle, cut out 2 pieces from your red fabric.

Fold your half circle in half as shown in the below photo and pin into place.

Using your sewing machine that has been set on the straight stitch, sew down the one straight edge of your fabric. (the wrong side of your fabric should be facing outward).

Your strawberry should now look like this:

Turn your strawberry right side out. Using thread and a hand sewing needle, run a gathering stitch through the top edges. Pull the gathering thread to help cinch up the top and stuff some poly fiber fill inside...then finish pulling your threads up and fasten off.


Now you can make your strawberry caps as plain or as fancy as you would like. I opted to go for plain...so I just drew an X shape onto a piece of paper and used it as my template. I then cut them out of green fabric.

I centered my green X's over the top of my strawberries and used green embroidery floss to attach them (by hand) with little tiny stitches. If desired, you can thread a 1 1/2" piece of 6-strand floss up through the center of your X to make a stem (I did) and knot it underneath before attaching the cap to your strawberry.

Once I had all of my strawberries done, I glittered them with some German Glass Glitter. I poured a little matte finish Mod Podge into a bowl and added 1 teaspoon of water to it. Using a sponge brush...I brushed this mixture over my berries. While it was still wet, I sprinkled a lot of 'fine grade' German Glass Glitter onto them and then set them onto a baking sheet to dry.

Now when I make strawberries I will do them in 3 sizes....after all, strawberries are never all the same size. I like to do 3", 4" and 5" diameter 1/2 circles for my templates.

~ Happy Crafting ~

Tuesday, January 19, 2010

Primitive Wax Chunky Snowman Basket or Bowl Filler


During the summer months, I was fortunate to find some old metal soap and candy molds at my local flea market. One of the molds was of a snowman and I just new I had to make some wax chunky snowman's using that mold. I finally dug out my mold and got busy with it a few days ago.

I had purchased a candle making wax kit a few weeks ago at my local craft store. I melted down my wax according to the box directions and added some vanilla candle scent. While my wax was melting, I placed some whole cloves in the metal mold where the snowman's eyes and buttons would be. When my wax was ready for pouring, I gently poured my wax into the mold. I left it harden for 2 hours (wanted to make sure it was good and hard) and then removed my snowman chunky from the mold.

I then cut down some of my homespun fabric scraps into 1/2" wide strips and tied them around my wax snowmen.

I now have my wax snowman shapes sitting in a primitive basket in my living room that is filled with waxed stars, dried pods and some pine cones.

Pretty easy project...took me about 20 minutes to melt and pour my wax and another 2 hours for hardening time.

~ Shelly ~