Sunday, January 31, 2010

Easy Scrapbooking Layout - Too Cute! New Baby Girl


Back in May 2009, I was finally blessed with my first grandchild and it was a baby girl...we refer to her online as Baby G. When it comes to scrapbooking pages that feature my darling little grandbaby...I like to use pink! Some of my pages are simple and quick and others are more time consuming and elaborate.

A few weeks ago I made this page which I titled "TOO CUTE" because on that day, we were all raving about how cute baby G looked...at the time, she was just a month old and we had taken her to visit my 84 year old great auntie.

This page took me less than 40 minutes to make...thanks to my cricut!

Paper: I used 2 sheets of 12x12 patterned paper...one has a dark pink floral boho pattern and the other is a lighter pink with a tone on tone pattern. I took the striped pink paper and tore it into thirds and glued one third onto the lower half of my boho paper to give my background more interest. I save the other pieces for another project.

I then cropped down my 4 photos and rounded their corners and mounted them onto solid bubble gum pink cardstock and then rounded the corners again. 3 of my 4 photos are vertical and 1 is horizontal so I knew it would be a little challenging to get them all onto 1 page...over all, I do like the photo positions. I then tacked them down with glue dots. Using my Cricut "George and Basic Shapes" cartridge, I cut out 3 pink flowers and then did the shadow option and cut out 3 white flowers on the 1 1/4 size setting. I then layered a pink with a white and attached them together with a mini blue brad. I used glue dots to affix them to my page. Using the same cartridge, I cut out the letters for my title which is TOO CUTE on solid bubble gum pink paper. I used the shadow option and cut them out again on solid white paper. Using a glue stick, I placed the white letters under the pink ones and then attached them all to my page. I had the left-over rub-on word "Bright Eyes" from another project and rubbed that on underneath one of the flowers and I had a 3-d glitter embellishment left-over from another project of baby pj's so I attached that near my title.

I like to see a person's handwriting on pages as I think it adds a nice personal touch so I hand wrote the name of each person under the photos and dated my page.

Simple and Quick and I think it makes for a very nice uncluttered layout.

Thursday, January 28, 2010

Decoupage - How To Make A Valentine's Day Flower Vase


I just love crafting up new items for Valentine's Day and a few days ago I decided to decorate a new vase for myself...after all, hubby will be getting me some Valentine's Day flowers to put inside it (usually white roses).

Decoupage Valentine's Day Glass Vase

This is a very easy project. Here is how I made my vase:

Tissue Paper- Dark Pink, Light Pink, White and Red
Decoupage Medium - Glossy Finish
Clear Mica Glitter
Foam Brush
Newspaper (cover your work surface)
Glass Vase

I first started by washing and drying my vase. I then took some rubbing alcohol over it and left it air dry for several minutes. While it was drying, I ripped up my tissue paper into a variety of shapes and sizes.

In a small glass bowl, I added 4 tablespoons of decoupage and 1/2 teaspoon of water. I like to add just a tad of water so its not as thick. Using my foam brush, I layered on a thin coat of decoupage medium onto one side of my vase. I then used my ripped up tissue paper and just layered it on in a pattern that I liked. You will repeat this process for all sides and the bottom of your vase. You will want to let it dry for 1-2 hours. Once dry, use your foam brush to layer a top coat onto the tissue paper and let it dry for an additional 1-2 hours.

Optional: After I coated my vase with the top coat layer, I chose to sprinkle on some mica glitter. If you want to add the glitter, make sure you sprinkle it on while the decoupage medium is still wet.

Now you have a beautiful vase for Valentine's Day!

~ Happy Crafting ~


FREE Crochet Apple Refrigerator Magnet Pattern


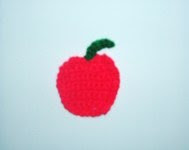
Like most people who crochet or knit, I often end up with a big box of yarn scraps that I don't know what to do with. A few weeks ago I found this very easy crochet pattern over on the Crochet 'N More web site to make a small apple refrigerator magnet (fridgie). You can find the printable pattern ---> HERE

The designer of the pattern used a size G crochet hook, I opted to use a size F as I found it better to use for the thickness of yarn that I was using. You only need a small amount of red yarn and even smaller amount of green yarn to make the magnet. Once you have it completed...some tacky glue to affix a magnet disc onto the back.

Happy Crocheting!

Tuesday, January 26, 2010

FREE and EASY To Make Tooth Fairy Pillow Pattern

Now that I am a first time grandma to an 8 month old baby girl...I knew there would come a time that we would need a tooth fairy pillow. After searching online, I found a free pattern over on the About.Com web site.

You can make it as fancy as you would like by adding lace, rick-rack trim or even embroidering on the front of your pillow. However, I wanted a simple clean look to mine so I just used the pattern shape and chose to make mine out of white cotton terry cloth. It took me less than 30 minutes to make the pillow for my grand daughter. Now that its done, I am going to go out and purchase an iron-on applique with her first name initial and iron that onto the front...but for now, you can see the pillow in the picture up above. I love that it has a little pocket on the front where you can place the tooth and then leave your "fairy" money inside.

~ Happy Sewing ~

Monday, January 25, 2010

Easy Felt Pieced Snowman Holiday Ornaments


Even though the holidays for 2009 are officially over, I still like to spend some of my crafting time making holiday ornaments for next years packages. Yes that is right folks...I love to craft for the holidays all year long. I have a habit of attaching handcrafted ornaments to every holiday package that I wrap, so I need to work on ornaments often.

During the summer, I found a vintage craft magazine at my local thrift store for .10 cents and purchased it...it features 18 snowmen craft projects inside. The name of the magazine is CRAFTS and it's the November 2003 issue. (hopefully you can find one on the secondary market). If not, I think you can look at the photo's of my completed projects and perhaps create your own pattern.

On page 70 of the magazine is a project on how to make felt applique snowmen and then attach them to your homemade holiday card fronts. I decided to use their felt applque snowman pattern and turn them into tree ornaments/package toppers. I think they are sooo cute that I am now going to make a few for my holiday cards and scrapbook layouts. The pattern shows 3 different ways to decorate them...one with a stocking cap, one with a top hat and one with no jacket.

Each one is completely handsewn and pieced together and made from craft felt. It took me about an hour to make each one...so far I have made 9 of them.


~ Happy Crafting ~

Friday, January 22, 2010

How To Make Fabric Strawberries With Sparkles


A few weeks ago I decided to make some strawberries out of some red cotton fabric that I had left over from another sewing project. With spring coming, I thought they would look cute sitting in a ceramic bowl on my counter top. After I completed them, I covered them in some sparkly German Glass Glitter so they actually look beaded (and beautiful).

Here is what you will need to make them:

5" circle template
red and green cotton fabric
poly fiber-fill stuffing
green embroider floss and sewing needle
sewing machine and basic sewing supplies
German Glass Glitter
Mod Podge and a Foam Brush
Scissors

I used a round jar candle to make my 5" circle template pattern. Once you have your paper pattern, cut your circle in half. Using your half circle, cut out 2 pieces from your red fabric.

Fold your half circle in half as shown in the below photo and pin into place.

Using your sewing machine that has been set on the straight stitch, sew down the one straight edge of your fabric. (the wrong side of your fabric should be facing outward).

Your strawberry should now look like this:

Turn your strawberry right side out. Using thread and a hand sewing needle, run a gathering stitch through the top edges. Pull the gathering thread to help cinch up the top and stuff some poly fiber fill inside...then finish pulling your threads up and fasten off.


Now you can make your strawberry caps as plain or as fancy as you would like. I opted to go for plain...so I just drew an X shape onto a piece of paper and used it as my template. I then cut them out of green fabric.

I centered my green X's over the top of my strawberries and used green embroidery floss to attach them (by hand) with little tiny stitches. If desired, you can thread a 1 1/2" piece of 6-strand floss up through the center of your X to make a stem (I did) and knot it underneath before attaching the cap to your strawberry.

Once I had all of my strawberries done, I glittered them with some German Glass Glitter. I poured a little matte finish Mod Podge into a bowl and added 1 teaspoon of water to it. Using a sponge brush...I brushed this mixture over my berries. While it was still wet, I sprinkled a lot of 'fine grade' German Glass Glitter onto them and then set them onto a baking sheet to dry.

Now when I make strawberries I will do them in 3 sizes....after all, strawberries are never all the same size. I like to do 3", 4" and 5" diameter 1/2 circles for my templates.

~ Happy Crafting ~

Easy To Make Felt Valentine's Day Candy Box


Last week I had to come up with an easy to make Valentine's Day project to do with 11 to 13 year old girls. This project also needed to be made from felt and be handsewn. After pondering this for a day or two...I decided that our project would be this easy to make Valentine's Day candy box (cube) made from 3 different colors of craft felt.

Here is what you will need:

Red, White and Pink Craft Felt
Red, White and Pink Embroidery Floss
Blunt Tip Embroidery Needle and Scissors
4" square template

The first thing you need to do is make your 4" square template. Once you have your paper template...cut 5 squares from your red craft felt. Next, make another paper template that measures 3 1/2" square, you will use this smaller square to make your heart template. Fold the square in half and cut out a heart shape. Trace this shape onto white felt and cut out. Now, trim off a 1/4" from all sides of your paper heart shaped template so that its a little smaller than what it was before. Trace it onto red felt and cut out. Cut off another 1/4" from your paper heart template and trace your final heart shape out of pink felt.

Using 2 strands of red embroidery floss, hand stitch the word LOVE onto the center of the pink heart. Using 2 strands of pink floss, blanket stitch around the edges of the pink heart to attach it to the front of your red heart. Using 2 strands of white floss, blanket stitch your red heart to your large white heart. Finally...using 2 strands of red floss, blanket stitch your white heart to one of your red square felt blocks.

Using 2 strands of white embroidery floss, connect 4 of your square blocks to the 5th block to form a cube. Once they are attached blanket stitch up the sides and across the top edges. You should now have a cube (box) shape.

If you are not familiar with how to do a blanket stitch, you can certainly just whip stitch all of your pieces together.

Your new Valentine's Day Candy Box is now ready to be filled up with candy...but I do recommend that you fill it with wrapped candies so that it doesn't get soiled.


Wednesday, January 20, 2010

FREE Crochet Pattern - Owl Refrigerator Magnets!


If you love owls...then you will love these! I have been collecting owls since I was a teenager so when I came across this free crochet pattern two weeks ago, I just knew I had to find some time and crochet some up!

The pattern is designed by Myra Shaw and you can print out the pattern directly from her blog ---> HERE

While you are on her blog, check out all of her gorgeous free crochet patterns!

I was able to make up my owl refrigerator magnets in a matter of minutes (about 10 minutes per owl) using 2 strands of yarn and a size F crochet hook. (she used a size J). Once done, just glue on some magnets on the back side using tacky glue.

I didn't have any dark brown pipe cleaners on hand for the tree branch so I used black ones...which I think is passable :) For one of my owls, I chose to use some dark colored variegated yarn (the owl on the end) along with one strand of dark brown yarn and I think he looks fabulous!

Happy Crocheting~


Tuesday, January 19, 2010

Primitive Wax Chunky Snowman Basket or Bowl Filler


During the summer months, I was fortunate to find some old metal soap and candy molds at my local flea market. One of the molds was of a snowman and I just new I had to make some wax chunky snowman's using that mold. I finally dug out my mold and got busy with it a few days ago.

I had purchased a candle making wax kit a few weeks ago at my local craft store. I melted down my wax according to the box directions and added some vanilla candle scent. While my wax was melting, I placed some whole cloves in the metal mold where the snowman's eyes and buttons would be. When my wax was ready for pouring, I gently poured my wax into the mold. I left it harden for 2 hours (wanted to make sure it was good and hard) and then removed my snowman chunky from the mold.

I then cut down some of my homespun fabric scraps into 1/2" wide strips and tied them around my wax snowmen.

I now have my wax snowman shapes sitting in a primitive basket in my living room that is filled with waxed stars, dried pods and some pine cones.

Pretty easy project...took me about 20 minutes to melt and pour my wax and another 2 hours for hardening time.

~ Shelly ~

Monday, January 18, 2010

How To Make A Kitchen Towel Fabric Topper


If you are looking to make some fabric toppers for some of your kitchen hand towels, I think you will be pleased with this easy to make project. You can find inexpensive nice kitchen towels at your local dollar type of store.

Here is what you will need to make this project:

1 cotton kitchen hand towel
2 pieces of 6" square cotton fabric
5" square of cotton batting
large 1" diameter button
8" piece of cording or twine
Sewing Machine & Basic Sewing Supplies
Scissors

Place your two 6" fabric squares right sides together with the 5" piece of cotton batting sandwiched in between them. Using a 1/2" seam allowance, sew around 3 1/2 of the sides. Turn the square right side out and hand sew the turning hole shut with a needle and thread. Set aside.

Find the center of your kitchen towel and mark the center with a straight pin. Using your sewing machine, run a gathering stitch down the center width of your towel. Pull the threads up so that your gathered towel will fit the width of your fabric square. Pin your fabric square onto the gathered edge (center edge) of your towel and pin into place. NOTE: Your square should be diagonal on the fabric and not placed up and down (diamond shape). Use your sewing machine and run a straight stitch down the center of your diagonal from corner to corner. Make sure you back stitch to ensure its attachment.


Finish your towel by hand sewing on a 1" diameter button onto one corner of the fabric square and by sewing on hanging loop on the back corner.

~ Shelly ~

Sunday, January 17, 2010

Country Homespun Snowman Applique Kitchen Towel


During the winter season, I love decorating my home in a snowman theme...I leave my snowmen out until the middle of February before I finally put them away for the season.

A few weeks ago, I saw some cute homespun towels out in a retail store that had snowman appliques on them...however, they were blue towels and my country kitchen is in red. I decided to not purchase them and to go home and make my own...that way, they would match my red kitchen.

Here is how I made my own snowman applique kitchen towels:

17" by 26" piece of homespun cotton fabric
Sewing machine with coordinating thread

I ironed my homespun to remove wrinkles. I then ironed a 1/4" back around all four of my edges (to the wrong side of fabric) and then folded it over again by a 1/4" so that it will hide the raw edges of my fabric. I then used a 1/4" seam allowance and sewed around all four edges of my fabric using a straight stitch.

Snowman Applique

You can find free printable snowman designs online by doing a search for free coloring pages or head to your local dollar store and purchase a holiday coloring book. Cut out the design. Scan the design into your computer and print off a few copies. I then cut apart my copies...one piece for the body, one for each piece of his clothing and so forth...until I have a pattern piece for each piece that I will need to make my snowman applique.

You will then trace each piece onto your desired color of wool felt with a disappearing ink pen. Cut out your felt shapes. Start building your snowman by hand sewing on his clothing and accents. I chose to use tiny little stitches for attaching all of his pieces to his felt body. Once I had him completed, I attached him to my towel by doing a blanket stitch around him. I used two strands of black embroidery floss for my blanket stitching.

It sounds a lot harder than what it really is...fun and relaxing. I like to sew up my towels one day...then during the evening while I am watching TV, I will hand sew up my appliques.

~ Happy Crafting ~

Saturday, January 16, 2010

FREE Crochet Butterfly Refrigerator Magnet


Last week I was browsing online for some free crochet fridgie (refrigerator) magnet patterns and came across this free pattern over on the Around The Crochet Table web site.

I decided to print out the crochet instructions and sit down and make one for my aunt who just loves butterflies! You only need some variagated yarn, crochet hook size H, a pipe cleaner (chenille stem), tacky glue and a magnet.

This butterfly magnet took me less than 20 minutes to crochet and I am no expert at this crafting medium. The original pattern maker used pastel colored yarn and I went with a jewel-toned acrylic yarn and she used a size H crochet hook and I used a size F as I wanted mine a little smaller.

~ Happy Crocheting ~

Shelly

Friday, January 15, 2010

Giveaway - Handpainted Sunflower Tote Bag By Donna's Mailboxes


Donna from Donna's Mailboxes and More! is sponsoring our first giveaway here on the Passionate About Crafting Blog! Thank You Donna!

If you are like me, you love to purchase handcrafted items for your home and/or to give as gifts. When it comes to handcrafted gifts, I look for unique items that are of high quality and the items that Donna makes...certainly are that!

Donna is an artist and she paints on a variety of surfaces. If you visit her Web Site Store you will find some hand painted mailboxes, ceramic planters, flower pots, canvas tote bags, garden decor, stepping stones, wind chimes, holiday decor and so much more!

I personally own some sea shell items made by Donna...I have a large planter and a serving tray....both of which sit proudly in my guest bedroom. I love beachy things!

Donna has graciously donated one of her beautiful hand painted grocery tote bags in a sunflower design. You can read about the tote bag ---> HERE She sells her hand painted tote bags for $15.99 which includes free shipping! What a great gift for someone on your gift-giving list!

Thank you Donna at Donna's Mailboxes and More! For Sponsoring Our Giveaway!

Rules & Guidelines: This giveaway is only open to USA and Canadian Residents. Please read the Terms of Service Policy here on my blog before entering the giveaway. I have not been compensated in any way for this giveaway. This giveaway will expire at midnight EST time on Jan. 31st, 2010. The winner will be notified via email and will have 72 hours to respond to that email before another winner will be selected. Please let your email address at the bottom of each giveaway/contest entry post that you make. Thanks!

Main Giveaway Entry - You must do this main entry before doing the bonus entries! Visit Donna's Mailboxes and More and let me know what your favorite product is from her store.

Please leave a separate comment for each entry! The winner will be selected by random.org after our giveaway has closed.


Thank You and Good Luck!

~ Shelly ~

How To Make A Primitive Wax Dipped Wooden Star


I just love primitive and/or country home decor...so I wanted some new things for my primitive fix'ins basket and decided to make a few items myself. For this project, I had my hubby cut me out some wooden stars from 1/8" thick pine wood...you could go to your local craft store and buy unfinished wood shapes pretty cheaply.

I then purchased an inexpensive votive candle making wax kit at the craft store...instead of making votives...I melted down the wax (following the directions that came in the kit) and dipped my wooden stars into it. I had to use an old pair of tongs to dip them and then laid them on aluminum foil to harden. My wax kit came with 3 scented oils...vanilla, gingerbread and pumpkin...so I chose to use the vanilla with the white colored wax.

Once they hardened, I took some homespun fabric scraps and cut them into 1/2" wide strips and tied them around my wax dipped wooden stars.

I have several of these stars now sitting in one of my prim baskets that is filled with rose hips, pinecones and some dried pods.

~ Shelly ~

Thursday, January 14, 2010

How To Crochet A Beautiful Beanie Style Cap By Christa Jensen


Today I am featuring another guest blogger craft/crochet project by designer Christa Jensen who was gracious enough to share her crochet beanie cap pattern with us today. I think its totally adorable! Thank You Christa!

Beanie Cap With Style

Worsted Weight Yarn
J Hook or Size to Obtain Gauge

Gauge: 3in x3in = 7 rows x 5 dc st

NOTES: You will be crocheting in the openings of chain 2 stitches not in the tops of the stitches.

Repeat from * to * to last stitch. Sl St always to the top of the beginning chain 2. Also you can change color to make this multi color. I did this on row 10 and again on row 14.

Begin: Chain 4, sl st together to form a loop

Row 1: 8 dc in ring, sl st together, chain 2 (counts as dc here and through out)

Row 2: Chain 2, *dc in next opening, chain 2, 2 dc in each opening (chain 2 between ea. dc)* dc in last opening, sl st together, chain 2

Row 3: Chain 2, *dc in next opening, chain 2, 2 dc in each opening (chain 2 between ea. dc) * dc in last opening, sl st together, chain 2

Row 4: Chain 2, dc in next 2 openings (chain 2 between ea. dc) *2 dc in next opening, 1 dc in next * ending with 1 dc in last opening from the round sl st together, chain 2

Row 5 thru 10: chain 2, * dc in openings (chain 2 between ea. dc) to end* sl st together, chain 2

Row 11: chain 2, skip first opening, dc in next opening, * dc in openings (chain 2 between ea. dc) to next to last opening* skip last opening, sl st together, chain 2

Row 12: chain 2, *dc in openings (chain 2 between ea. dc)* sl st together, chain 2

Row 13: chain 2, skip first opening, dc in next opening, * dc in openings (chain 2 between ea. dc) to next to last opening* skip last opening, sl st together, chain 2

Row 14: chain 2, *dc in openings (chain 2 between ea. dc)* sl st together, chain 2

Row 13: chain 2, skip first opening, dc in next opening, * dc in openings (chain 2 between ea. dc) to next to last opening* skip last opening, sl st together, fasten off

This pattern is copy written by Christa K. Jensen aka Chrissy Jensen and Quirky Crafter. You may not distribute this directly in any way electronically or print other than for your personal use of the pattern itself, but can link to this pattern to share. You can by no means sell this pattern what so ever or use it in a collection to sell what so ever!!

This is an original design by Christa Jensen.IF you find any errors until then please contact me.You may share this as long as the byline stays intact. See my site Quirky Crafter for information about selling derivative works.

Creative Commons License
This work is licensed under a Creative Commons Attribution-Noncommercial-Share Alike 3.0 United States License.

Wednesday, January 13, 2010

Play Food - How To Make A Felt Sandwich Free Pattern


As part of my ongoing series on how to make felt play food for your little girl to play with...here is my next installment which is a delicious looking sandwich which consists of: 2 slices of bread, piece of cheese, lettuce, bologna and a tomato slice. All of these pieces are made from felt.

To Make The Bread Slices:

You will need 2 sheets of white felt and 1 sheet of tan felt
White cotton embroidery floss
low-loft quilt batting

Pattern: I made my own pattern by tracing around a slice of bread onto a piece of printer paper. Once you have your shape, cut out on your traced line.

Cutting The Felt: Using your paper bread slice pattern, cut two pieces from white felt. For the bread crust, you will need a tan colored strip of felt that measures 1/4" wide by the circumference of your bread slice. I also added a 1/4" to my circumference measurement so that I could over-lap my seam while sewing.

Hand-Sewing: I used 2 strands of cotton embroidery floss for all of my stitching. Starting at the bottom of your bread slice, blanket stitch the tan felt strip to the white bread slice. You will want to blanket stitch the whole way around and fasten off. Place your other white piece of felt on top and blanket stitch it to the tan felt but stop once you reach the last corner. I cut down a piece of quilt batting to measure slightly smaller than my bread shape. I folded it in half and placed it inside my sandwich. Once it was flat inside the sandwich, I finished my blanket stitching and then fastened it off.

You will need to make 2 complete bread slices.


To Make The Cheese Slice:

My cheese slice measures 4" square, you can make them any size you would like. You will need 2 squares cut from yellow felt. You will also need yellow embroidery thread and a sewing needle. Place the squares together and use a blanket stitch and go around all 4 sides of the cheese slice. When I do the stitching, I use 2 strands of cotton embroidery floss.

To Make The Bologna Slice:

Make a circle pattern by tracing around a 3 1/2" diameter drinking glass. You will need two 3 1/2" diameter circles cut from pink felt. Using two strands of pink embroidery floss, blanket stitch the two circles together to make your bologna slice.

To Make The Lettuce Leaf:

I drew a 4" diameter square onto printer paper and then used scissors to cut out what looked like lettuce. Basically, you just round off your square in an uneven scalloped edge cutting. Trace that shape onto two pieces of olive green felt and cut them out. Place the two shapes together and then use two strands of olive green cotton embroidery floss and blanket stitch around the edges.

To Make The Tomato Slice:

You will need 1/2 sheet of red felt and a 1/4 sheet of pink felt. For my pattern, I traced around a drinking glass to make a 3 1/2" diameter circle. I then traced that circle onto two pieces of red felt and one pink piece of felt. I then used my scissors to cut just a tad off of the pink felt so that my pink circle was slightly smaller than my two red felt circles. On a piece of scrap paper, I hand drew a tear drop shape that measures just shy of 1" in length. I used this tear drop paper pattern to cut four tear drops out of the center of one red felt piece (see photo).

Next, sandwich the three pieces together (the two red pieces on the outside and the pink between them). Using two strands of red embroidery floss, blanket stitch around the outer edge of your tomato slice. Once finished, use two strands of floss and tiny whip stitches to whip stitch around the tear drop shaped cut outs but just connect the stitch to the pink felt, don't go all the way through to the back.

That's it! A pretty easy way to make a felt sandwich for your faux food toy play sets!

You can find the rest of my faux foodie patterns ---> HERE Please click on FOLLOW MY BLOG so that you will be notified of new faux foodie patterns. I try to post a new one every week to 10 days :)

~ Happy Crafting ~

Tuesday, January 12, 2010

FREE Primitive Snowman Ornies Bowl Fillers By Barefoot Primitives


A few weeks ago, I was browsing around online for some free primitive snowman sewing patterns and came across a beautiful pattern by: Barefoot Primitives
and decided to download, print and make the project.

Her pattern is really easy to use and follow. These snowman ornaments and bowl fillers work up really quickly.

When I made mine (using her pattern) I decided to omit the twig arms...and leave mine arm-less as I liked the look of it better. In addition, I added mica (glitter) to mine after they were completed as I like the 'twinkle' on them. Some of the ones I made...I did hand stitched eyes and buttons and on other ones I used black round beads that I picked up at the craft store.

You can grubby them up with coffee stain or leave your Warm and Natural cotton batting plain...I did them both ways although my photo shows a prim one.

While you are visiting the Barefoot Primitives Web Site, take a look at her other goodies. She has completed products and also patterns available for you to purchase.

I really enjoyed making the snowman bowl fillers/ornies!


Country Homespun Hearts Throw Pillow - FREE Pattern


If you are looking for a quick and easy sewing project, I think you will appreciate this one. Today...I am posting how I made an easy Country Homespun Fabric Pillow that has an attached applique that says 'Homespun Hearts' on the front of it.

I think this little accent pillow makes a great gift or make one for yourself.

Here is what you will need to make this project:

2 pieces of homespun fabric that each measure 12" by 9 1/4" in size
Tea-Stained Muslin or Tea-Stained Cotton Broadcloth (3 3/4" by 5 1/2")
Poly-fiber fill stuffing
Sewing Machine and basic sewing supplies
Cotton Embroidery Floss
Disappearing Ink Pen

I decided to make my pillow in a blue color scheme so I chose blue homespun fabric and blue embroidery floss to match it.

Pattern: On a piece of printer paper that measures 3 3/4" by 5 1/2" in size, write the words "HOMESPUN HEARTS" as shown in the photo. This will become your pattern so center it on your piece of paper. You will then use your disappearing ink pen to transfer the pattern onto your tea-stained muslin. Use 3 strands of embroidery floss and stitch your wording. Once done, use an iron to iron back 1/4" on all edges to the back side of the fabric. (this will hide your raw edges). Next, machine stitch around the edges using a beige colored thread...so that it blends in with the color of your muslin. (you can also hand-stitch it if you would like). Now set this piece aside and work on your pillow.

Place your two pieces of homespun fabric right-sides together and sew around 3 1/2 of the edges. Turn right side out and insert the stuffing. Once done, sew the opening closed with small blind stitches.

It is now time to attach your stitched panel to the front side of your pillow. You can hand stitch it on or use fabric glue, the choice is yours. I chose to hand stitch mine on.

~ Happy Crafting ~

Shelly

Monday, January 11, 2010

Crochet Mini Mitten Refrigerator Magnet or Ornament Pattern


Several years ago my aunt gave me instructions (she wrote them down for me on a piece of paper) on how to crochet mini mittens that you can turn into refrigerator magnets or holiday tree ornaments. I don't know if it was her original pattern or if she got it from someone else.

With that being said, I am going to post the instructions for you. You can crochet one and glue a magnet on the back to turn it into a refrigerator magnet or you can crochet 2 of them, tie them together and hang them onto your Christmas tree.

Crochet Mini Mitten Pattern

Crochet Hook size F
Multi-Colored Holiday Yarn
Scissors

Note: You will want to work in the back loops unless otherwise stated in the pattern.

Row 1: Starting at the cuff of your mitten, chain 6, sc in 2nd chain from your hook, sc in the last 4 chains, turn. (total of 5 sc)

Row 2-12: Chain 1, sc in each stitch across, turn.

Row 13: You will want to hold the first and last rows together, matching up the stitches, work through both thicknesses, chain 1, slant stitch in each stitch across, do not turn.

You will now be working in rounds instead of rows.

Round 14: For hand, working in end of rows on the cuff, chain 1 , (sc in next row, 2 sc in next row) around, join with a slant stitch in the first sc. (18 stitches)

Rounds 15-17: Chain 1, sc in each stitch around, join as before.

Rounds 18: sc in first stitch, sc in the next 10 stitches, 2 sc in next stitch and then leave the last 6 stitches unworked, join. (13 stitches)

Rounds 19-21: You will repeat rounds 17 and then 16 alternating between the two but starting with round 17 and then ending with round 17.

Round 22: Work this round in both loops, chain 1, sc in each stitch around and then join.

Round 23: Work this round in both loops, chain 1, sc in each of the first 2 stitches, sc next 2 stitches together, (sc in each of next 2 stitches, sc next 2 stitches together) 2 times, sc in last stitch, join.

Leave a 8" yarn tail for weaving and fasten off. Weave end through stitches of round 23, pull to gather, secure the end.

To Make The Thumb

Round 1: Working this round in both loops, sc in first unworked stitch on round 17, sc in next 4 stitches, 2 sc in last stitch, join with a slant stitch in first sc. (total of 7 sc).

Rounds 2-3: Work these rounds in both loops, chain 1, sc in each stitch around, join as before. At the end of the last round, leave 8" of yarn for weaving, fasten off. Weave end through stitches of round 3, pull to gather and secure your end.

Once done, take some tacky glue and glue a magnet onto the back and stick your pretty little crochet mitten on the front of your refrigerator. If you want it to be a tree ornament, thread some satin ribbon or extra yarn through the top to make a hanging loop.

Optional: Cut a 5" piece of solid green yarn and thread it through the stitches to make an accent bow using a tapestry needle. (see photo for placement).

~ Happy Crocheting ~

Shelly

Ps. If anyone comes across the original designer of this pattern, please let me know as I am not sure if its original to my aunt or not.

Sunday, January 10, 2010

Play Food - How To Make Felt Green Beans or Pea Pods


My grand daughters play felt food collection is growing by leaps and bounds! For this weeks installment, I chose to make felt pea pods...although my husband says they look like green beans. The truth of the matter is...I think they can be used for both!

Here are the supplies you will need:

Olive Green Felt
Olive Green Cotton Embroidery Floss
Small Amount of Poly-Stuffing
Scissors
Ruler

Pattern: I free handed my own pattern which measures 7/8" wide by 2 3/4" long, so basically rectangular in shape. Using your scissors, slightly trim off some of the paper so that you end up with a curvy bean shaped piece.

Next, you will use your pattern and cut two bean shapes from your green felt. Using two strands of cotton embroidery floss, hand sew around your piece...before fastening off, insert some fiber-fill stuffing. Please Note: you want to pack the stuffing in firmly so that it gets buldgy and bumpy so that it will resemble a real bean/pea pod. Once its packed in...finish sewing it shut and fasten off by hiding the ends of your floss inside of the pea pod.

You can use your finger to shape your felt pod and it should hold its shape like mine do.

You can find the rest of my felt play food patterns ---> HERE

~ Happy Crafting ~

Saturday, January 9, 2010

Adoreable Country Primitive Spring Chicken Shelf Sitter


A few weeks ago I found this vintage unused pattern at one of our local thrift stores for .50 cents and decided to purchase it. I love vintage patterns, especially when they are cheap!

This pattern is copyright 1993 by Plain Jane Creations out of Shoreview, MN. I tried to find a web site, but couldn't locate one. The pattern is #117 and is titled 'The Mc Clucks' and its too cute.

After lunch today, I finally had time to sit down and do some sewing and decided to do this one since I had all of the supplies on hand.

Her pattern was pretty easy to follow...however, I don't recommend making your own orange binding to make the chicken legs, it was very tedious so next time I will purchase the single-fold binding at the store and use it to save time and a headache LOL. She used white cotton fleece to make the chicken wings and I opted to use Warm and Natural batting which worked out perfectly fine. She also made a wire hanger to hang hers...I opted to make mine a shelf sitter as I plan on sitting him on a shelf come spring when I do my spring and Easter displays. Other than those changes, I pretty much followed her pattern and instructions.

I think Miss McCluck turned out way cute and I am considering making some for my spring craft shows. What do you think?

I am not sure what other patterns this designer has made...but I rate this pattern packet a 7 out of 10 stars on ease of use and design.


Note: I have not been compensated in any way for this pattern/project review. I personally purchased the pattern and used it. If you purchase it, your opinion and use might differ from mine.

Friday, January 8, 2010

Crochet Project - Brimmed Ear Warmers By Christa Jensen

Wow...what a great crafty guest blogger post for this week. If you love to crochet, I think you will absolutely fall in love with this project by guest blogger Christa Jensen. Thank you Christa for sharing your wonderful project with us!

Here is what you will need:

Worsted Weight Yarn
J Hook or Size to Obtain Gauge

Gauge: 3 to 3 ½ inches width. To gauge the circumference of the head use a scrap piece of yarn to measure around the largest part of the head. Decrease final measure by a half inch for the snug fit.

NOTE: You will chain the amount that equals the length of yarn, sl st together (make sure not to twist the chain)

1st Row: Ch 2, hd in same st, *hd in ea ch* sl st to top of begin hd (not top of chain 2)

2nd – 6th Row: Repeat 1st Row

Fasten off.

Edging Top: Fasten onto chain row, chain 1 single crochet in same st, *single in next st* sl st to beginning sc. (repeat one more time.)

Edging Bottom with Brim: Fasten on bottom (where you finished off hdc rows) chain 1 single crochet in same st, *single in next st* sl st to beginning, fasten off

For Brim- Row 1: Fasten on (where you finished off), ch 1, sc in same st, hdc in next, 2dc in next, *1 dc in next st, 2 dc in next st* repeat ** 5 times, hdc in next st, sc in next st, fasten off.

For Brim- Row 2: Fasten on (where you finished off), ch 1 sc in same st, sc around to start of brim, sc in first st of brim, hdc in next st, 2 dc in next st, *dc in next st, 2 dc in next st* repeat ** 8 more times, hdc in next st, sc in next and around. Fasten off.

Weave in all ends.

This is an original design by Christa Jensen. This is written from memory of a custom ear warmer I came up with for a Christmas present; it has not been tested yet for accuracy. It will be updated should it need to be as I have orders coming for 2 more. IF you find any errors until then please contact me.This pattern is free to use for personal projects only. You can not distrubute the works except by linking it with this byline. You may not sell items made from this pattern.
Creative Commons License
This work is licensed under a Creative Commons Attribution-Noncommercial-No Derivative Works 3.0 United States License.

Handmade Friendship Floral and Ribbon Note Cards

A few weeks ago, I made a set of these quick and easy friendship theme'd note cards for one of my very good friends who loves handmade cards and paper goods. I was able to make a set of 4 note cards in less than 1 hour.

I used standard size white blank cardstock note cards which I purchased at my local craft store with matching envelopes.

I had a piece of 12x12 striped scrapbooking paper in muted tones that I cut down to size to fit my card front. I had a spool of some olive green sheer 1 1/2" wide ribbon and cut it slightly longer than my card width. I then used glue dots to attach the ends behind my striped paper and then used a glue stick to attach the paper to my card front.

I then got into my flower stash and found these pretty olive green flowers that measure 1 1/2" in diameter. I didn't like the center stem so I removed it and attached a tiny faux pearl in the center of the flower. I used glue dots and affixed them to my card front.

Finally, I had some left-over 3-D embellishments from a few friendship pages that I had scrapbooked a month before and used one on the front of each note card. They were self-adhesive embellishments so that saved me time!

I decided to leave the inside of the note cards blank but I did decide to decorate the envelopes with some floral rub-ons that I had left from another project. Once all 4 cards were completed, I put them in a little box along with a little note about how much I appreciated my friend and our friendship.

Now if you wanted to get fancy with them, you could ink your paper edges, stamp on some wording or add other embellishments. I wanted quick and simple for this project.

I just love easy and quick projects that use up my left-over scrapbooking supplies.

~ Happy Crafting ~

Thursday, January 7, 2010

Play Food - How To Make Felt Carrots For Your Foodie Play Set


Here is my next installment on how you can make felt carrot slices and a whole carrot for your felt foodie little girls kitchen play sets. The carrot slices are hand sewn and the whole carrot is machine sewn.

Supplies Needed To Make Both Items:

Light Orange, Dark Orange and Dark Green Felt
Orange Embroidery Floss
Small Amount of Poly-Fiber Fill Stuffing
Sewing Machine and Basic Sewing Supplies
Scissors

Carrot Slices: You will need to draw a 1 1/2" diameter circle and a 1" diameter circle onto printer paper. These will serve as your patterns. From dark orange felt, cut two of the 1 1/2" diameter circles and from your light orange felt, cut one of the 1" diameter circles. Using a tiny whip stitch, attach the light orange circle to the center of one of your dark orange circles by stitching around the edge. Once completed, lay the second dark orange circle under it and use two strands of orange embroidery floss and blanket stitch around to attach both circles to one another. Right before you finish, add just a tad of fiber-fill and then finish your blanket stitch.

Large Whole Carrot: On printer paper, free hand a semi-triangular shape to represent your carrot. Mine measures 6 1/4" long by 2 1/4" wide at its widest point. I was able to easily free hand my triangular shape. This will now serve as your pattern. Pin pattern to a double layer of orange felt and cut out. Using your sewing machine, sew around the pattern using a 1/4" seam allowance, leaving the top open (un-sewn). Using 2 strands of embroidery floss and a sewing needle, hand gather to top edge, right before fastening it off, stuff some fiber fill down into the carrot, then pull gathering tight and fasten off. From dark green felt, I cut four strips that measure approximately 1/4" wide by 5" long. I center each strip over the top of the carrot and hand stitched them into place using cotton embroidery floss. If you feel they are too long, you can shorten them.

You can find the rest of my felt foodie patterns ---> HERE I will be posting many more to my blog during the next few weeks so please follow my blog or bookmark it so you can find them.

~ Shelly ~

This pattern, photo and instructions are copyright 2010 by Shelly Hill, All Rights Reserved. If you would like to reprint my instructions and pattern, please contact me. You may post a link to my site/blog post from yours but you can not use my photo or text without my permission.


Wednesday, January 6, 2010

FREE Primitive Cat Sewing Pattern!

When it comes to sewing...I love to make primitive items for myself, friends and the craft shows I participate in. A few weeks ago I found this FREE online pattern to make a primitive cat over on the Pattern Mart web site ---> HERE The designer of the pattern is Shweet Potato Dolls N Patterns.

I think they would be cute to sit out as Halloween decorations too!

This pattern is a free online printable pattern that also includes a primitive owl pattern. She says the pattern is for ornies and bowl fillers...although I think the cats look great sitting in a primitive basket which is what I have done with the ones I made. (see photo above of them sitting in a primitive basket that is filled with dried pods and pinecones).

I made my cats using vintage tan tweed fabric that I purchased at the thrift store a few months ago. For his nose, I used a solid piece of brown cotton fabric and his eyes are made up of warm and natural batting and vintage black or brown buttons. I was able to sew several of these adoreable primitive cats up in just one afternoon. Since that time, I have sold about 15 of them at a local craft show last month. The finished size of the ones I have been making measure 6" wide by 4 1/2" high.

So...if you love primitve cats, head on over to the Pattern Mart web site and download the free cat and owl pattern.


Tuesday, January 5, 2010

Country Homespun Friends Stitchery Accent Pillow


A few weeks ago I made this little accent pillow for one of my dear friends who was feeling down at the time. I thought it would make a great "I am thinking of you" gift to cheer her up.

Once you complete this accent pillow, it will measure approximately 6 3/4" wide by 7 1/4" tall. I used a 1/4" seam allowance during the sewing construction.

Here are the supplies that you will need:

6" by 6" piece of tea-dyed cotton muslin fabric
1/4 yard of cotton homespun fabric
Embroidery floss to match homespun fabric
Sewing Machine and basic sewing supplies
Disappearing ink tracing pen
Small Embroidery Hoop
Small amount of poly-fiber fill

The saying that I stitched on my accent pillow says: "Side by side or miles apart, Dear friends are always close at heart." Please see photo for placement of wording.

Pattern: On a piece of paper that measures 4 1/4" by 4 1/2" in size, write out the wording as shown in the picture. You will use this as your pattern.

Trace the words onto your muslin fabric with a disappearing ink pen and then place fabric in a small embroidery hoop. Using 3 strands of embroidery floss and an embroidery needle, stitch the wording using small straight stitches.

From cotton homespun fabric, cut four strips that each measure 2 1/2" by 7 1/2", these strips will be used to make the border. Using your sewing machine, sew each border strip onto your muslin fabric. You will need to trim them down once you have them sewn on so that you have a complete rectangle.

Once your front panel of the pillow is completed, measure it and cut a matching back piece out of homespun fabric. Pin the two pieces right-sides together and sew around 3 and a 1/2 of the edges. Turn pillow right-side out and stuff with poly-fiber fill. Using a sewing needle and matching thread, sew the opening shut with a blind stitch.

Adding the accents: From homespun, cut a strip that measures 1/2" wide by 8" long and tie it into a bow. Trim ends of the bow and then hand sew it onto the top center of your pillow. If desired, cut a tiny heart from homespun and glue it to the front of the pillow with fabric glue. (mine is near the word 'always').

~ Happy Sewing ~

How To Make Paper Cupcake Treat Box Party Favors


Back in April 2009, I held a large baby shower for my daughter who was pregnant with her first child. We were expecting 65 guests and ended up with 69...so over all, it was a huge baby shower!

Anyway, we did a theme...she wanted a care bears and a cupcake girlie theme so that is what we did. I wanted to make some cupcake treat box party favors and found a cupcake template over on the Paper Wishes web site ---> HERE I purchased the template and it arrived about a week later.

The template has 2 different designs on it along with a little cupcake shaped hang tag. I went out and purchased scrapbooking paper to go along with the pink theme of the baby shower (yes, she had a baby girl). The template has a paper cherry part to it but I decided to use red and pink 1" pom-poms for our cherries and just tacked them on top of the paper cupcakes using scrapbooking glue dots.

It's hard to tell by my photo's (flash issues) but I used baby pink paper to make the cupcake and black paper with a pink print for the cupcake holder.

Inside the cupcake party favor treat boxes I put candies and little baby novelty items. It took me about 6 weeks to make up 70 of the cupcake boxes but it was well worth it as they were a huge hit at my daughters baby shower.


~ Shelly ~

Monday, January 4, 2010

Play Food - How To Make Felt Toaster Pastries


As part of my weekly installment on how to make faux food (felt foodie items) for your little one to play with, here is how I made my felt toaster pastries aka PopTarts.

Supplies Needed:

Light Tan, Pink and Vanilla Colored Craft Felt
Light Tan, Vanilla and Pink embroidery floss
Blunt Tip Sewing Needle and Scissors
Ruler
Tiny Pink Seed Beads (I used pink ones with silver centers)
Pinking Sheers (optional)

Pattern: On printer paper, draw a rectangle that measures 3 1/2" wide by 4 3/4" tall. Draw a second rectangle (icing) that measures 2 3/4" wide by 3 3/4" tall.

Cutting The Felt: For each toaster pastry, you will need two of the large rectangles cut from tan colored felt. Decide if you want your pastry to have pink or vanilla icing and cut one from the coordinating felt color.

Assembly: Using two strands of pink embroidery floss, hand sew tiny pink seed beads onto your smaller piece of felt to represent strawberry sprinkles. Once you have completed that, use two strands of embroidery floss (same color as your icing) to hand sew on your icing felt to one of your tan felt pieces. I used a tiny whip stitch to do this on the pink one and a blanket stitch on the vanilla one. (either stitch will work just fine).

Once you have that completed, lay your two pieces of tan felt together, lining up their edges and blanket stitch around the entire pastry using two strands of tan embroidery floss.

Optional: If desired, you can use pinking sheers to cut out your icing felt to give the edges a zig-zag appearance.

You can find the rest of my felt foodie patterns ---> HERE I will be posting many more to my blog during the next few weeks so please follow my blog or bookmark it so you can find them.

Happy Crafting,

~ Shelly ~

The photo, instructions and patterns are copyright 2010 by Shelly Hill, All Rights Reserved.

Sunday, January 3, 2010

Easy Felt Valentine's Day Beverage Coasters Pattern


If you are looking for a fast and easy craft project that you can make for Valentine's Day, consider making some felt beverage coasters. These coasters only take a handful of crafting supplies and are completely hand sewn.

Here are the supplies that you will need:

Red and Pink Craft Felt
Red, White and Pink Cotton Embroidery Floss
Scissors
Blunt Tip Sewing Needle
Ruler
Hand Drawn Heart Pattern (our pattern measures 3 1/2" tall by 3 1/2" wide).

Step 1: Cut your pink felt into 4 1/2" squares. You will need two squares for each coaster that you make. From red felt, cut one heart shape for each coaster.

Step 2: Using two strands of pink or white embroidery floss, hand stitch the word hugs, love or xoxo onto your red felt heart. Once that has been completed, use two strands of pink embroidery floss and blanket stitch the red heart to the center of one pink square. You will do a blanket stitch around the entire circumference of the heart which will attach it to the pink square.

Step 3: Place your heart square (right side up) against a solid pink square and use two strands of red embroidery floss and blanket stitch both of your squares together. Once finish, fasten off the ends of your floss by hiding them inside the coaster.


This pattern, photograph and instructions are copyright 2009 by Shelly Hill, All Rights Reserved. If you would like to use this pattern on your web site, please contact Shelly for permission.

Saturday, January 2, 2010

Primitive Star Shaped Santa Holiday Ornament


Yeah...I know...Christmas is over and its a new year...but I just had to share this Primitive Style Santa Ornament that I made a few weeks ago. I think he is too cute! I used a vintage McCall's Crafts Pattern that is #707 and titled "Your Holiday Home" and its copyright 1991. I hope you can find this pattern some where as I just love it because you can make Heart Shaped Holiday Wreaths, Tree Table Centerpieces, Star Shaped Santa Pillows along with 5 different holiday tree ornaments.

I decided to make the star-shaped Santa Ornament but I wanted him in more of a primitive style so I used cotton homespun fabric and coffee-stained cotton muslin fabric. Once I had him made, I lightly sprayed him again with some coffee liquid mixture and left him dry. Finally, I brushed on a very thin layer of matte finish Mod Podge and sprinkled some clear German Glass Glitter onto his muslin beard. I left him completely dry and then hung him onto our holiday tree.

NOTE: When I brushed his beard with Matte-Finish Mod-Podge, I mixed a little of the Podge in a bowl with some tap water to thin it down some...used a sponge brush and lightly brushed his beard with the mixture. Then I sprinkled on the German Glass Glitter.

Once I made one...I couldn't stop and made a total of 14 of them in this Primitive Style and sold them all. I will be definately making them again for Christmas 2010.

~ Happy Crafting ~

Friday, January 1, 2010

Scrapbooking - Casino Page Layout


Back in Feb. 2008, I went to Atlantic City, NJ for a few days to visit with my good friend Joan. We stayed at the Trump Marina Resort and had a great time...even though we had a little snowfall and it was cold. While we were there, I found this cute pack of Casino theme'd 3-D Embellishments and just knew I had to have them. Once we got home, I decided to make a simple page to showcase the embellishments that I had purchased.

Over-all, I accomplished my mission of a quick and easy page by using those cute embellishments. Too bad....we didn't win any massive amounts of money while in Atlantic City!

The title was printed from my computer onto cardstock. The rest of the words are rub-on transfers. I ripped my pages as I like the torn page edge look and then inked them. Like I said, I wanted to show off the embellishments that I had purchased down there and wanted a very simple and clean page layout.