Tuesday, April 30, 2013

Craft Project - Scrabble Tile Framed Wall Hanging


My future son-in-law is turning into a really crafty guy and today, I just had to show you all what he made for my daughter as a Christmas present this past year. Even though he gave it to her for Christmas, it would make a great Valentine's Day, Mother's Day, Easter, Wedding or Birthday gift too!

Scrabble Tile Framed Wall Hanging

Supplies List:

Wooden Frame (your choice of size, his is very large)
White Photo Mat (or color of your choice)
Piece of Heavy Duty Cardstock (color of choice to fit inside the photo opening of the mat)
Lots of Wooden Scrabble Tiles
Glue Dots ( adhesive used in scrapbooking & cardmaking)

Directions: For the project, he spelled out their names, daughter's name and words that are related to love, trust, friendship, etc. (sorry for the flash in my photo). He spelled out the words he wanted and then arranged them onto the black piece of heavy duty cardstock using the glue dots on the back of each wooden tile to hold them in place. He then took the left-over wooden Scrabble tiles and just randomly placed those letters onto the white photo mat as shown in the photograph above. He then assembled everything and slipped it all into a black wooden picture frame. On the backside of the frame, he wrote a love letter to my daughter directly onto the back of the frame which is super sweet!

My daughter has her new piece of handmade "art work" hanging up in their family room and I think it's absolutely GORGEOUS! My photo doesn't do it any justice thanks to my flash on the camera bouncing off of the glass. I will try to get a better photo of it and update this blog post when I do.

Monday, April 29, 2013

Wood Staining Made Simple with Flood.com

This is a Sponsored post written by me on behalf of Flood® Wood Care for SocialSpark. All opinions are 100% mine.
Since we have moved into the new house, we have been busy remodeling and getting everything ready indoors.  Now that Spring is here, it is time to get the outdoor projects going!  One this that I would love to have is a beautiful overhang with a comfortable wood bench for lounging, stained in a wonderful rich redwood color, just like in the pictures.  I have the perfect spot in my backyard that I am going to have my hubby build the lattice style overhang so we can have some shade from the hot sun.  The beautiful bench would be a welcome place to sit and relax to enjoy the cooler evenings.
Flood Stain OverhangFlood Stain Bench
Thankfully the wood stain from Flood® Wood Care makes it easy to finish a beautiful project like the ones I want, super fast with beautiful results. Flood means Staining Made Simple because they are designed to restore, protect and beautify natural woods and other surfaces. I was over on their site looking at all of the awesome projects, inspiration and DIY tips for starting and finishing a staining project.  They have a Staining made simple guide to help you get the results you want quickly and easily.  Check it out on their site.
Flood Stain Project Helper
Plus you can enter the Flood Better Backyard Sweepstakes for a chance to win a $1,500 gift card or one of 12 $10 gift cards given away daily! All you need to do is like Flood® Wood Care on Facebook to enter, and share the sweepstakes for more entries! Also, follow Flood Wood Care on Twitter for helpful tips about staining and other ways to make the most of your outdoor living space.
Take a few minutes to plan your next staining project with the help for Flood.  We did and I cannot wait to see the end result!

*Disclaimer* NO PURCHASE NECESSARY. Legal residents of the 50 United States of America and (D.C.) 18 years and older. Ends 5/17/2013. To enter and for Official Rules, including odds, and prize descriptions visit www.facebook.com/flood. Void in Puerto Rico and where restricted or prohibited. This Sweepstakes is in no way sponsored, endorsed or administered by, or associated with Facebook. You understand that you are providing your information to Sponsor and not to Facebook.    
Visit Sponsor's Site

Friday, April 26, 2013

Craft Project - Beautiful Beach Craft Nature Bowl for your Home Decor


My husband and I are pretty passionate about traveling, so when we hit the road for a vacation, day-trip or just go out hiking for the day, we look for natural things in our environment to collect and bring back home.

Twenty years ago we started this "nature" or "natural" collection of things and over the years we have collected things like: duck feathers, bird feathers, pine cones, acorns, dried flower petals, sea shells, small river rocks, small pieces of drift wood, etc. If the item has a hard surface like a seashell or river rock, we will take a Sharpie marker and write the date onto it along with where we found it.

We place all of these "nature items" in what we call our "Family Beach Nature Bowl" which is an old pasta jar with wooden lid. It's quite large and at one time, it held 1 gallon of dried pasta noodles. We simply washed it out and decorated the bowl with some dried raffia to keep with our "nature" theme.

Two years ago my hubby found a dollar bill on the beach in New Jersey and he added the dollar bill into the bowl too...although, I have been trying to remove it since it's not a natural thing, he insists that it stay within the bowl! LOL

My photo of our Family Nature Bowl looks small, but trust me, it's a very large old glass pasta container. It's a great little "family craft project" that won't cost you a dime since you are recycling an old glass container and filling it up with mementos that you find out in nature.

We add small items to our collection every year and it's always fun to sit & talk about the things we have already collected and the new things that we are adding to it. We keep ours sitting on our fireplace mantle most of the year and then during the holidays we move it onto a side table, so that our mantle can be dressed up for the Christmas holiday.

If you love to travel and/or spend a lot of time outdoors (hiking, camping, walking the beach, etc.) then this is one easy and frugal home decor craft project that you can start right away and build upon it over the years. Enjoy!

Thursday, April 25, 2013

Spring Gardening with Scotts Florida Select Mulch

This is a Sponsored post written by me on behalf of Scotts Miracle-Gro for SocialSpark. All opinions are 100% mine.
 photo 6d50af2c-aba7-44e2-b0ed-d3510804d726_zps3aae88a5.jpgNow that Spring has arrived, I am itching to get outside and work on my flower beds and vegetable garden. Spring arrived a little early here in Pennsylvania and I need to get in-gear and get my gardening started.
My Spring flowers just popped up out of the ground 2 weeks ago and next week we will be planting our annuals. I ordered a slew of petunias, impatients, gladiolas, lillies and other flowers which will be arriving soon. Once they are in the ground, I will need to get busy mulching.
I have been looking at the Scotts Nature Scapes mulch as an option for my garden this year. I got online and found out that it comes in 3 colors (classic black, sierra red and deep forest brown). It's made from all natural forest products with no waste wood. This type of mulch is great for maintaining moisture, preventing weeds and helps your landscape look beautiful all year long.
If you live in Florida, you can check out the Scotts Florida Select Natural Eucalyptus Mulch which is proudly made in the U.S.A. Eucalyptus mulch is a sustainable alternative to Cypress and it re-grows 4-times faster making it a great eco-choice! I am all about sustainable gardening this year! How about you? 
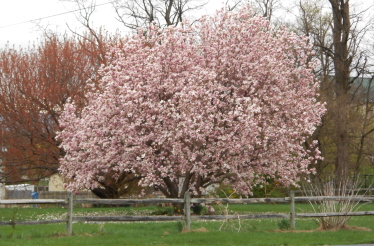
Plus, you can use the mulch around your trees, shrubs, in flower beds & even in your garden! You do want to keep it away from your home's foundation and don't place it right up against the tree trunks.
What is really cool about the Eucalyptus Mulch is that it's Florida plantation-grown and it's very easy to use. A 2 cu. ft. bag will cover a 6 to 12 sq. ft. area...that is a lot of coverage from just one bag. You can find the Scotts products nationwide in Home and Garden stores, so make sure you check them out.
What kind of gardening supplies do you need this year? I got my shovels, bulbs, fertilizer, rakes, flower seeds and everything ready to go...except for my mulch!
So lets hear from you! What kind of Spring gardening are you working on this year?
Visit Sponsor's Site

Monday, April 22, 2013

Crayola Experience - World's Only Interactive Crayola Family Attraction

Many of the children's craft projects that we publish here on the Passionate About Crafting blog involve crayons or some type of Crayola product. Today, we wanted to share with all of you some information about the Grand Opening of The Crayola Experience, coming soon!

To celebrate their 110th birthday, the 8 original crayons are throwing a birthday bash at the new fun-omenal Crayola Experience, the world's only interactive Crayola family attraction. Right now, they're out on a colorful adventure to spread the news, and you're invited to join the fun!

How can you join in on the fun? You can FOLLOW the crayons on their adventure, LEARN more about each color and enter to WIN a trip for 4 to celebrate their birthday and the Grand Opening of the all new Crayola Experience this coming May, 2013!

Visit the Crayola Facebook page and click "enter now" for your chance to be first in line when the Crayola Experience reopens.

The new Crayola Experience features four floors of new interactive exhibits and one-of-a-kind attractions that will bring the magic of color and your child's creativity to life! The winner will be among the first to experience the fun, along with a three- night, all-expenses paid stay. It's an experience your kids will never forget - and neither will you!

Disclosure: The great folks over at Crayola provided the information & graphic for this blog post. Thanks Crayola!


Seashells and Candle Beach Coastal Cottage Table Centerpiece


I needed a new table centerpiece for the upcoming Summer season and since I decorate most of my home in a coastal theme, I decided to make one myself. My entire centerpiece cost me only $11.00 to make and I am pretty happy with the results. In addition, it took me less than 5 minutes to construct and I personally think it looks really nice sitting on my dining room table.

We do a lot of entertaining outdoors during the Spring and Summer seasons and I will be moving it outdoors as the need arises. Here is how I made it.

Seashells and Candle Table Centerpiece

1 Round Natural Palm Plate
1 Tall Battery Operated Pillar Candle
2 Double AA Batteries
1 Bag of Natural Seashells

You can find natural Palm Plates at various retailers, I got mine online from Marx Foods who sells Palm Plates in a wide variety of shapes and sizes. I also purchased my tall battery operated pillar candle online and forget where I purchased it but it stands 6" tall and takes 2 double AA batteries. I purchased my bag of natural seashells at my local dollar store.

You simply place your battery operated pillar candle in the center of the palm plate and then stack up your seashells around it. That's it...nothing that is time consuming or hard to do. I had some leftover seashells and I glued them onto some dollar store clear acrylic napkin rings to match my table centerpiece.

Now to find some nice fabric placemats to go along with it and I will be pretty happy! Enjoy!

Moms Are Loving the Mombo Nursing Pillow!

This is a Sponsored post written by me on behalf of Comfort and Harmony. All opinions are 100% mine.
We found out last month that our daughter is expecting child #2 in about 6 months and we are really excited to become grand parents again. Our first grandchild was born 4 years ago and since then...we have been waiting for this exciting news!

We are very hands-on grandparents and spend a LOT of time with our grand daughter. She is over at our house at least 4 times a week and it will be no different when grandchild #2 arrives in early Fall. With that said, I have already been out shopping for new baby supplies and products.

Our daughter will again be breast feeding the new bundle of joy and I am thinking about getting her the mombo nursing pillow that I have been hearing a lot about. I saw a bunch of positive reviews on this infant nursing pillow online and I think it will be the one that I purchase for her to use.

The nursing pillow has a 2-sided design called FirmaSoft and each side offers a different nursing experience. One side is perfect for when you are breast feeding the baby and the other side is perfect for when the baby is just lounging around on your lap. Current moms are stating that it's a really comfortable baby nursing pillow and they love that it comes in 3 styles (standard, deluxe and nude).

Another thing the moms are liking is that you can buy a lot of different covers for the nursing pillow to fit your mood and style. I bet they have one that would coordinate with my daughter's nursery style pretty nicely. I like the idea of having several nursing pillow covers because when one is dirty, you will have a back-up one that is clean.

I learned that the Mombo nursing pillow is the only one that offers a vibration action which I would imagine helps to soothe and calm a fussy baby. Our last grand baby wasn't fussy at all, but that is a great option to have in a nursing pillow for sure.

I spotted the Mombo pillows at Toys 'R Us and at Babies 'R Us...have you all seen them? Have any of you used them? I would love to hear your thoughts about them!

You can follow Comfort & Harmony on Facebook and/or follow Comfort & Harmony on Twitter for additional information and to learn more about this wonderful product.

Visit Sponsor's Site

Friday, April 12, 2013

Refinishing Old Wooden Kitchen Stools


A few months ago my husband and I picked up some old wooden stools at our local flea market for $5.00 a piece. These stools are made out of solid pine wood but needed to be refinished. The varnish was old and rough...and there were scratches in the 15 year old stools.

We brought them home (4 of them) and used an electric palm sander with fine grit sand paper to sand off the old varnish and finish. Each stool took about 5 minutes for the sanding process. The stool on the right in the photo is the ugly old stool with the worn finish. The stool on the left in the photo is one that was completely sanded down to it's original unfinished pine wood.

Once we were done sanding them, we sprayed each stool with a golden pine stain and used a clean cotton cloth to wipe the excess stain off. (We used a spray stain by Thompson's Water Seal). We left the stools dry out in the sun for 2 hours and then applied a spray clear coat varnish on top. We left them dry again for another 2 hours out in the hot sun and they were done!

This was a quick and easy make-over project that didn't take a lot of time, effort or money to do. We love the results and are using the wooden stools on our back deck (we have an outdoors bar area on our deck during the Spring, Summer and Fall months). (photo above shows a completely refinished wooden stool).

Next week I want to get into my sewing room and make some cushion covers for the stools, so that they are more comfortable to sit on. I think I will use some beautiful sea shell beach fabric that I picked up at the fabric store last week to make the new stool cushions. I will update this post again once that part has been completed. Enjoy!

Friday, April 5, 2013

Scrapbooking: Precious Baby Girl Easy Scrapbook Layout Idea


It has been about 3 months since I had any time to scrapbook and that is thanks to us moving into our new home back in January of this year. I finally dug out some of my scrapbooking supplies and got busy scrapbooking a few of my grand daughter's newborn pictures.

The photo's in this layout are of her when she was barely a month old and they were professionally taken by a well-known baby photographer here in our area. I wanted a quick, easy and very clean scrapbook layout that wasn't too busy or too cluttered and I think I accomplished that.

Today I am sharing one of the pages I made and the coordinating page will be shared here on my blog next week. That page is very similar to this one but has 2 photos, journaling block, a few embellishments and a mini birth announcement.

The page I am sharing today has 4 photos (3 wallet sized ones and one 3" by 5" photo). The color scheme for this layout is light pink, dark pink and pale yellow. It is done in the 12x12 format (size). I matted all 4 of my photos onto dark pink cardstock and trimmed them so that only 1/8" edge remained around each photo.

The focal point of this layout is the 3 wallet sized photos which I matted onto a shelf of paper (pink, yellow and purple printed plaid paper) with a scalloped edge. I off-centered the 3 photos across the paper shelf. I accented the left side with a pink & white sheer bow with a mini clear flower shaped button in the center.

The layout has 2 borders...one across the top and one across the bottom as you can see in my photo. I used rub-on words (Precious Baby) for my title and the rub-on words (It's A Girl) as accents. In the top right corner of the layout I made a flower out of 5 round pink buttons and the center of the flower is a larger peach colored round button. I drew a stem using an olive green marker and used 2 leaves (rub-on) to finish off the flower.

This is the left-side page of the 2-page layout and next week I will share the coordinating page which has a really cool journaling tag and pocket on it. Thanks for reading my blog and checking out the baby girl scrapbook layout! You can click on the photo in this post to enlarge it to see the details.