Monday, February 27, 2012

Butterfly Theme Baby Diaper Cake


My 26 yr. old daughter has finally taken an interest in crafting and today I am sharing a photo of a diaper cake (the second one she has ever made) with all of you. She made this butterfly theme'd diaper cake for my nieces baby shower last weekend. I think it is totally cute!

She did an excellent job making it and as a crafty mommy myself...I am very proud of her! She found these sparkly butterfly wings from a child's costume shop and put them on the backside of the cake...totally cool! Sorry the photo isn't too great but trust me...the baby diaper cake is absolutely gorgeous!

Everyone who was at the baby shower remarked how cute it was and my daughter has been getting orders to make more since that time! She has surprised me with her creativeness when it comes to making homemade baby diaper cakes!

Saturday, February 25, 2012

Scrapbooking | Hubby's 50th Birthday Party Frugal Scrapbook Layout Idea

A few weeks ago I made a very simple and frugal scrapbooking layout featuring 2 photos I took of some of the guests at my hubby's 50th Birthday party back in October of 2011. I wanted to make a scrapbook page that cost me less than $1.50 to make and I accomplished that with ease by using mainly scraps that I had leftover from other projects.

This layout is in the 12x12 format and was done on a solid black piece of cardstock. I used 1/2 a sheet of printed paper (martini glasses print) and then some cardstock borders from red cardstock that I got out of my scrap box. I mounted each photo onto black cardstock (left 1/8" border) and then onto red cardstock (left 3/16" border) and then put them onto the page with glue dots.

I had some scraps of olive green cardstock so I used my Cricut to cut out the letters to spell "THE GUESTS" and used my glue pen to put them onto the page as my title. I had 2 birthday themed glitter stickers leftover from another layout so I layered them onto black & red cardstock and trimmed around them leaving an 1/8" border. I used adhesive foam dots to put them onto my page so that they were 3-dimensional and added texture to the layout. I did some journaling in my own handwriting under each photo and more journaling on the bottom red cardstock border.

This was a great way to start using up some of those scraps that are accumulating in my scrapbox and I stayed under my $1.50 limit by using those scraps!


Monday, February 20, 2012

Candle Making Tips | A Variety Of Candle Making Wax

A Variety Of Candle Making Wax
By Lance Mardian

The need for candle making wax, today, is not limited to just the candle manufacturers. It is now in demand even more as a lot of people have now learned and a lot more are learning the craft of making candles at home. It is really an art in itself, the way to make candles, and is widely being learned by people of like decorating their homes and this helps them adding an extra bit to their decor. The only problem with buying decorative candles is that most don't get the desired candles and this makes them decorate it further after buying the candles. The advantage of buying wax to make candles at home is that it is not only a fun process but, more importantly, people can make their own shapes, sizes and designs of candles and make decorations of their own choices which would otherwise be limited.

Making candles is increasingly becoming a famous craft work for the common people especially amongst craft lovers and homemakers. It is considered to be a hobby by many. Previously the variety of wax and the ease of availability was a matter of concern for a lot but due to such growing popularity of candle making, the availability of good quality candle making wax has eased up and there is a variety from which one can choose from. It is no more a fuss to find materials for candle making in today's times. There is a list of the types of waxes that are used for candle making but the most common type is paraffin wax which is made from petroleum. It is basically refined from the fuel and then used for the purpose of making candles. There are other waxes as well, amongst which some are made or refined from plants, vegetables or peels, and are therefore referred as natural waxes. Bayberry, palm and soy are included in the natural candle making wax category.

Soy candles are obtained by hydrogenating soya beans. It is considered eco-friendly as it is renewable and that is why the use of soy wax is greatly encouraged when it comes to candle making. The use of soy wax is widespread in America as soya beans are produced there as well as because soy waxes are of very good quality and make good candles. Palm wax is also popular for the purpose of candle making. The major contribution that was initially made due to use of palm wax is that it helped in the clearing of major poor plantations to grow palm trees for producing palm candle making wax but later an alarm was raised on the amount of danger it caused to the habitat of some local species and certain endangered species. Hence the use of palm wax is only encouraged when it is being produced from a source that is not jeopardizing the flora and fauna of habitat concerned.

The use of gel wax is gaining popularity since the recent past. The reason being it is transparent or translucent nature and the fact that it looks extravagant when a candle is being used in a jar. The decorations done with gel wax can add a little more to the visuals and thus the gel candle making wax is being widely used as well. Gel wax is of a rubbery nature although it is no different from normal wax when it burns and can be considered as competent as traditional wax when it comes to serving the real purpose of candle wax. It is available in different types of densities, three types of densities, and also in different fragrances that makes its use so popular.

Lance is a candle making expert. For more great information on candle making wax, visit http://www.candlemakingtips.com/.


FINE YARNS

Guest post from: Constance Rodgers

I’m glad that we upgraded our internet service and decided to go with wireless internet providers shawnee. I have been using the internet a ton lately to help me pursue my hobby. I recently learned how to knit. My sister taught me over the holidays. I have been much better at it than I expected and have enjoyed it much more than I every thought that I would. Now, I have been knitting hats, scarves, and baby blankets. I have been staying really busy. I have also found a lot of free patterns on the internet. The other thing that I have enjoyed is being able to get access to some fine yarns and wools on the internet. We don’t have a very unique shop here. On the internet there are hundreds of websites that specialize in fine yarns and wools for knitting. I know that the more I knit the better than I am going to get. It is going to be so much fun and all of my friends are going to be very happy with their birthday gifts this year!

Sunday, February 19, 2012

Scrapbooking | Using Broken Vintage Jewelry to Accent Your Scrapbook Layouts

A few months ago I went to the Flea Market and came across a huge ziploc baggie full of vintage jewelry that the seller only wanted $2.00 for. This was a gallon sized plastic bag that was totally full. Some of the jewelry pieces are broken, some of it was heavily used or missing rhinestones or whatever...but at least 1/2 of that bag was in perfectly fine condition. (NOTE: Click on photos in this post to enlarge them to see the details).

I purchased the bag full of jewelry because I knew I could tear the pieces a part and use them on some of my scrapbooking layouts or in various other types of crafting projects. I love adding "bling" to my layouts and its an inexpensive embellishment when you buy them by the bag full at a yard sale or flea market.
A few months ago I made this scrapbooking layout which features Christmas photos of my precious grand daughter opening up her holiday gifts. I did the layout in blue & white since she was wearing a Cinderella princess dress in the photos which happened to be baby blue in color. Trying to find Holiday embellishments in a pretty blue was near impossible so I made my own!

I used a broken rhinestone earring to accent the holiday stocking (on the cuff) and another broken rhinestone earring to accent the package (bottom right corner). I simply used wire cutters to remove the earring backings.I then had 2 clear rhinestone vintage pins (brooches) which I removed their backings and attached one on the top left corner of the left photograph and one on the top right corner of the right photograph using a liquid glue pen.

I think these broken vintage jewelry pieces look fabulous on this scrapbook page as I wanted to add some "bling" to the page to go along with our Christmas Cinderella Princess Theme. I kept the rest of my embellishments minimal as I wanted the photos and the "bling" to be the center of attention.


Tuesday, February 14, 2012

Scrapbooking | Hubby's 50th Birthday Party Free Scrapbook Layout Idea

Today's featured layout is done in the 12x12 format size and features photo's from my husband's 50th Birthday Party that we held at the Olive Garden back in October 2011. We had a fabulous time so if your local Olive Garden has a private room that you can reserve for parties, we highly recommend it!

I wanted the layout to be manly looking but wanted to use green, mustard and purple colors as my color scheme and I think I accomplished that with my choice of papers. My background is a sheet of striped scrapbook paper and I made my own top and bottom borders from purple and green colored paper scraps. (these are all muted colors, not brights). I had 4 photos I wanted to use so I cropped down 3 of them which I matted onto light green and muted purple cardstock, leaving 3/16" around each mat. I them placed them onto my background using glue dots. The 4th photo was a picture of my granddaughter and nephew playing there so I used tiny scissors and cut it out and trashed the background. I then used glue dots to put it onto the page in the bottom left corner. I had 2 balloon stickers and put one into each of their hands. I think it's cute!

The title of my page is "Celebrate" and that is placed onto the page above the top left photo. I then matted a small "Happy Birthday" and a small "Memories" stickers onto muted purple paper and used foam dots to place the Happy Birthday one to the right of the top left photo and the Memories one to the right of the top right photo. I had candle stickers which I laid end-to-end and ran them across the top to make my own border. I then hand wrote on each one wording that relates to the party.

This layout took me about 45-50 minutes to make and I think it came out well...especially because it only cost me about $1.30 to make and I love inexpensive layouts! Enjoy!

clipix - Will help you organize online photos and ideas!

Today I would like to introduce you to the online web site called clipix. Have you ever stumbled upon something online like a recipe, craft project, home decorating idea, fashionable outfit, etc. that you absolutely loved but a few weeks later you forgot about it? If so, clipix can solve that problem for you!


When you open up your FREE online clipix account you will immediately see how cool this tool is. You will want to read the brief instructions and then add clipix to your toolbar favorites. You will then create a few personal clipboards and name them. I have a recipe one, home decorating one, a crafts one and a Shelly's closet one.

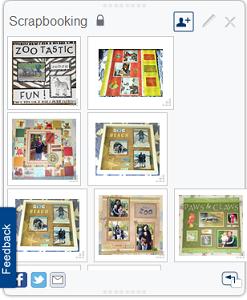
Now when you find something that you want to save online you will simply click the icon in your tool bar and clipix will add it to one of your personal clipboards. Here is a screen shot of one of my personal scrapbooking clipboards where I saved a few photos of scrapbooking layouts that I found online and liked, hopefully I can use those scrapbooking ideas with my next scrapbook I plan on starting later next week.

You can access your online clipboards from anywhere in the world and at any time. You can even set up PUBLIC clipboards where your friends and family can view your clipboards and you can share information back and forth. I think this is a great option as you can ask your friends & family members for opinions on the things that you clipped to your clipboard!


You can check out this really cool YouTube Video to found out even more about clipix and how easy this tool is to use. Plus...it's totally FREE!


I can see this free tool being used to clip recipes, craft projects, home decorating ideas, wedding ideas for new brides, build a virtual wardrobe of current and in-style clothing trends, travel destinations that you someday want to visit and so much more! How do you think you would use clipix? There is even an iPhone App for clipix that you can use so that you can use/view your clipboards via your smart phone too!


I would like to invite you to visit clipix today and open up a FREE account and get busy clipping your favorite things! Once you do, come back here and tell us what you clipped and how you plan on using clipix for your own personal needs! I am just loving this free Clipix tool and I am looking forward to making a few more clipboards next week!

Promoted Post
Visit Sponsor's Site

Sunday, February 12, 2012

Scrapbooking | Bubble Trouble Scrapbook Layout Idea

A few months ago we took a vacation down to the Jersey Shore and had a fabulous time! One evening the "girls" decided to hop into the jacuzzi so I poured in some bubble bath and over-flowed the jacuzzi with bubbles...hence the title of this page "Bubble Trouble". We had to have the guys come rescue us by removing some of the bubbles from the tub! Since I was wearing a black & white swimming suit and my daughter was wearing a black and hot pink swimming suit...I decided that those 3 colors would be the color scheme for the layout.

I used 3 photos and matted them onto hot pink and black cardstock. My background is a piece of black cardstock and I accented the background with circles that I cut from textured bubbled hot pink scrapbooking paper. I love that bubbled texture and just glued my circles, half-circles and quarter-circles onto the background paper. See photo above for picture placements. I used my Cricut to make the letters for my title of the page "Bubble Trouble" which I cut from hot pink and black cardstock and layered them together using my Xyron sticker maker. I then accented a couple of the letters with 1/2 pearls to give the appearance of small bubbles on my title.
My journaling block I made myself and it is above the top right photo and then I have another block to the left of the bottom left photo that says "Rubbadub". The skinny bottom left photo was accented with 5 tiny hot pink half-gems to just add a little pizzaz to it.

Overall...I love the layout. It is busy but not overly-busy as I am not a huge fan of cluttered layouts. I really love that textured bubble hot pink scrapbooking paper and will need to get more of that for future layout ideas I have.

Friday, February 10, 2012

Expert Advice on Addressing Wedding Invitation Envelopes

Expert Advice on Addressing Wedding Invitation Envelopes by JoDitt Williams

You start to critique your handwriting, then you decide that the basic blue or black ink won't do and don't forget the added cost of postage. Here are a few tips to help you with this very important, often under estimated task!

Here are a few tips to help you ease into the addressing task!

1. Addressing the Wedding Invitation Envelopes -

There is a misconception that the cheapest route is to address your own envelopes. However, you may not realize just how long it will actually take you. It may take you so long that you take off work or skip class in order to get them finished. Or, if you are a perfectionist, you may end of throwing away half of your envelopes because they weren’t perfect. It’s possible that the whole process could get you so stressed out that you end up sick at the doctor’s office, missing work or other important engagements, which could cost you money and time. All this can easily be avoided by outsourcing the addressing of your envelopes. On the other hand, if you have plenty of time and writing addresses relaxes you, then by all means, save a little money and do it yourself.

If calligraphy is out of your budget range, consider having them printed using either the same font as is used on your invitation,or a font that looks similar to calligraphy. Or get someone who has nice, legible handwriting to do them for you.

2. Return address printing-

Sometimes return address printing is included in the price of your wedding invitations. If you choose to have your addresses done in calligraphy, you would not want the return address printed on the envelope. You would want the return address to be done in calligraphy as well. In that case, check to make sure that you are not paying for a service that you do not need.

3. Printed response card envelopes-

Likewise, do not assume that printing your address on your response/RSVP envelopes (or on the back of a response postcard) is included in the price. Sometimes it is and sometimes it isn’t. Just make sure if it isn’t included that you can add it for a reasonable price.

4. Lined inner envelopes-

Wedding etiquette no longer requires you to include inner

envelopes. Many brides see this as an unnecessary expense,especially if they are using contemporary style and/or pocket fold type invitations. If you do use inner envelopes, hand-write the names on the envelopes. Never use printing or labels on inner envelopes.

5. Assembly-

What is the proper way to place your wedding invitation and all of your inserts into the wedding invitation envelope? Does the wedding invitation go on top? Or does the RSVP card go on top? Where do you put the map? There are a lot of differing opinions about this. But it becomes quite easy if you choose a pocket style wedding invitation. Pocket Wedding Invitations are constructed so that the main wedding invitation is glued or taped to one panel and then all of the inserts stack neatly on top of one another inside the pocket. Assembly also includes gluing/taping layered invitations, placing inserts into the pockets on pocket style invitations and adding embellishments like ribbons, jewels, charms, etc. Some invitation prices include assembly and some do not, so be sure to find out before ordering.

Assembly usually does not require a lot of skill, so if you have time to assemble your own invitations, it’s a great way to save a few bucks. Or, if you don’t have time to do them all yourself,invite your bridesmaids over for an “Invitation Assembly Party” and get them all done in one day!

Once you've picked the perfect wedding invitation, take it one step further and make sure that you have the perfectly addressed envelope, after all the envelope is what your loved ones see first!

JoDitt Williams, known as "Your Custom Card Lady," is an invitation designer and the owner of Joyful Heart Design, an online custom wedding invitation boutique. JoDitt welcomes you to visit her website to view the most up-to-date customizable invitations on the market. Please visit http://www.oohandaahweddinginvites.com/


Monday, February 6, 2012

Scrapbooking | Paws and Claws Zoo Scrapbook Layout Idea

Today I am featuring one of my favorite quick and easy Zoo theme'd scrapbook layouts done in the 12x12 format size. One of the things I like about this layout is that I was able to get 5 photos onto it (6 if you replace the lion embellishment with a small photo) and even with 5 photos it doesn't look cluttery!

My background is a sheet of solid olive green cardstock. I then took a piece of alligator print scrapbooking paper and cut two strips each one measuring 1" by 12" in size. Those strips became the top and bottom borders on my layout. I then took lime green & olive green grossgrain ribbon and placed that along one edge of each border strip to add some dimension to the borders using glue dots.

The title of my page is "Paws & Claws" and I cut the letters out using my Cricut machine on the 1 1/4 size setting. I cut each letter from light green cardstock and then did the shadow effect and cut them again from dark olive green cardstock. I layered them together by running them thru my Xyron sticker maker and placed them across the top of my page.

The two larger photos were slightly cropped down and then matted onto light green, chocolate brown and medium olive green cardstock (leaving an 1/8" border). The three smaller photos of various zoo animals measure 2" by 2" square. I framed them with light green and chocolate brown cardstock. (see photo for placement of all pictures).

I then embellished the page with a 3-D embellishment of a lion and a sign tag that says "The Animal Kingdom" from a 3-D embellishment sticker pack. I then added small paw print stickers (under the left bottom photo) and 2 word stickers "Wild" and "Animals" under the photo of the tropical macaw bird.

I am very pleased with how this layout turned out as I am not a huge fan of cluttery layouts so getting 5 photos onto one layout and still have it look nice & clean was a challenge for me but I do like this layout a lot! It's a great way to use a lot of different animal photos on one layout page.

Friday, February 3, 2012

How To Make A Three-Layer Scrapbook Diaper Cake

Scrap booking and diaper cakes meet with a winning combination.

You will want to watch Barb's cool YouTube Video:


This three layer cake can be easily modified to fit any theme for Baby. Tried of the same ole diaper cakes? Do you love scrap booking and just itching to try something new? You'll just love creating a cake like this then. There are no rules to bind you, just use your imagination! If you can dream it , you can make it! The recipient of this gift will be amazed because it will be one of a kind, you simply ask the baby shower giver what the New-Mom -To Be theme is and create, go wild!It's fun!

Items used to make the cake are:

Poster broad or you may use card stock if you can find pieces large enough
Fabric
Lace
White rosebuds
Pink paint
Chalked ink (pink) to stamp on lace flowers.
Hand sewn lace flowers ( either purchase them on Ebay, or make them.I made mine and it's simple.You can find instructions on Youtube.
Diapers -size one "luvs"
Mixed color of shred to match theme.
Double sided tape
Hot glue

To construct your cake, you'll need to cut three and a half strips of poster broad.
Bottom layer - takes one and a half lengthwise and 5 1/2 inches in height.

Second layer-takes one strip and you want to make this one 5 inches in height and about 6 inches round ( you may cut some off) Just hold the ring over bottom layer and eyeball where to cut off excess.You just want to make sure the second layer will not overlap bottom layer.( Think cake when eyeballing it:)

Third layer- takes about a little over a half of the strip and should be 4 1/2 inches in height and about 5 inches in roundness.It's always best to cut a little over than be short, then just eyeball how far to take in end of strip to make sure the layer does not overlap the second layer.

Next take your fabric and measure out enough fabric to cover strips, but leave an inch or so bare on one end of each strip.Next wrap and secure fabric on the inside of strips with double sided tape ( no one is going to see the inside) You may iron the fabric too. Check once again where you'll secure both ends together to form a ring, or layer. Take a strip of double sides tape and put on end of poster broad, insert that end into the other side where the fabric is and hold a few seconds till secure.

Embellish them now with your flowers, strips of lace or whatever you choose, let dry good.Next you'll add diapers. Make sure you pack the diapers in tight so there is no room to move ( Very important). Complete all three layer. Stack them and add shred, and your done!

You may also want to position your bottom layer on a cake plate before adding the other layers! Most of all have fun and create!

May be reprinted with Authors bio intact - Copyright Barb Ireland 2011
http://www.makeadiapercaketoday.com/

Thursday, February 2, 2012

Glade® Expressions™ - Welcomes You Home With Fabulous Scents

This is a compensated post written by me on behalf of Triad Retail Media. All opinions are 100% mine.

I have always been a huge fan of the Glade® home fragrance products and every year they keep on getting better & better! I love how we always have new products to look forward to and they always update their fragrances with new ones. They truly have a product and scent for just about everyone!

The new Glade® Expressions™ fragrance mist is something I have been wanting to try but haven't had the pleasure to just yet. This product line has "true" scents which means they smell exactly like the "real" thing! I think they are so pretty and will fit in with every decor and since I have coastal decor, they will look perfect in my own home. My sister told me that she has one and the fragrance lasts for a very long time! She also told me that they are refillable with any of the Glade® Expressions™ Scents. The oil diffuser fragrance lasts for a full 30 days and that is something that definitely interests me because I don't have time to run around my house refilling other products every other day!

The new Glade® Expressions™ oil diffuser is definitely at the top of my list for new fragrance products to purchase and I am going to buy one to try it out in my own home since my sister has been raving and raving about them to me for days now. This product doesn't use electricity which is important to me since I suffer from Epilepsy and don't like having open-flames or electrical products running incase I have a dreaded seizure.

I also love that the new Glade® Expressions™ Oil Diffuser products can be purchased at Walmart and there is a coupon available for $1.50 off. Yeah, I love using coupons and I love Walmart! You can get the coupon on their site. I am personally looking to get the Fuji Apple & Cardamom (great for my kitchen/dinning area) and the Pineapple Mangosteen (great for my master bathroom) but they have other great scents available too!

I love that Glade® is backing up their products with a scent guarantee! I love it when companies back up their products and that is one of the things that impresses me about Glade®. You can find out information about that by visiting the Glade® web site.

Have any of you ever used this product? If so, what did you think of it? I am really looking forward to hitting Walmart this weekend and picking up two of them for my own home!

Wednesday, February 1, 2012

Scrapbooking | Family Fun Time at the Zoo Scrapbook Layout

Today I am featuring for you a 12x12 scrapbook layout that I made a few weeks ago. The photos are from a recent trip that we took to the Cape May Count Zoo in New Jersey. This scrapbooking layout took me around 45 minutes to make and cost me around $3.50.

My background is a sheet of 12x12 paper that has a "tree bark" texture to it. I then made 2 border strips that each measure 3/4" by 12" in size. (mint green dots on brown paper print). I glued one strip at the top and one at the bottom of my layout. I then cut 2 more strips from solid mint green paper and each strip measures 1/4" by 12" and glued one along one edge of the previous strips. (to form top and bottom borders).

My title block is a piece of vellum that says "This Place Is A Zoo" which I framed out onto matching brown polka dot paper and solid brown cardstock. I accented the top right corner of my title block with a 3-dimensional butterfly. It is on the top right of the layout design. I slightly cropped down my bottom right photo and framed it out onto brown polka dot paper and brown cardstock. I accented the right top corner of that photo with a 3-dimensional embellishment button that says "Wild Thing" and the bottom right corner of the photo is accented with a 3-dimensional sticker of a green lizard.

I cropped down my 2 remaining photos into square shapes and matted them onto the polka dot paper and then framed them up with the brown cardstock so that I actually had a solid strip and glued that on the left side of my layout. To the left of the photos is a 3-dimensional flower. Underneath those photos are three 3-dimensional words that say "Lions", "Tigers" and "Bears". Right underneath the word "Tigers" I placed a clear adhesive backed sticker that is simply a "swirl".

In a few days I will post about the companion page that matches this one which has an additional 2 photos and my fancy dancy journaling block. I love how I off-centered my photos on this layout with the one on the right being down towards the bottom and the two on the left are placed upwards onto the page.

Dig, Drop, Done Flower Bulbs Presents Curbside Chaos Contest!

This is a partnered post written by me on behalf of Bulbs. Dig, Drop, Done. All opinions are 100% mine.

Every year I look forward to spring because once spring has sprung I get outside and work on my flower gardens. When it comes to planting flowers, often times I purchase flower bulbs because I can simply dig, drop and be done with my gardening in quick and simple fashion.

I found this really cool web site online called Dig, Drop, Done where you can learn all about flower gardens and flower bulbs. They have a great planting chart and bulb calendar which I found to be very informative on when I need to get busy planting up here in the North East. They also have these really cool videos that you can watch and I loved and identified with the one that featured Evelyn because I have this pesky groundhog that likes to tear up my garden and Evelyn gives you tips on how to keep pests out of your garden areas.

I then went and visited a web site called Curbside Chaos where you can find out more information about this fabulous contest they are holding right now. You can enter for a chance to win a $5,000 yard makeover and all you have to do is take a photo of your yard and submit it to them for a chance to win! How cool is that? Totally cool! Not only that, the lucky winner will win a visit from Taniyah Nayak (you can follow her on Twitter @TaniyahNayak and she will give you simple tips on how you can update your own yard! yeah! Every Twitter share gets $1.00 donated to "Rebuilding Together" which helps to preserve affordable home ownership.

I used their handy dandy garden guru tool and learned that I should plant my Daffodil Bulbs in early March so that they will bloom in May. I absolutely love Daffodils and they are my favorite spring flowers. I like to plant most of my flower bulbs outdoors but I do keep a few of them planted in big pots indoors in my sunroom area. I love looking at them every day...bright and cheery!

I love gardening and I am super excited that spring is only 6 weeks away and once it gets here, I will be ready to go with all of my flower garden planting!